
Well, I was so glad to get the door completed and hung that I took a few shots of it with my iPhone and posted them on Facebook! It brought a number of positive responses and I knew I wanted to share the final steps of this project with my readers so here it is.

Twin Tenons
First of all, the initial process of how I went about making this door and my reasons for it can be found in this first blog on the project through this LINK . Much larger in scale than my normal furniture work but sound construction practices included twin mortise and tenon joinery with tenons 5/8″ thick and 2 1/2″ long. All the material used is 8/4 Poplar and the Speak Easy window is 7/8″ in thickness. As expected, there is a little bit of a discrepancy in the flatness of that panel but that will probably fluctuate with the seasons anyway so I’m not overly concerned about that. I did build it more to furniture quality hardwood and oil finish standards rather than construction standards using Poplar and latex and found my fit was a bit snug!

Speak Easy adjustments
I needed to relieve the corner where the panel pivots into the opening. My first plan was using a piano hinge but that proved to not be a good one — too much flexibility. I resorted to a couple of butt hinges which work much better. The sides of the panel were trimmed as well and the opening is now sealed with weatherstripping.

Laying out bevel
The unorthodox method I used to hang this door included mortising and fitting the hinges to the stile before gluing the door together. The same procedure was followed for setting in the lockset. This was a much easier task for a one man operation before assembly and the resulting heavy door!
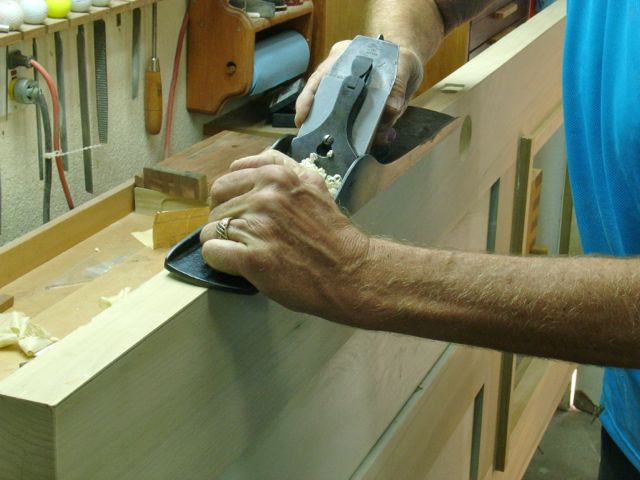
Beveling the Strike Edge
The only thing done after assembly was planing a slight angle on the strike side of the door. The original door was 1/8″ smaller across the width on the front so that’s what I used to lay out my line. I then planed to the line using a small bevel square to check my progress.
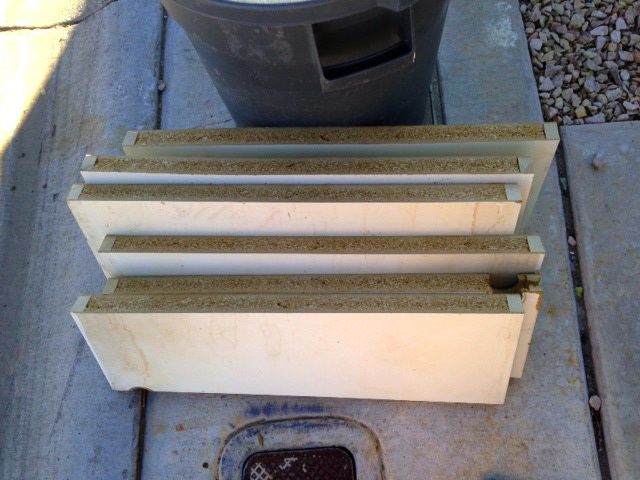
Out with the Old
It took some final adjustments and fiddling around but all in all this project went rather smoothly. There always seem to some unforeseen things in any project. The positive things though is that I now have a door that isn’t delaminated and at the bottom and blistered on the surface, I can get light and air into my shop area and have full access to the tool chest and end vise, and finally don’t need to worry about Brandi getting out unnoticed! Here’s the old door, right where it belongs with the trash. Basically a solid block of particle board, yikes!
Last but certainly not least, let me leave you with this slide show of this custom, garage side door. One of my friends coined it as the Vegas Dutch Door.

Great
LikeLike