
Work is progressing well on this project and it’s given me an excellent way to “hone” my dovetails. Any time you read about certain skills the phrase muscle memory seems to come up. I know during the many years I spent ultra-running my muscles responded to running without any hesitation. Now, if I try chasing the dog around the house it feels like a completely foreign movement! I now continue to pursue woodworking techniques and am rewarded when that muscle memory seems to be kicking in! Here’s the progression so far:
There is so much information in magazines, on line, and from other woodworkers on how to cut dovetails it’ll make your head spin. I always tell my students that the way I teach is just one way and encourage them to explore other methods once they get the hang of it. There are two woodworkers that have influenced me in this regard. One is Tage Frid and the other is Christian Becksvoort. I’ve linked them to information from Fine Woodworking if you’d like to learn more about them. Like many others, Tage Frid influenced me when in the late 60’s and 70’s when woodworking and furniture making was a popular endeavor. Christian Becksvoort started during that time period too and continues to make primarily Shaker style furniture. In any case, my dovetail technique is influenced by both of them. Both advocate cutting tails first, chopping out the waste with chisels rather than a coping saw, and stacking your work to aid your efficiency. They also encourage you to learn how to saw to your lines so that you spend minimum paring with chisels to get the joints to fit.
You’ll recall I cut all of the tails first. This morning they were scribed onto the pin board, cut and chiseled out. Lay out begins with a marking knife but the line is darkened with a pencil whose point has been sharpened by a chisel.
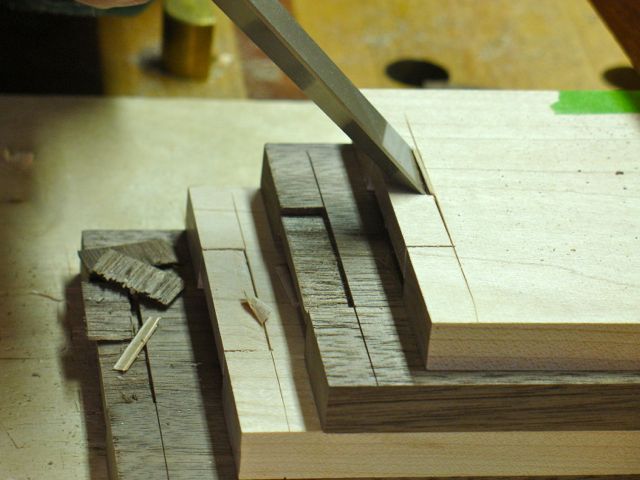
Initial cuts on shoulder line
This was done to each board until I had my “pile of pins” you saw earlier. Both Frid and Becksvoort encourage stacking your pieces to save time it would take you to clamp them individually. The first cuts are straight down into you shoulder line but not too deeply at first. You only want to remove a thin sliver to begin with since going too deep will force the chisel away from your shoulder line. Notice that in the Maple I cut a small wedge out of the waste area rather than a full piece as on the Walnut. The hardness and grain pattern of the Maple wouldn’t allow for that full cut!
The technique is to cut about half way down on one side then flip the board over and finish the other side of it.


Very happy with how the initial fit went on these joints and not much paring was required. Both Frid and Becksvoort recommend making your first cut into the shoulder line light and at 90 degrees. Removing that piece gives clearance for your chisel and prevents it from pushing the shoulder line back. It was really evident how different woods react to the chisel with this project. The Walnut and Black Limba behaved while the Maple fought me every step of the way! Once that initial, 90 degree shoulder is established the remaining cuts can be undercut slightly to make fitting the pin and tail boards easier. Of course, having only one tail per board helped to make this more successful.
The remainder of todays work included using Lee Valley’s slot cutting bit to make the 1/4″ groove for the bottom of each box. If you’ve never used this bit, Lee Valley #16J83; I highly recommend it for installing bottoms in any box you make. I do find that when making a 1/4″ deep groove it’s best to reach the final depth in two passes. Tomorrow will be the time to fit the bottoms, sand the insides, and drill for the pegs in each of the tails. Also looking forward to getting back to work on the Art Nouveau frame, Diane put the picture it’s designed for in another frame just to taunt me!

Wow, John, your woodworks really looks great! I’m the co-founder of a wood boxes & wooden furnitures factory in china. From your pictures above, I saw a serious skilled woodshop teacher. Hope we could learn from each other in the near future 🙂
We specialized in packaging wooden boxes and living furnitures (Website is http://www.afarpack.com ), do you have any suggestions?
LikeLike
Hi Chloe, thanks for your compliments. I checked your website and the main difference between us is that I do only unique, one of a kind work where you are a large scale commercial operation.
LikeLike