
Chinese Checker Set
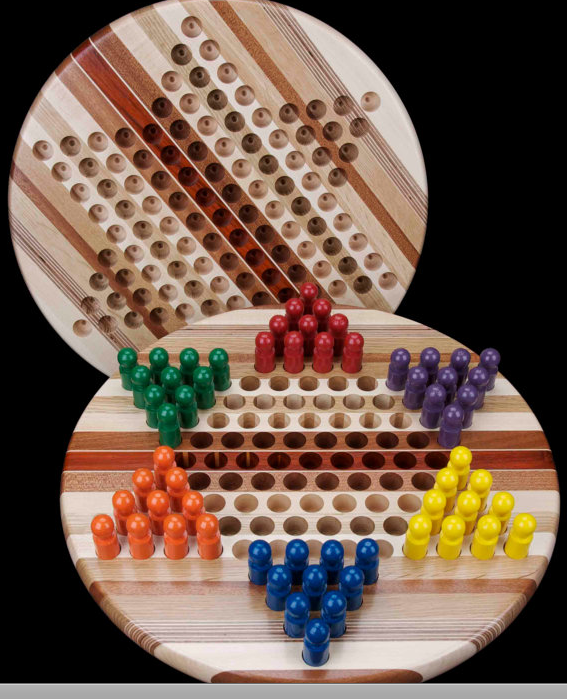
Last week I began a series of conversations with a potential client from my Etsy store. They asked about making two boxes to hold pieces for a Chinese Checkers game set that is destined to become a Christmas present. Included was this picture of the game set plus the box requirements of 6″ square and 2 1/2″ tall on the inside. She had found one of my boxes that featured dovetails so I suggested we use a style of boxes I have that called Tails around the Corner. These have a puzzle like quality and making them of contrasting woods will complement these game boards.
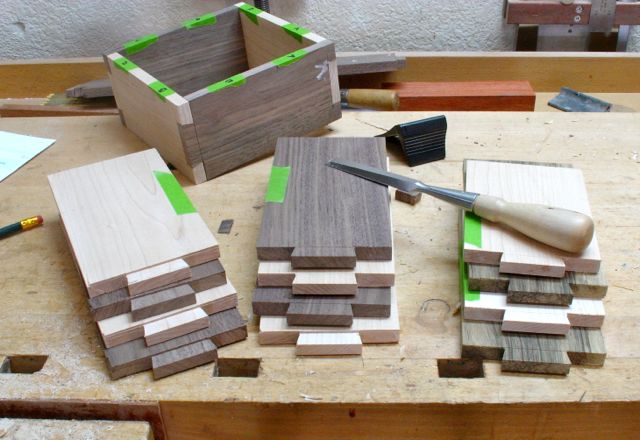
Pile of Tails
This met their approval and so work has begun on this project. Since I had Walnut and Maple in the shop and they provide a nice contrast that is the material we agreed to use. So far, I have what I’ll call a pile of tails! I’ve found it to my advantage to make more than what’s needed for any custom order I receive and then add them to my inventory. The box in the back is made of the same materials but different size, it’s my experimental box to make sure things will go according to my plan. The pieces in the foreground are the custom order plus another of Maple and a nice piece of Black Limba I had from another project.
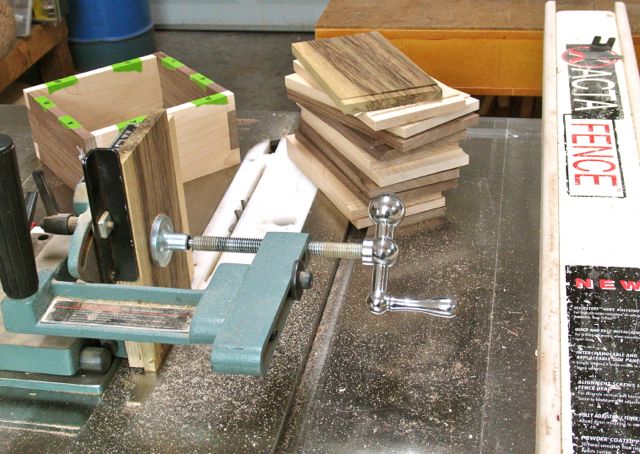
Stanley 140 Technique with a tenoning jig
After cutting the pieces to size work began on the tails, if you’ve read my blog you’ll recall that I’m a “tails first” dovetailer. I also use a variation of the Stanley 140 technique in my work which gives dovetailed drawers and boxes a neat, inside corner. Not having a set of the skewed, rabbet planes I use either the rip fence or; in this instance, a tenon jig. Looking at that pile makes me realize that there are a lot of dovetails that need to be cut!
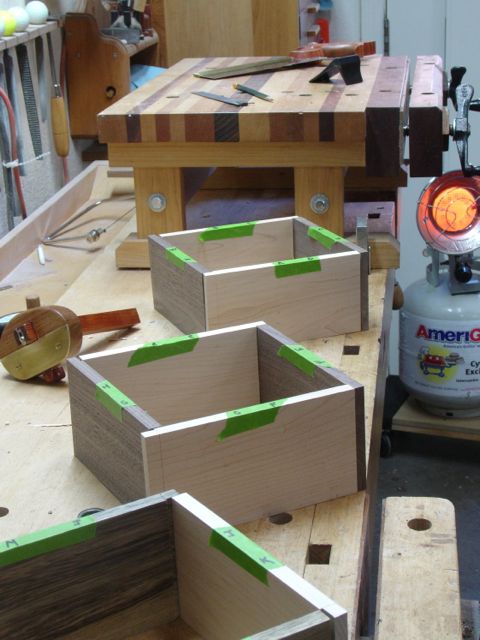
Parts laid out
The pieces needed to be chosen carefully for each box and marked for re-assembly. For furniture work I use a set of metal alphabet stamps to mark joints but didn’t think stamping a bunch of letters on the bottom corner of each box would look too good. Instead, masking tape and a sharpie were chosen for this project. One word of caution, using the tenon jig can cause the bottom of the edge to tear out a little, that makes it a good edge to have on the bottom. Yes, you’re not seeing things that is the heater going for the first time this season! Those of you in colder climates probably think I’m being a wimp but we got down to 47 degrees last night! Once I began sawing and chopping out the dovetails though the I warmed up naturally and the heater was moved out of the way.
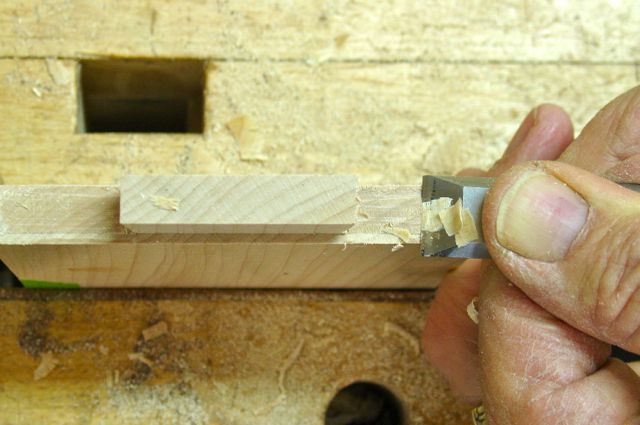
Paring to the line
The Walnut and Black Limba cooperated just fine to having the joinery cut on them. On the other hand; the Maple was a real bear. It is extremely hard and for some reason I really struggled maintaining a good line cutting down to the tails. This line is about 1″ long and I found that I consistently angled to the outside of the line. Maybe the wood, maybe the saw, maybe the sawer, but I’m going to blame it on the time change. Thankfully I had recently re-honed all of my chisels so was able to pare each joint to the line. Rather than allow myself to get upset I looked on it as a good exercise in honing my paring skills, we can always practice this craft to get better!
These boxes will feature a peg of contrasting wood in the center of each dovetail. This is what I drew out for the client and besides adding a bit of strength, it will also add a nice design element. Of course, you just can’t go out and buy dowels of any species of wood. At the local big box stores you may find some Oak but most of it is a mysterious species of Chinese white wood! That means you’ll need to make your own dowels out of your material of choice. For me that was Poplar and Walnut. I use a Lie-Nielsen dowel plate which is one of the few left on the market. When I first began teaching woodshop in the late 70’s a standard issue item was a dowel sizer. This was used to make dowels the exact size since at that time, they were usually oversized. That’s not the case today, now they will usually be undersized and crookeder than a dogs hind leg!
There are several ways to go about making your own dowels. One recommendation is to rive your wood to get the straightest grain possible. Although this works well I find it to be pretty wasteful. Another way is to cut oversized square pieces and then plane them to an octagon shape. This time I decided to try a different approach and it worked well so here’s a little slide show on how I went about it. In keeping with the current trend of putting out warnings and disclaimers this is probably not an OSHA approved method of using the tablesaw! On making the second cut the piece of wood will shoot out behind you but I simply put my hand out to catch it!
Just a word or two about the dowel process, cutting on the saw is safe if you’re confident in your abilities and keep safety in the forefront of your mind. It’s important to cut the piece upright first — if you reverse the order all that remains is a very thin piece that will lodge between the blade and the slot creating a kickback or worse! As with most of my things, the dowel plate holder is “over-kill” but since I spend much of my time in the shop I’d just as soon be surrounded by things I like to see. This is made of a piece of 8/4 White Oak and Lacewood. The purpose of the holes through the bottom rather than just one open slot is to prevent the dowel from twisting as it’s hammered through the plate. Not all of the dowel will be perfect, you may have a flat spot here and there but should be able work around that.

John, I am making a small box right now as well but was going to shy away from dovetails because I wasn’t sure how to hide the groove for the box bottom. What are you planning to do in that respect?
LikeLike
Jeff, if you check out the link for the Lee Valley router bit you don’t need to worry about that! Assemble the box and maybe put a band clamp around it for security if needed. The slot cutting bit is put in your router table and you run it on the inside of the box. It does create a lot of dust so I hold a vacuum inside during cutting. I generally do this with two passes, the bottom piece needs to be radiused at the corners. I use a nickel to draw that in and you can file it to shape, I use a 1″ belt sander. Love that bit, here’s a link to a blog where I explained it a little better: https://woodworksbyjohn.com/2013/10/08/forgot-about-the-complexity/
LikeLike
Thanks John, I’ll give that a try.
LikeLike
Pingback: Dowel Making Video: My First Hi-Tech Attempt | Woodworks by John