
It always seems to take a long time between the start of a project to the assembly of some of its pieces. The first goal, after milling the lumber to approximate dimensions, was to assemble the top. The rest of the cabinet sizes would be based on that. Well, if you’ve been following the progress of this piece the top has been done. The next step was to cut all of the frame and panel members that will make up the front and sides of the Mechanical Cellarette. In my last blog about this unit those pieces were completed on the shaper, the panels were sized and ready for a couple of coats of the Tried and True Danish oil that will be used for this project. If you missed that, here is a LINK to that post. In my opinion the panels turned out beautifully with the two coats of oil. The purpose of pre-finishing the panels is primarily to make sure no unfinished surface will ever be visible should they shrink as time goes on. Another plus to doing this is so the glue won’t stick to the panels as the frame is assembled.
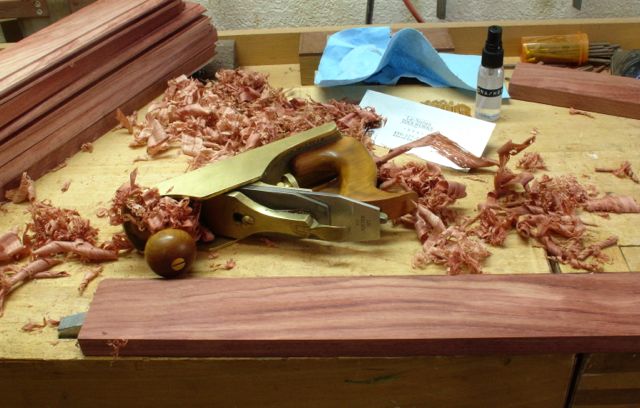
Smoothing tools for the Bubinga
Once the pieces were coped and sized they were made as smooth as possible at this stage of the construction; although I prefer not to sand I think this project will require it. I’ve mentioned how difficult the Bubinga can be to work with due to it’s tricky grain structure. At left are some of the tools used to accomplish that. They included a smooth plane which was effective on 70% of the wood as long as a super thin cut was taken, a cabinet scraper, and denatured alcohol to tame the grain down a bit so that it could be planed successfully. That’s a technique that works well too in carving. Here’s some of the process, pictures do not truly show the effects of smoothing the wood but this will give you some idea:
Rabbet Block Plane to fine tune joinery
The horizontal pieces of the frame and panel assembly are tenoned into the legs at the top and bottom. The entire side piece fits into a shallow 1/4″ x 1/4″ groove. The pieces were initially cut using a dado head in the tablesaw but intentionally slightly oversized. A rabbet block plane is used to fine tune the pieces to fit into their perspective grooves and mortises. Something usually needed to compensate for that inevitable wood movement.
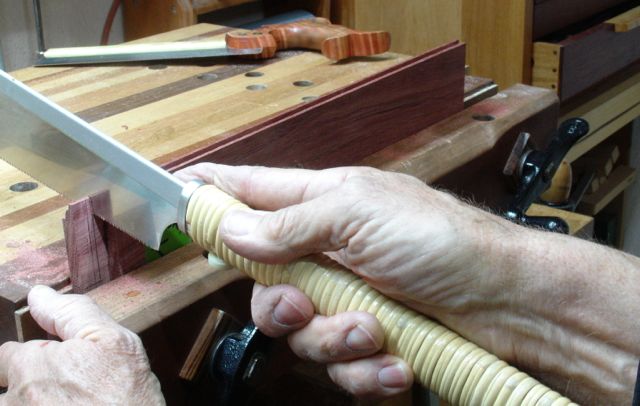
Japanese Razor Saw
When it came to cutting the tenons to fit the mortises I discovered that my English style crosscut dovetail saw didn’t have enough blade under the reinforced back to complete the cut. Although I prefer the English style saws for my joinery for this instance only a Japanese style razor saw was able to get the depth I needed. By holding its long, bamboo handle as shown in this picture I’m able to get a straight cut. By the way, here is another great use for the Black Diamond Headlamp I mentioned previously, it really helps me see and cut to the line!
The first panel I decided to tackle was the front one. It’s approximately 39″ long and 22″ tall. The frame consists of four, 5/16″ thick, equally sized panels. After arranging the wood to where I thought the grain was being showcased to it’s best advantage it was time to do a dry fit, label all of the pieces, and lay out all of the clamps needed to accomplish the job as stress free as possible.


As you know, once the glue is applied to your pieces things can slip and slid around a bit and that is especially true with an assembly such as this. What you’re seeing is the backside of the panel. I had to chuckle to myself during the layout process as I recalled the difficulties my students have with math. The horizontal rails needed to be divided evenly and then the vertical members centered on those divisions. All of those markings are on the backs of the boards. What you see in the second picture are polyethylene pads (1/4″ thick) laying on the clamps. Their purpose is to elevate the panel so the clamp pressure is centered but more importantly they’re a barrier between the metal bar clamp and the glue. Water based glue and steel clamps equal some pretty deep stains! The glue up was done on the workbench so it looked like the first photograph. Once all the glue was applied the entire unit was carefully carried over to the assembly table, laid onto the clamps, then squared, flattened, and secured to dry. Can’t wait to turn it over tomorrow and see the show face! My glue of choice comes from Lee Valley, this particular glue has an open time of 15-20 minutes, one that’s definitely needed when you’re a one man shop doing a complicated glue up. After the assembly was in the clamps for about a half an hour it’s a good idea to make sure you can move each panel within the frame. No matter how careful you are, some glue is bound to stick to the panels, pre-finishing them with the oil makes it easier to break them loose. They need to be able to move as the wood moves due to seasonal changes.
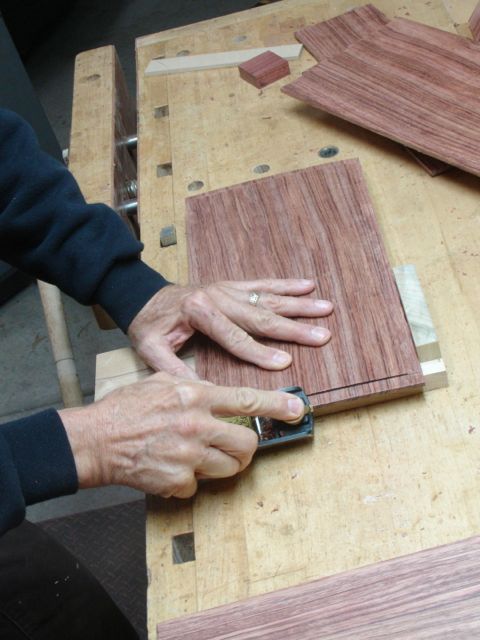
Whenever I do a frame and panel assembly there is usually some slight discrepencies between the pieces. Usually these can be smoothed out by careful block plane use but I have some concerns due to the nature of the Bubinga. Sanding carefully with a random orbit sander followed by hand sanding and a block may be what’s needed to work this beautiful wood. I made up a sample piece to experiment with before committing myself to the process — better safe than sorry!
