
Now that I have the finger joint jig dialed in for the SawStop and the sliding table it’s time to make a series of boxes. The only craft fair I’ve ever done was the Summerlin Craft Fair two years ago when Diane and I shared a booth. It was an experience and although my passion is making furniture and carving frames, making one of a kind and custom boxes keeps me in the shop with some money in my pockets — there’s a combination that’s hard to beat! Since I have quite a bit of the Radiata Pine from the last commission that’s what I’ll be using. I’ve mentioned before about making more than one of a certain box series at a time, it’s much more time effective especially with finger joints that are cut by machine.
Sliding Table with Stops
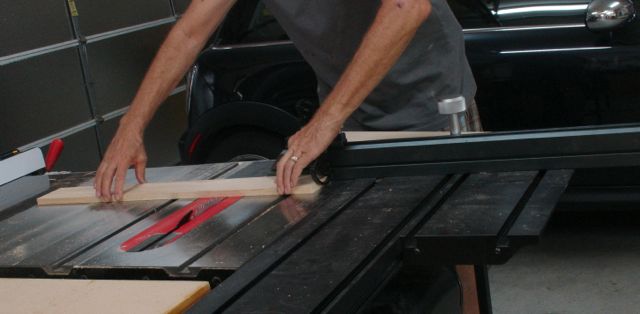
After deciding the sizes of the boxes, the first step was cutting the pieces. I’m starting to get used to the sliding table for this operation although it still seems weird to me to have the shortest piece of a board supported by the “miter gauge” aka sliding table. Unlike using that with a standard miter gauge there is absolutely no friction to overcome so the cutting action is extremely smooth. I was able to use the stops which was easier than the method before where I used spacers. As always, as the pieces are cut they are laid out in sequence and then marked so the grain flows around the box.
I had one of my woodworking friends give me the “thumbs up” for adding some YouTube video’s to my blog so I did this one showing the sliding table finger joint jig in action. Don’t worry too much about hearing what I’m saying because the sound of the saw has taken all of that away! The action of the sliding table on my SawStop is so much improved over other jigs I’ve made — love it!
You may notice that after cutting the two longer pieces of the box I use one as a spacer to cut the first joint on each side of the shorter piece. Saves time that way in my opinion. Also the boxes are all marked with the painter’s tape, numbers, and arrows to make sure they are assembled with the grain flowing continuously around the box. Another note, if you read the first post about the jig I mentioned that the blade was cutting 1/64″ oversize well, guess what? Today it was right on so just added a shim from a set of machinists shims so that solved that.
I generally cut the pieces a little bit wider than needed and trim them so they end right at the end of a finger (saw and plane). Next I use this little box slot cutter bit that I love from Lee Valley. I’ve mentioned it before but for a “mass-production” like this it’s so much simpler than making stopped dado’s for the top and bottom. Here’s a link to it from Lee Valley.


It does create lots of chips so I’ll hold a vacuum inside, also make the cut in two passes; one without going to the bearing, followed by a full depth cut. Keep in mind which way to feed the bit and if the joints are loose it’s wise to put a band clamp around the box. The bit leaves rounded corners so use a nickel, trace it on each corner, then file, sand, whatever works the radius.
All that remained was to rabbet the lids which are 3/4″ thick. Rather than set up the dado head I made the rabbet in two passes on the table saw. All that remained was to use the panel raising jig you see to chamfer the lid. Luckily, all that was needed to modify this jig to fit the SawStop was to add a layer of laminate and it now rides snugly on the fence.

Lids 0iled, 2 in front are distressed.
At the end of the day there were two of the lids that were distressed, which is a nice way to say “beaten up” with some nuts and bolts attached to a wire. I think this gives the Pine and the box a bit of character. All that remained was to oil them prior to assembly in the morning.

Fine woodwork. Your blog is really a place full of treasures, thank you 🙂
LikeLiked by 1 person
Pingback: How to Make a Finger Joint Jig for SawStops Sliding Table | Woodworks by John