
Although making and selling boxes on my Etsy store is a rewarding way to fill my shop time between commissions I’ve decided to re-focus on doing picture frames. Although most of my frames are designed for Diane’s work my goal is to branch out and establish my work with other artists. Besides, now that her focus is geared towards her on-line gallery as opposed to being in brick and mortar galleries, most of her work is sold unframed. You may recall that quite some time ago we went to Foster Planing Mills and picked up quite a bit of wide basswood moldings from their seconds area. My plan is to make as many frames from this material plus some custom designs of my own. Here is what’s been accomplished during the past week or so (click on image for full size):


The two frames on the left are from some of the moldings we got at Foster Planing Mill. The other three are a custom profile I designed and made in the shop. In this blog I’ll explain the process for making these from 4/4 stock. Just some background information, artists usually paint on either 1/4″ gessoed or linen panels or else a stretched canvas that can be anywhere from 3/4″ to 1″ in thickness. For the panels it’s no problem using 4/4″ wood to create a frame but the stretched canvas work needs thicker stock (8/4 or so) to accommodate the thickness of the stretcher bars. One way you can make a frame for the canvas from 4/4 stock is to cut a bevel on one edge which angles the piece up, away from the wall. I’ve done these in the past and will do a blog explaining that technique in the future.

Detail of Frame
These three frames consist of a panel and edging to get the clearance needed for stretched canvas work. Two are made of Basswood which will be easier to carve and the other is made of Walnut for a painting already completed. Diane prefers a wide molding so I let the widths of the rough material determine the size. It ended up that the panel is about 2 3/4″ in width and the edging is 2″. The picture at the left is some of the scraps left over and mocked up to illustrate the profile. The Walnut frame is for a 14″ x 18″ painting, the Basswood ones are 12″ x 16″.
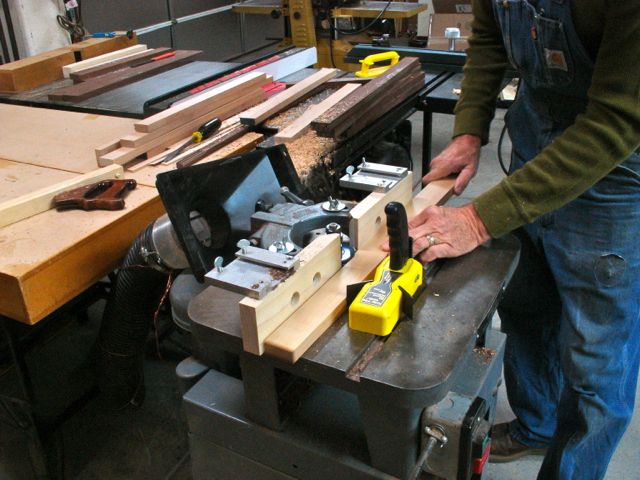
Shaper for Edging
After the pieces were cut and planed to size the shaping began. The edging is pretty straight forward and was cut on the shaper using a triple bead cutter. After running the edge through the shaper, the pieces needed to be planed down slightly — the triple beaded cutter cut about 2 and 1/3 bead! I suppose I could have planed them to the required thickness first but this worked out just fine. I hear from many woodworkers that they are reluctant to use shapers but this almost antique one of mine works great. Truth be told, I feel more comfortable on this with its relatively low rpm’s when compared to a router table. The only other thing required for the edging is a dado to accommodate the panel, you can see that in the detailed picture above.
The panel require more work. First up was shaping the sight edge using a single bead router bit. Here’s where I really like the set up for the SawStop using the auxiliary fence with the vacuum hooked up. When using either the shaper or a router table it’s important that your feed is constant, not so fast that it leaves a rough cut but also not so slow to leave a burned cut. For any inconsistencies you can use an appropriate size tadpole sander to smooth it out.


After the sight edge was completed on the router, two rabbets were cut on the tablesaw. One to fit into the dado of the edging and another to accommodate the painting. These were both cut using a dado head in the tablesaw. Using an L-Shaped fence to cut the dado required for the edging insures that it will be consistent all the way around. The edging also needed a dado to accommodate the panel.


To assemble these frames, the panels were glued up first, miters are reinforced with a #10 biscuit. The edging is mitered and glued into the dado, some planing to get a good fit was required and done with a rabbet block plane.


So now these frames are complete, I’m saving the cut-offs of the moldings to practice carving on. Diane has been awarded a scholarship at the Scottsdale Artist School so we’ll be spending some time in Scottsdale. You may have seen my previous blog post about making the portable bench for gilding and carving; that’s what is going with us for me to work on. Looking forward to the challenge of carving and gilding these frames.
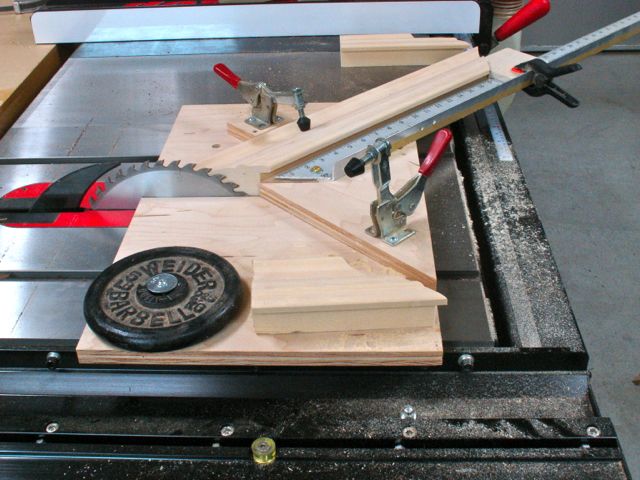
Counter weight for miter jib
Just a side note regarding the jig I use for cutting the miters. You may recall I mentioned it would tilt off the table for longer, heavier moldings. Well, here is how I solved that problem — a 5 pound weight attached to the opposite corner. This jig allows me to cut each leg of the frame accurately which makes assembly a bit easier.

Cinder clock to keep frame flat
Frame shops generally use a V-nailer which joins the frame members from underneath. I use biscuits and a band clamp for my work. A problem with the wider moldings is that the band clamp causes the inner edge of the molding to raise up. Here’s the low tech way I attempt to solve that dilemma — a cinder block!

Pingback: Current Work — Tropical Walnut Picture Frame | Woodworks by John
Pingback: Faux Sgraffito | Woodworks by John