
I’m just getting started on a frame for a new client who was referred to me by a previous client of mine. How’s that saying go: “referrals are your best form of advertising?” That’s certainly true and I always appreciate it when one client refers me to their friends. This referral came about when my client saw a similar painting she had by the same artist; Robert Lemler. Obviously the process a one man shop (boutique picture framer?) goes through to create a frame will differ from the likes of Aaron Brothers or Michaels so always like to share how it comes about.
This time I’ll stick with pictures and you’ll notice I have a nicely wrapped, green finger! After marking out countless joints with a knife and try-square someway or another I managed to let the knife slip away from the square and take a good sized slice off the top of my finger, sharp tool = clean cut so nothing to stitch. I’ll end up with a nice divot there so wonder how that’ll effect my guitar playing. In any case, let’s talk wood. Started out with a nice piece of 8/4 Basswood from Timber Woodworking in Mesa. Following my hybrid style I have them straight line one edge and go from there. The first step is using a scrub plane to flatten one face prior to running the board through the planer.


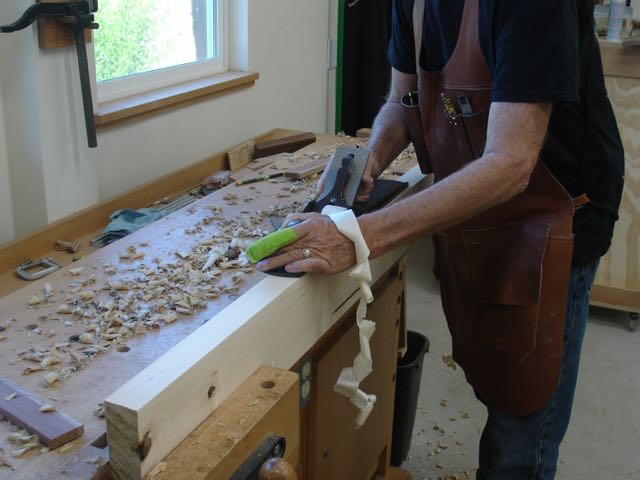
Planing the working edge
The stock was pretty good, only one piece had a bit of a wind to it but all in all, this step went well. Besides the winding sticks I also lay the board on a flat table to make sure it doesn’t rock — planer won’t take that out. The 4 boards were planed to a thickness of 1 3/4″. This step is followed up with planing a working edge, ripping it on the tablesaw to 1 5/8″ and then bringing to the needed width of 1 1/2″ for this frame.

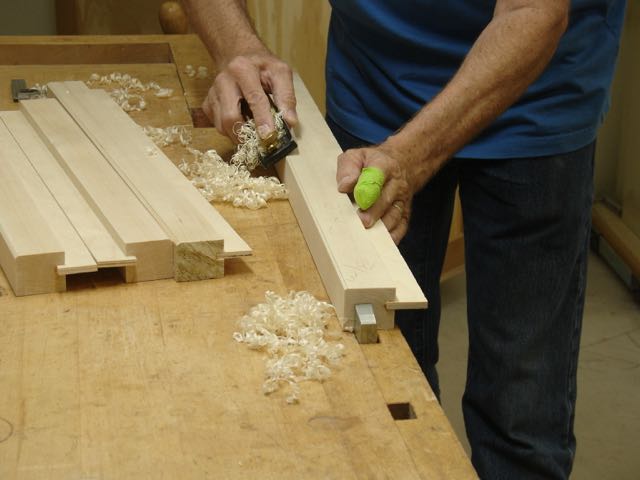
Plowing the grooves
Each piece was then cut oversized which makes it easier to do the next step which is to plow in a 1/4″ x 3/8″ groove for the floater panel to glue into. Sure, this could be done quickly with a router or dado head on the saw but working with the small plow plane from Lee Valley doesn’t take much longer and is much more enjoyable. No dust, no noise, just that satisfying swish as each groove is cut where it belongs.

Clamped and left overnight
The last step of the day is to glue in the 1/4″ Baltic Birch piece that becomes what I refer to as the float section. If you’re unfamiliar with a floater type frame, check out this previous blog post I wrote about them. Due to the design of the frame it’s easy enough to gang them together for clamping to dry overnight.
Planing the chamfer
This morning the final step to this particular profile involves cutting a slight chamfer on the outer edge. I’ve found that this creates a subtle glimmer of gold around the perimeter of the frame. Again, my choice is to go with a block plane rather than a router. Not only is it quieter the surface is much cleaner and you’re able to work in either direction as the wood grain dictates. Started to think back to teaching junior high woodshop in the 70’s and 80’s; taught students how to do this and also use block planes to form quarter rounds on their projects. Oh boy, any still doing that or have they gone to computer aided production!
Well, need to give this finger a break — next up will be mitering the pieces to their required lengths, biscuit joining the corners, and then it’s overnight in the clamps for lasting strength.
