
Those of you that follow me may recall that back in October I had an order for 15 frames from a local artist. These were 4″ x 6″, finished with black and about 4″ wide. She contacted me recently and asked about doing another 3 of that profile in a 5″ x 7″ size which was my latest frame commission. Luckily this time, instead of having to get 8/4 Basswood and waste a lot planing to a better thickness, I found some very nice 1 – 1/16″ thick Basswood at Peterman Lumber here in Phoenix. Width of these was determined by the material they had so they ended up being about 3 – 1/2″ wide which worked well for my client.

Semi-Production Mode
It’s a good feeling knowing that there are artists here who are willing to pay a bit more for a quality frame, it does make such a difference in how their work is presented to their potential clients. An internet search will give up all kinds of cheap frames that are assembled with V-nails, maybe some glue or solvent cement, and have a slick, characterless finish. Most of these will begin to separate or the miters will be sad when you get them! With this particular frame there are 6 different steps needed to create the profile after the wood has been milled to size. I’ll use a smooth plane to remove all of the marks left by the planer on the flat surface and tadpole sanders to eliminate chatter left by the router.
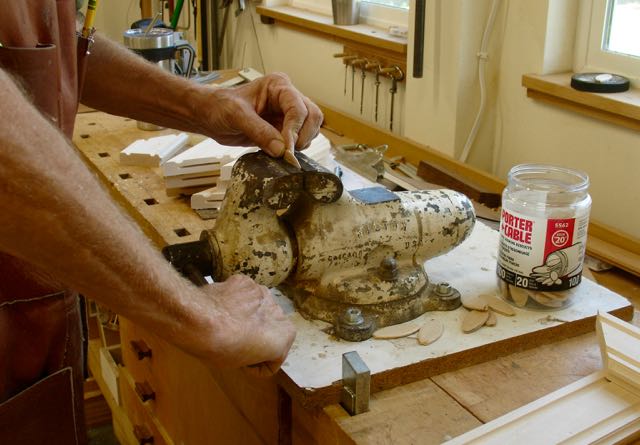
Compressing Biscuits
After mitering, the joint is readied for a biscuit and then glued and clamped overnight. I have a question for those of you that also use biscuit joinery. I’ve found that with the #20 size they are almost always snug in the slot! Not a problem except with a frame you need time to be able to slide the joint so all of the profiles match up. I did some measurements and found that the slot was about .160 and most of the biscuits were .155+ which didn’t allow much leeway. As soon as the glue is applied to the slot it too will expand. A recent article in Fine Woodworking magazine showed someone who compressed tenons (hammer and anvil) to make assembly easier. I’d beat biscuits before but that didn’t do much so decided to try using my machinists vise and it worked! Each biscuit was compressed twice and brought down to .150 which gave me plenty of leeway and time to get the profile of the frame to match up. I’d like to hear back from anyone else that has this problem — thanks!
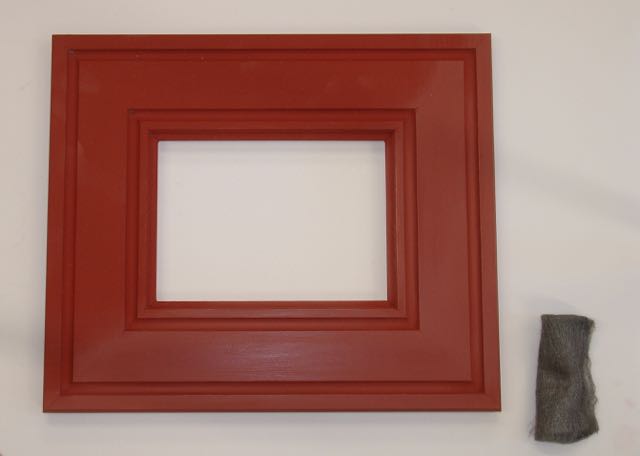
Burnisher/Sealer with half of the frame burnished.
The finish is the next step and something that’s always in progress. For these the frames were first sealed with a red burnisher/sealer that I purchase from LA Gold Leaf. You can see the difference in the finish at the left, the bottom and right side have been burnished with oil free, 4/0 steel wool from Liberon. This is a great product and being oil free means that your finish work won’t be contaminated. I’m experimenting with using thinned Japan Black for the top coat, black frames seem to be the thing that most galleries are asking for these days but I feel they should have character and a certain patina/age to them. By thinning the Japan it’s more of a wash and easier to rub back with wax. That’s the step that requires some careful timing and why it’s important to make sample pieces to work with. Here’s a collage of some of the finished areas, in a few instances using steel wool and turpentine was needed to rub back to the red.


")

This type of frame has also been done using spray paints but I feel that this is a more “traditional” method to achieve this look. Using Liberon Black Bison wax gives them (in my opinion) just the right luster — not too flat and definitely not too shiny!
