
Basic Profiles
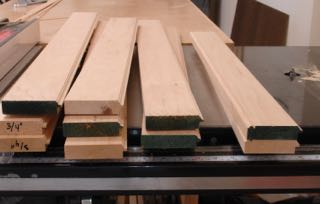
The client I recently completed the Tabernacle frame for, Christine Vallieres; contacted me and needs a number of frames for an upcoming show she has in March. She’s a very good client and her show will be held at The Sagrado in Phoenix. For this job there are 7 different frames so it’s important for me to organize the work flow to stay efficient. One starts out with 1 – 1/16″ Basswood, the others are smaller and for panels so were made from 4/4 Basswood. All are created using a combination of tablesaw, router, and hand work. Shown above are the profiles for the smaller (4×6 and 5×7) frames which are what I call The Christine Profile. These are 3 1/4″ in width.
I’ve been contacted by several other folks who make picture frames asking about my process. I buy my Basswood in S2S with one fairly good edge. After cutting to workable length (depends on frame sizes) the first step is hand planing a perfect edge to guide against the tablesaw rip fence set to the required width. After cutting, that edge is refined with the hand plane. The larger frame features a beveled profile so these were cut on the tablesaw first and then refined with a smooth plane.
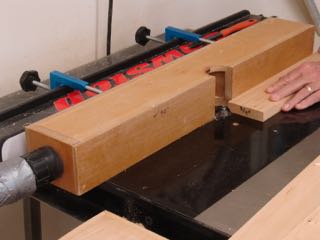
Fence for dust control with router edge work.
One of the frames had the outer edge formed by using my plow plane with a beading cutter — that I like! Others required the router which; although it’s essential, isn’t one of my favorite activities. Why — dust and noise! To combat the dust this is a fence I made years ago that captures about 90% it. That works fine for profiling an edge but there are also coves cut into the face of the molding. All of the dust goes down the bottom and everywhere else. There are various after market dust buckets you can buy but I really haven’t researched them fully, I did know that if you enclose the entire router there’s the danger of heat build-up and possible tool damage. My solution was an $8.00 rubbermaid container and a couple of bucks worth of plumbing fittings — captures about 75% of the dust I’d guess so a definite improvement.
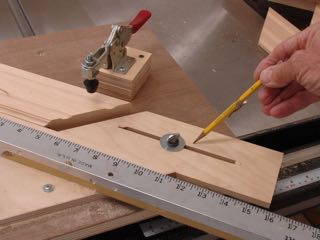
Adjustable stop for small moldings
After all of the molding is profiled it’s time to cut them to length. There are two critical requirements for a good frame, first the miter has to be exactly 45° and the lengths of opposing pieces have to be exactly the same. Since these frames are so small, I needed to modify the miter jig and add a new stop to it. After cutting a slot in a piece of plywood a threaded insert was put into the jig. The stop is slid where needed and then tightened with a thumb screw. I’ve been asked about making this jig, here’s a LINK to the blogpost of the first one I made.
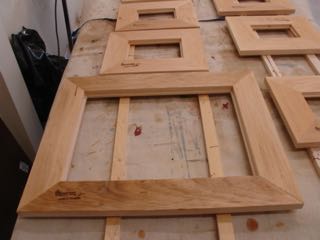
Ready for Finishing
All of the frames have been assembled (#20 biscuit, glue, clamped over-night), signed and numbered, and the backs have been sealed with shellac. Probably an extra step but worth it in my opinion. Finishing is next although it’s been kind of cold and windy for Phoenix anyway so my “whole world” spray booth conditions aren’t optimum!
