
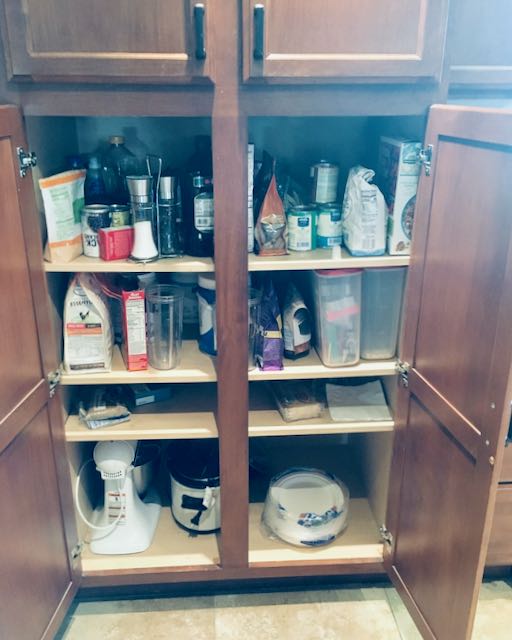
 One of the many benefits of being able to do woodwork is that there is virtually no limit as to what you can do. From rough concrete forms, to house framing, cabinetry, carving, fine furniture, etc. there’s an unlimited spectrum of challenges. During this Covid-19 season we’re now in that’s a good thing! Kitchens are the center of many homes and we spend lots of time in them so any improvements are good. In our home we have this very deep shelved cabinet, half of the back of it was essentially wasted space; an area to lose things. Always thought that pull out shelving would make this a more efficient area and this was a good time to remodel it.
First consideration was the material and clear coat, Baltic Birch was chosen. Love this stuff for projects like this because virtually nothing sticks to it, including the glue used for assembly. That means you need to expose the plies for joinery or else the glue won’t stick. The other important thing was the slides. We went with European style, 3/4 extension and a bottom mount. This way, the entire bottom is supported and groove/dado isn’t required for the bottom. Joinery is finger joints which provide lots of strength and give a nice look. As you can see, there are two doors so my design called for inserts that fit between the members of the face frame.
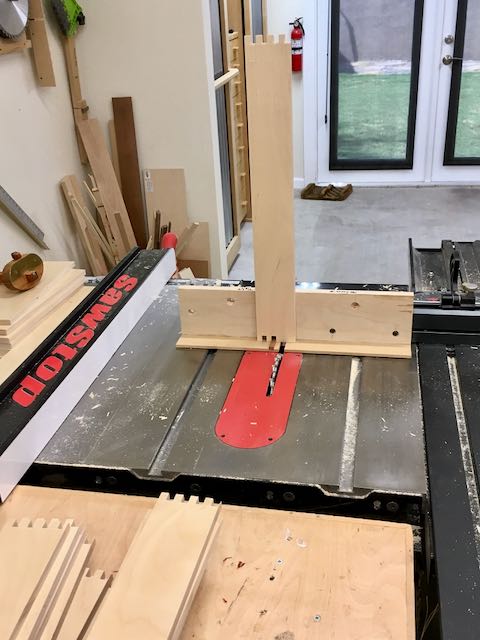
SawStop with Finger Joint Jig
Measure twice, cut once; truth be told I measure more than once!! The inserts were made of 3/4″ material using rabbeted joints assembled with glue and screws. After cutting all of the 3″ wide pieces of 1/2″ Birch these were all finger jointed. My SawStop has the sliding fence and the jig I made for is works great. I did a blog about this unit, here is a LINK to it. Usually you’d leave the fingers slightly proud so the can be sanded flush but with the pre-finished plywood that wasn’t an option. Instead the blade height was carefully adjusted to the exact thickness of the ply. A trick is to also use a marking gauge to scribe the the back of the board before cutting those fingers. No matter how tightly you hold them and even with a zero clearance insert the back inevitably will have some tear out. After all of the pieces were done it was time to cut the bottom. The bottom is sized exactly to the size required to fit inside of the insert with the hardware. A 1/2″ wide rabbet was routed around the perimeter. This will ensure the drawer is square and also exposes the plywood for gluing. Here’s all of the parts ready for assembly: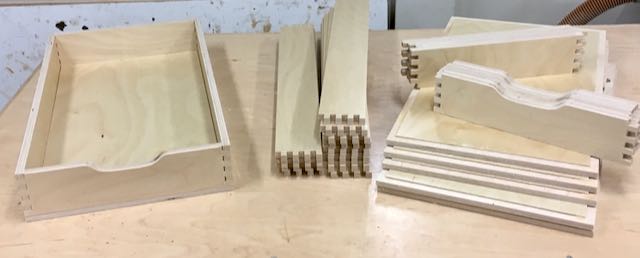
The fingers were arranged so there was a finger on top of the long side pieces, this meant I could form a handhold in the front of each drawer and add a rounded over edge for comfort. My preference for glue is Old Brown Glue, long open time and easy clean up. With the 110+ degree days we’ve had all I need to do is set it outside in the sun and in no time it’s at 120° or so for the right viscosity! Process was to first glue up the fingers, square them up and apply glue to the rabbet on bottom and bottom of drawer. Now the bottom is put in place, drawer is clamped, and a couple of nails secure the bottom until the glue sets.


Let me share an old school method of installing drawer hardware. Back in the day you didn’t find all the jigs available today. Rockler, Kreg, Woodcraft, Accuride, etc. are only to happy to sell you theirs! A low cost option is to cut a piece of sheet material to the measurement of the highest drawer. Make sure it’s square, set it on the bottom of the cabinet and hold the slide firmly in position so you can drill for screws. Once all are installed simply cut the sheet to the height of the next set of drawers and repeat until done — easy/peasy!


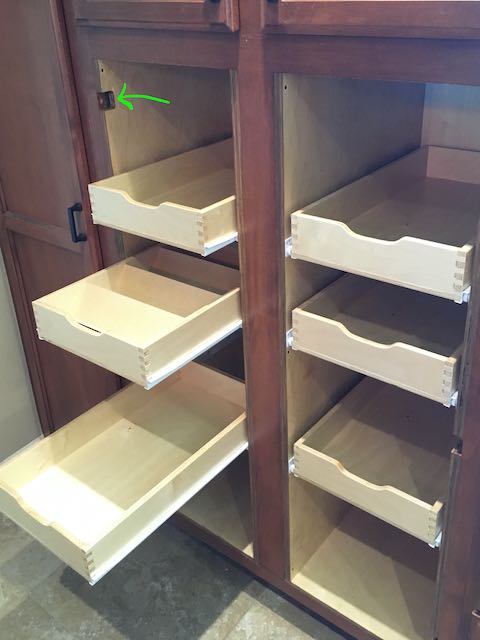
Installed, note notches for the hinges
Installation went well, I needed to add a piece of 1/8″ masonite so that the bottom of the cabinet was even with the face frame. Also added some material to the inside to attach the insert to. I didn’t consider that the doors needed to be attached to the face frame which the insert covered! This required removing the unit, taking it back to the shop, and notching out the insert at the hinge locations. A jig saw and router template took care of that. The installed unit works like a charm; the pantry is full and there is one dedicated drawer for spices. Cost was around $250.00 — money well spent.

When doing this, I had to replace the existing (Blum) euro hinges by wide angle ones; otherwise I could not get the drawers out of the cabinet.
My wife (and me too) is very happy she hasn’t to bend anymore to get access to anything.
Sylvain
LikeLike
I didn’t make an insert so I didn’t had the extra 3/4″ for the door.
LikeLike