
Many of my projects have begun with a simple conversation; “I think we need to replace this chair, it’s looking worn and faded” — of course my response was “ok, I’ll make one” and so it began! My wife and I both like the mid-century modern style of furniture for it’s simple yet elegant design and it fits well with the other pieces I’ve made through the years. So began my internet foray into the world of the internet to find as much as I could about this chair credited to Paul Jensen and produced by Selig in Denmark. There are lots of pictures and furniture for sale on many websites but the actual making of them isn’t as prolific. I was able to find a number of sized drawings but the sizes referenced varied so it all became a bit confusing.
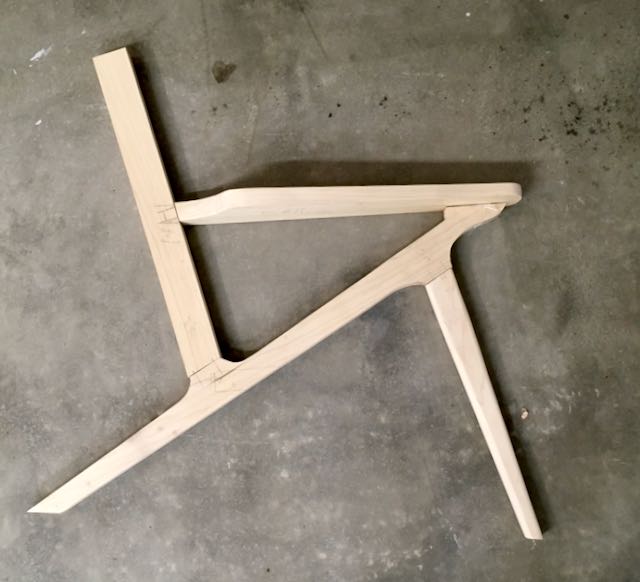
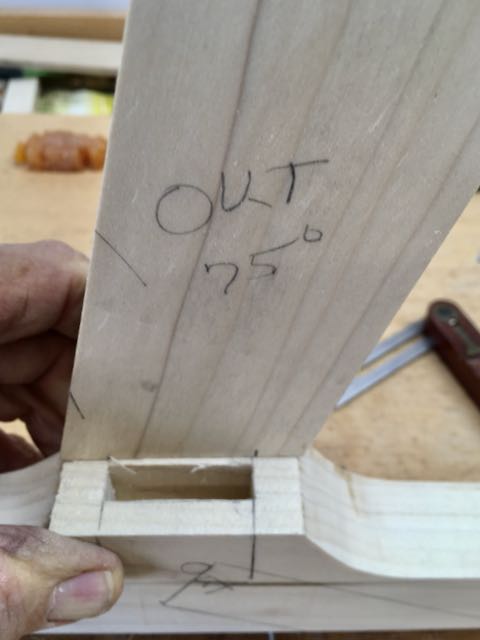
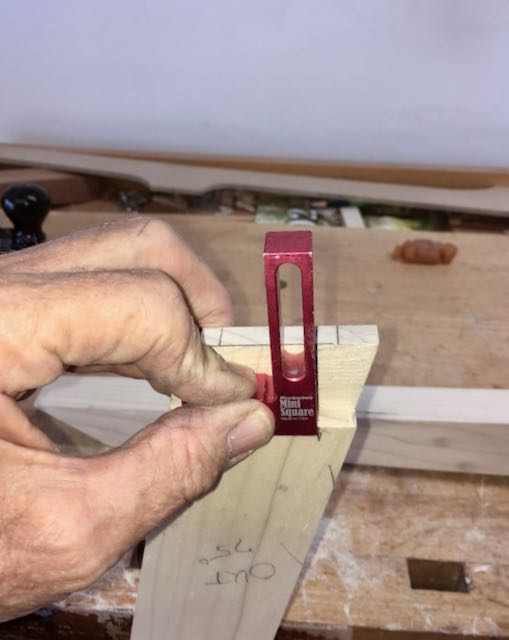
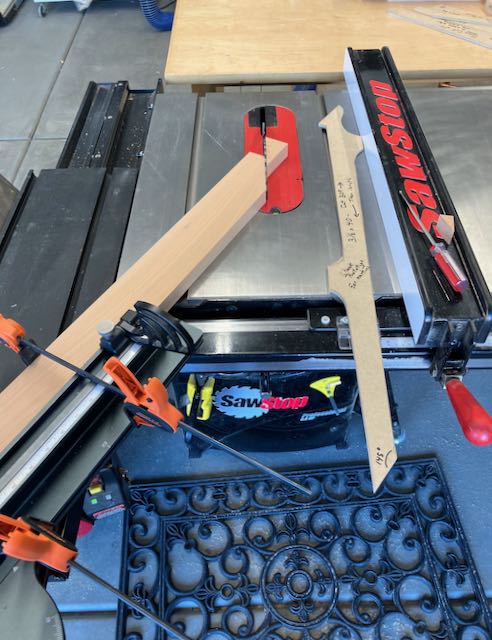
I decided the best way to go about it was to choose a couple of sites and pictures that seemed to be similar and use dimensions from them. Next was to make templates out of 1/4″ MDF and use those to create a mock up. I figured that the critical piece is the center member which is the back leg and the support for the arm rest. The picture on the left is the result and is made from 6/4 Poplar. There are some important angles too, the back of the leg is 145° while the support for the armrest at the other end of it is 30°. Leg and backrest are cut at 75°.
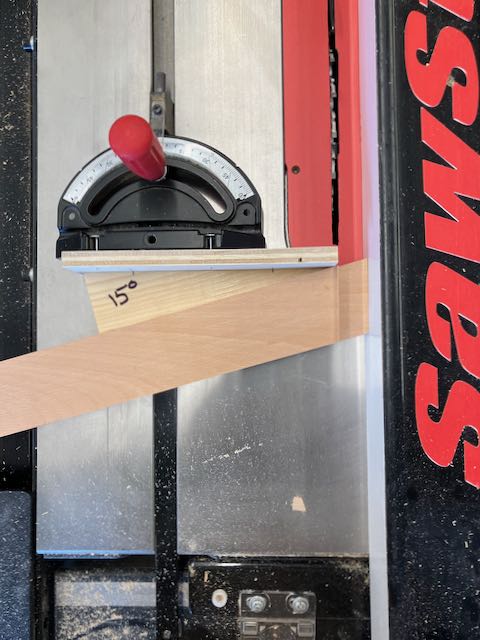
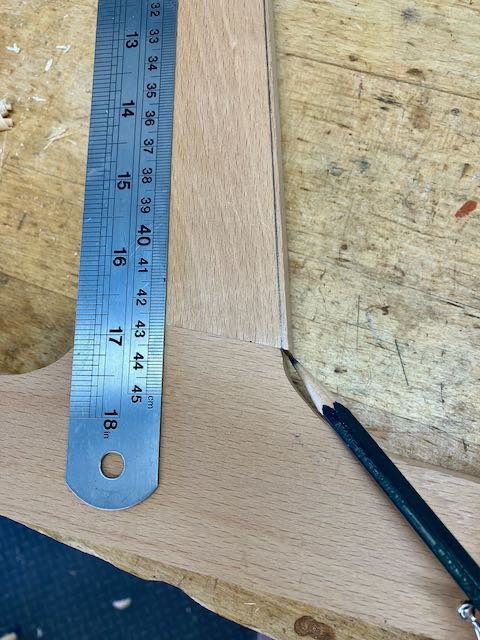
I found a set of plans from a woodworking magazine but the construction utilized dowels which I don’t like to use. Another way is using the Festool Domino system which is way to expensive for me and I’d rather take the time and use mortise and tenon joinery. With the angles used in this piece that meant that either the mortise or the tenon had to be angled. Many years ago I made a set of dining chairs and used angled tenons without any problem so that is my choice for this project. The process I followed was to start with a piece 3 1/2″ wide for the main leg and cut the angles I mentioned above. Once done, the pattern was traced, first bandsawn, and then pattern routed. The tenon’s on the prototype were all done by hand but the shoulders gave a lot of problems. After the front leg and backrest were cut at 75° I used marking gauge to lay out the dimensions. Also used the Stanley #71 Router plane to true up the tenon but not satisfied with the final outcome. I learned about a way of using the tablesaw to do this which gives more control of the angles on the shoulders which results in a much tighter joint.
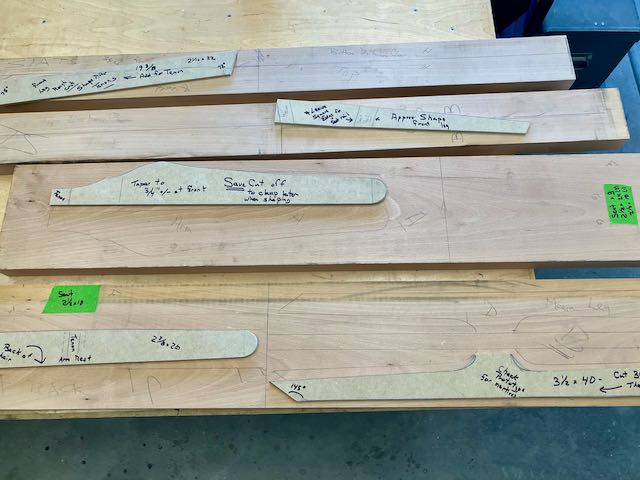
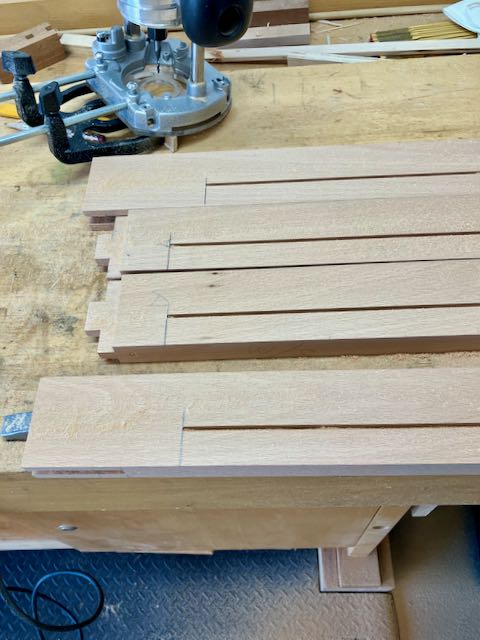
There’s no way I can explain the entire process to you so will summarize the best I can. I decided to go with 8/4 European Steamed Beech. Very difficult to calculate what I’d need because of the differing shapes and sizes. Peterman Lumber won’t cut so whatever piece you find, you have to buy the entire board. God was watching over me and the two pieces I bought worked out well! After laying and rough cutting the 8/4 material I resawed each piece to 1 3/8″ which gave me a bunch of 7/16″ thick material for future drawer stock.
The process started by cutting the main piece to size and angling the arm rest at 30° and the back leg at 145°. This established the over-all length and the mortises were located and cut next. The pattern was traced, cut on the bandsaw, and pattern routed with a 1/2″ diameter bit from Woodpecker. The pieces for the front legs and back support were cut and the first step was the tenons at 75°. Here’s where I used the “wedge trick” from Tim Rousseau, Fine Woodworking Magazine; to cut them. My saw has a sliding table which wouldn’t allow that technique so I used my miter gauge but reversed it. My outfeed table doesn’t have a slot for the miter gauge to go through since I rarely use it. You can see how the wedge is attached to a fence, after cutting all of the tenons on one side, the wedge is unscrewed and reversed to cut the other side. The tenons were fitted into the mortises and since the pieces were still slightly over-size they were planed to fit the outside wall of the mortised area.
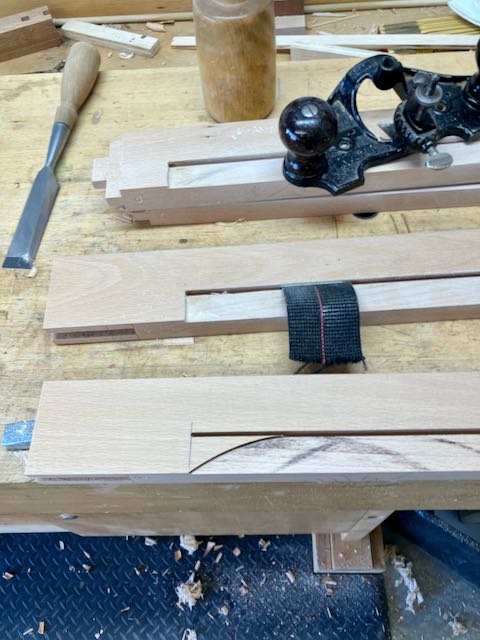
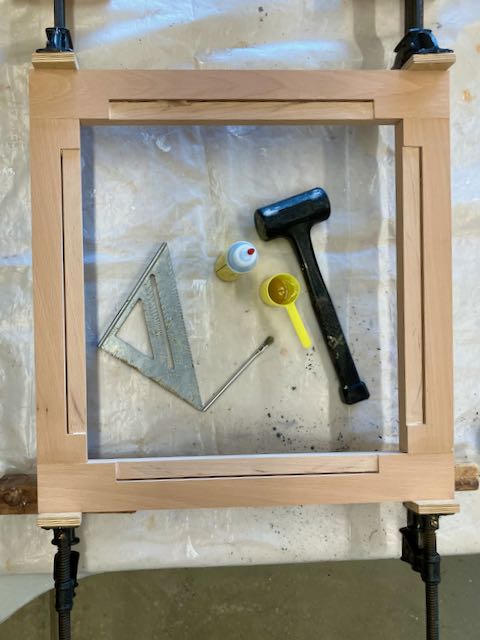
There are three members that connect the two sides of the chair together; the front seat support and the top and bottom stretchers for the back. Mortises were located and then the tenons were cut and fitted. The other main assembly is the seat which will fit into a 1/4″ deep dado cut into the sides. I need to wait until the sides are assembled before cutting that dado — I think! I decided to make the seat frame first. It’ll be 1″ thick and I’m using webbing and clips to support the cushion. These were bought on Etsy from House 2 Home, quick shipping and support. Few realize how many steps there are for this seemingly easy process but there are many! First the pieces need to be cut to size, then mortise and tenon’s are cut and fitted. The clips require an 1/8″ wide by 3/4″ deep groove which is routed. Then you need to remove the wood so that the webbing sits flat. This was done on the tablesaw with a plunge cut. Finally that recess is squared off and the piece is glued and clamped, whew — tired out just thinking about it!
That’s enough information for now. The back pieces need to have the slats added so I’ll go into that on the next blog. At this point all of the pieces are square so shaping via bandsaw work, pattern routing, and spokeshaves will follow. Looking forward to that step as it’s the main reason for this RABBIT HOLE!!

Pingback: Z-Chair Project Completed! | Woodworks by John
Pingback: Danish Loveseat: Part 2 | Woodworks by John