

There are many seemingly minor details and decisions to be made on this project. I’ve discovered that to locate the seat, for example; the front and main leg need to be clamped together. Clamping was a problem I knew I’d have due to the angles. I found that using a parallel clamp with 150 grit paper taped to the jaws would hold securely. The clamp is tightened onto the leg to match the angle on the main leg. Then I taped a piece of wood to the top of the main leg and applied clamping pressure as close to the center of the joint as possible and it worked!
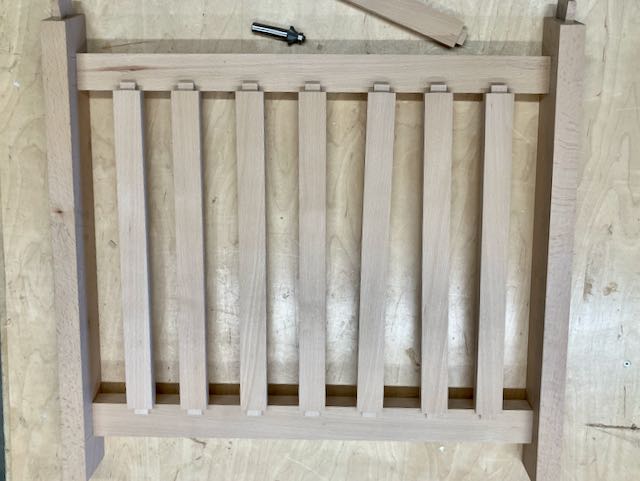
The joinery for the back supports that connects the legs together was next followed by laying out the locations for the back slats. There are different designs for those but I decided to make simple slats measuring 5/8″ x 1 1/4″. They have 1/4″ x 3/4″ tenons on each side and all 4 edges have radiuses. Getting the lay-out accurate took some time, my method is to do it on a piece of masking tape first and then once set I’ll lay it out on the wood with dividers. The mortises were cut on my hollow chisel mortiser and tenons on tablesaw and jig. They’ll be put into the mortises without any glue and have already been finished with Osmo #3043.

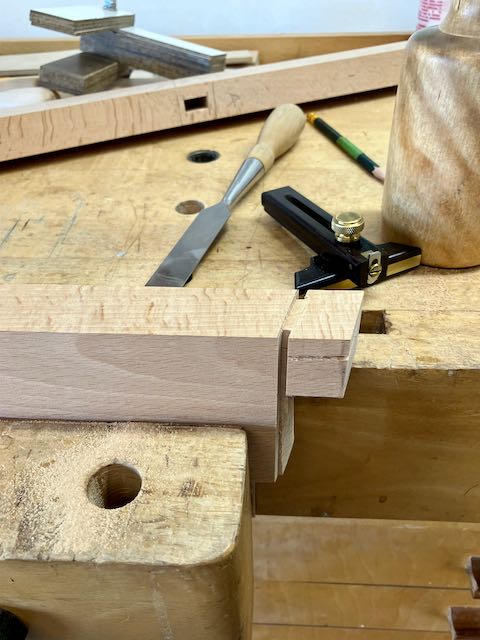
The next major step is locating and shaping the arm rests. Because there is”wiggle room” in the joinery no matter how tightly I clamp them together the final fitting will be done after the front leg and back rest are securely glued in position. The mortise was cut into the back rest before any shaping took place. It’s 3/8″ thick and roughly 3/4″wide and 1″ deep. The tenon is angled. For me, the hardest cut to do by hand on tenons is the shoulder so I figured out a way to use a jig and the tablesaw similar to the wedge system I used before on the legs. Everything else was cut with dovetail saws and chisels. I used a draw bored joint on the prototype chair which solidifies the structure and will use it on the final chair as well.


In my opinion, the thing that makes the Z-chair stand out is the way the armrest and the rest of the structure come together. At this point it’s still somewhat in progress but almost there. The original design looked more like an Adironadack with the curved ends. Now that the entire chair is assembled I can see that. I’ve found that by putting tape on the wood and drawing on that it’s easy enough to change by replacing the tape rather than drawing directly on the wood and trying to erase. I only reshaped one side and then it was used as a template for the opposite arm. Final shaping with spokeshaves is next; a step I’m looking forward to since it’s one I don’t have a lot of experience with — the new challenge!


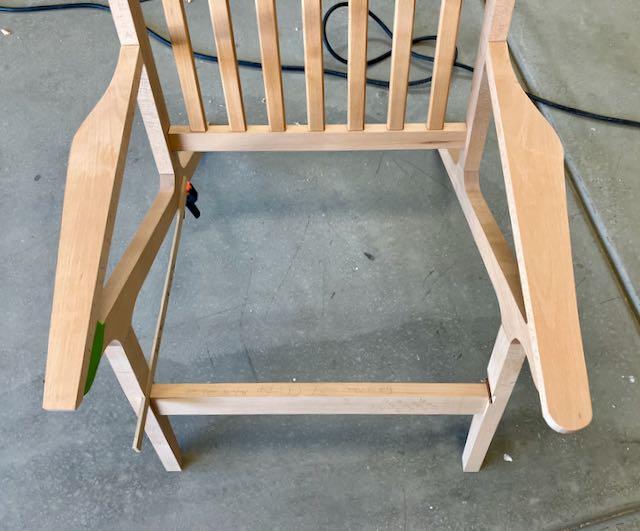
The final angle that needs to be cut is on the top of the front piece that connects the two sides together. You can see it in the picture above, it needs to be angled about 10° to meet the frame for the seat. Once the angle was planed the final step is drilling and counterboring from the bottom to secure the seat to the chair. All that remains is to route out a 1/4″ deep recess for the back of the seat frame but that will be done after the side is completely glued up.
Looking forward to the spokeshave work and will talk about that in the next blog.
