Beginnings — it started out easy enough but that soon changed! I decided to see if I could construct a hexagon box that had a hinged lid. Why, just because I’d never done it or see it done! I wanted a better place to keep my Lie-Nielsen spokeshave than the cardboard box it came in. Since I had some Poplar in my shop decided to use that. Started by cutting 6 pieces at 30° and assembled them using packing tape, even book matched them– easy ’nuff!!
Now that I had a hexagon cylinder it needed the end pieces. Used a scrap of MDF to play with the sizing to match the outside of the hexagon. Once the miter saw was set with a stop block and the MDF fit well I cut the Poplar. The blade angel is 30°.
First cutsSecond cuts
I’m a tails first dovetailer and this took a bit of thinking and planning ahead. The first step was scribing the thickness of the box on both sides of the end pieces. The tails are at the and marked off with a pencil. Removal of the waste began by first deepening the scribed marks with a chisel. After cutting closely to the line those deeper lines made it easier to chop the shoulders square. Transferring to the hexagon began by scribing the thickness of the end pieces all around, both inside and outside of the hexagon. Then the end piece was positioned and the tails were transferred to the hexagon. Not much room to move a dovetail saw but that was the easier part. The waste can only be removed from the outside of the hexagon so I got creative in how to hold the hexagon. At this point, I think a slideshow will illustrate better than anything I write!
Tails laid out, scribing shoulders
Making scribe lines deeper made final chisel work easier
Fitting and scribing onto hexagon
Awkward position but able to chisel waste out
Used body weight to hold hexagon on scrap and chiseled out waste
Almost ready to glue
Once the box was glued up, I separated the lid on the bandsaw, I correctly assumed that cutting it would change the size so the lid was a bit smaller than the box. Another unforeseen problem is the the screws for the hinges were too long since they sit on a 30° angel — cut them shorter so there’s not a lot of purchase with them. I had a small piece of curly Spanish Cedar so used that for a lid lift and also the French fit insert to hold the spokeshave. Sorry, didn’t take any pictures of that process but it’s secured inside of the hexagon with silicone seal. The hinges and the lid lift are mortised in, quite different cutting a mortise on an angled piece of wood!
Cutting off the lid lift
Stanley #271 scribes depth of mortise
Mortise laid out
Progress on mortise
Mortise done!
All things considered, this was an interesting challenge and glad I took it on. I enjoy these types of projects, let me know if you too decide to try making one of these. Here’s a short video I posted to YouTube of the finished project, enjoy — John.
Frame #266 measures 24″ square and was designed for Diane Eugster’s painting titled Trail Dust. The closed corner frame was made using my 15° process and I’ll admit I probably went into way too much detail on how it’s made — sorry! A feature of this frame was using clavos to add that western vibe to it so feel free to scroll down through the tutorial on milling the Basswood to create that 15° profile. The finish is Real Milk Paint using a 9:1 ratio of Black Iron and Soft White.
I’ve been asked by a number of my readers how to create my 15° frame from 1″ thick material which can hold 3/4″ thick canvas. As you know, I also use my blog to remind myself how to do different process — at 75 years of age it helps! In any case, I’d appreciate it if you’d let me know if this tutorial helps you as well, I’ll write it using my best, retired shop teacher format as I can. For this frame I’m using 5/4″ rough Basswood that I get from Peterman Lumber here in Las Vegas. My preference is to get their 8″ and wider, I make my frames about 3″ wide so this gives me the least amount of waste. After flattening one face with a scrub plane it’s surfaced with a power planer. I usually get 1 1/16″ to 1 1/8″ thickness from it.
I prefer to cut each leg of the frame to length (plus miter allowance) separately which makes it easier to control on the saw. I strongly suggest to also cut at least one additional piece 10″ to 12″ long to use as your trial piece to set up your saw. Set your blade at 15° and lock it, it’ll stay the same for the entire job. Lay out both ends of your trial piece with the sliding bevel set to the angle of the tablesaw blade. To ensure that all cuts are made in the right place, I lay the frame legs out on the tablesaw in the exact orientation for each cut — believe me, it’s really easy to make a cut on the wrong face or edge.
Cut 1: I forgot to take a photo of this one but the face of the frame will go against the fence and the board is set on edge. Setting the fence for about 3/4″ works for me but experiment. This cut is what the frame sits on to raise the sight edge. I did a blog on this some time ago but have changed the order of cutting a bit for safety, you may want to check that blog out.
Cuts 2 & 3: These are 15° angle cuts on the sight and back edges. Note that the angle on the back edge will become shorter when you make cut #4. For this frame I measured about 5/8″ in and the cuts are made with the piece on edge. After these cuts I use a smooth plane to remove any mill marks on the face of the frame.
1. Cutting 15° angles on face, keep pressure on flat, not angled cut!Smooth PlanedOptional beading
For this frame I wanted to add some bead details and used a Veritas small plow plane with a 3/16″ bead cutter. This is an option, if you decide not to simply go on to the next steps. You need to do this before cut #4 so you have a 90° corner to guide the plow plane.
Cut #4: This cut will allow you to easily clamp the frame together for joining. The profile is upside-down for this cut. This creates a 90° edge for clamping.
Cuts # 5: This is tricky and creates your rabbet. I use a saddle square to “guesstimate” the depth of the rabbet (5/16″) and draw a line on the sight edge. Use that to adjust the blade height and then set your blade on line #5. You can see the orientation of the piece on the fence. I make the sight edge about 1/4″ thick. This is my set up block and you can see my initial cut was a little too deep!
Cut #6: To finish the rabbet this is how the piece is oriented. Again, I use a saddle square to “guesstimate” the depth of the rabbet, drawing a line on sight edge. Adjust the blade to the line and put your pressure on the outside of the piece, not by the fence where it’s angled. As a general rule I need to sneak up on the depth but that’s what the trial piece is for.
The final step is to cut the miters and assemble the frame. When you cut them be sure to apply pressure on the angled cut at the outside of the frame, not the sight edge. I use biscuits to join my frames and the same thing applies here, the biscuit joiner needs to be held securely to the angled cut on the bottom of the profile.
Pressure point for cutting mitersBicuited, glued, and clamped
Final Steps:
Once the frame is removed from the clamps it’s time to do any clean up of glue, especially in the grooves between the beads. Any slight variation at the miters can be fixed with a paring chisel. This slideshow demonstrates the process for creating the areas for the clavos. Chisels were used as shown and you’ll notice I drew arrows to remind me of the grain direction, the miters required caution.
Layout, area removed at center and miter
Center area, about 3 1/2″
Miter area, about 2 1/4″
Dividers used to locate clavos
Installing the clavos
After locating the clavos location with dividers I used a scratch awl to deepen the holes so they were visible after painting. To install them they were first pressed in by hand and aligned to the center of the space. To protect the finish from the hammer I placed a piece of hard plastic and tapped them in. They did tend to twist so before they were completely seated I used those pliers with the plastic jaws to align them and tapped them into place. They have an uneven bottom edge which digs into the wood preventing them from twisting.
All things considered this was a good challenge and fit for this painting. Like I mentioned at the beginning of this somewhat lengthy blog I’d appreciate any comments about it — let me know if you make a 15° profile frame and how you liked it; Thanks — John
At the recent West Coast Art & Framing expo here in Las Vegas I made it a point to visit AJoy Framing and after seeing her frames in person it inspired me to create one of my own! My artist wife, Diane Eugster; was with me and after talking with Alana and seeing her work she too was inspired to use that technique for a frame for her work. The unique thing about Alana’s work is that it’s painted in subtle colors and she adds a customizable trim to the sight edge. I’ve created a few frames using milk paint from Real Milk Paint Company and like the results so that was the product I used for this project.
Of course, any new technique has its own set of challenges. Diane recently completed a painting titled Force of Nature which is 24″ square and on stretched canvas. It is painted in a contemporary figurative style. The first challenge was to design what I’ll call a filigree for the trim on the sight edge. My first thought was to do it in two sections to insure that both sides were the same. After trying that method I realized the joint in between the two halves would always show. Since the frame and filigree will be different colors they will need to be painted first and then assembled. That raised too many problems so another approach was needed.
Plan B: To get four identical pieces the first step was to make a router template and pattern jig. To make the pattern start with a piece of paper at least the length of the filigree. Fold it in half, draw on thalf of the design then cut it out and glue to the jig. To make the pattern routing jig I used 1/2″ MDF and 1/4″ Basswood. The Basswood was attached to the MDF with pin nails and glue to cradle the filigree in position for the routing. The measurement inside of the mitered pieces is 23 1/2″ which gives me a 1/4″ rabbet since the filigree is also the sight edge. After cutting the MDF on the bandsaw files and sandpaper are used to get the final design.
Preparing profile, 15° angle, smooth plane to remove milling marksPattern bandsawn and shapedDesign traced onto 1/4″ x 2″ basswood
The filigree pieces were treated like a picture frame, each is exactly the same size and fit snugly into MDF template. The design is first traced onto the wood then cut out on the bandsaw with a 1/8″ blade. Double stick tape was used to hold the filigree in the jig and the final shape was routed with a 1/4″ round over bit.
Assembly: The frame was painted with milk paint from RMP.co, I chose Plum for the filigree and for the frame mixed 9 parts Black Iron with 1 part Soft White to achieve a charcoal color. Before painting the frame the filigree design was traced onto it and then taped off so that the glue has bare wood to adhere to. The challenge now was how to attach them in the exact location, if you’ve ever tried gluing and clamping long pieces of wood in place you know my concern! The problem was solved by using four pieces of 1/4″ masonite that I cut the exact size as the filigree; this was done at the same time the filigree pieces were cut. When both edges of the masonite lined up with the miter of the frame they were perfectly aligned. To attach the filigree one piece of masonite was removed. The glue was applied sparingly with a brush to both surfaces, the filigree is positioned between the miters, and clamped securely. The opposite edge as done the same way so now 2 of the filigrees are attached. Having the masonite pieces there made it easier to line the filigree up and after they had been glued for several hours it was just a matter of gluing the remaining pieces in. It’s important not to get any glue on the painted surfaces because it’ll leave a stain — learned that from my sample piece! Sounds complicated but this slide show should illustrate it the process for you:
Frame taped of prior to painting
Tape removed, ready for filigree
Masonite clamped onto inside of frame to anchor filigree for gluing
Ready to glue, brushed on both surfaces sparingly
Opposite sides of filigree glued and clamped
Detail to show how masonite anchored the filigree
I’ve been using OSMO PolyX 3043 to seal the milk paint. Before applying it I used a Mirka Mirlon pads in 1500 and 2500 grit from Lee Valley to smooth the finish of the milk paint. My wife and I are both pleased with the results. Her painting is done in a contemporary take on a traditional figure and the frame is done with a contemporary take on traditional framing where I used painted ornamentation rather than traditional gilding. The shape of the filigree compliments the flowing dress of the subject and the palette. I wonder if there will be more of these frames in our future?
That expression “necessity is the mother of invention” has been proven to be true and this frame is proof of that for us. Recently Diane, decided to paint on a smaller format (12″x 12″) than she usually does and asked for a floater style frame. Reason was that she didn’t want any of her painting hidden beneath the sight edge. A floater style was the obvious choice but she asked if I could give it more of a presence so I added a collar and the frame was born! I posted it on social media and received many positive comments so decided to share the building of this frame.
I chose Basswood since I knew it was going to be painted and I have that in my shop. Haven’t priced it out yet but if your interested contact me. The retired woodshop teacher in me likes to share my work so that if you’d like, you could make your own — appreciate it though if you give me credit for the design. Peterman Lumber carries a rough, 5/4 Basswood that I can usually mill down to 1 1/8″ or so. I chose to resaw that and was able to get 1/2″ thick material for these frames which looked fine for a frame of this size. For a larger canvas it should probably be thicker but resawing saves money and reduces waste.
Clamped together for glue upCollar glued and clampedFloater glued and clamped
Basically the frame consists of two parts, the collar and the floater section. The collar pieces are 2 1/2″ wide, mitered, then biscuit slots are cut before gluing it up. I found that clamping the 4 pieces together made it easier to apply the glue to the ends and the #10 slot, they were too thin to stand on their own. Clamping was a little tricky because the pieces are so thin and the clamp wanted to tilt up and off.
For the floater piece I use a technique which is a bit more elaborate to make than the basic L-shape profile available commercially but I believe it’s more versatile and stronger. I cut a groove/dado in the side pieces to mount the canvas to, it also keys the pieces together. That dado allows me to position the canvas at any depth. I did a post on it some time ago, here’s a LINK that will explain my process in detail. After being clamped overnight the next step is to prepare to join them together, you may need to fine tune the corners either with a sharp block plane and/or sandpaper. With wood this thin it’s very easy for the mitered corners to get slightly misaligned.
Marking gauge to scribe line Initial attachment prior to pilot holesGlued & Screwed
To insure that the holes were centered exactly in the 1/2″ thickness I came up with a method that I like better than a pencil line. Set your marking gauge to 1/4″ and scribe the line. A scribed line helps you center your scratch awl better then a penciled line. This was followed by pre-drilling and countersinking the holes for the #6×3/4″ screws, I used my drill press to make sure they’re 90°. In the middle picture I carefully line the two sections together and only drilled pilot holes for two screws. These were then tightened and the remaining pilot holes were drilled into the back of the floater section. Hint: mark the location of the collar to the floater section before you remove it. The collar was removed and I started screws in each hole to save time, glue ups can be stressful! A thin bead of glue was applied to the inside edge of the floater. The collar was then carefully centered and held in place with those first two screws and then each screw was tightened down sequentially like you’d tighten the lug nuts when changing your tire.
For the finish on these I decided spray paint would be the easiest. I imagined fighting runs on the vertical corners of the floater section and then the paint building up on the “collar” if I’d attempted to brush on the finish. My usual process is to seal the entire frame with a coat of Zinsser seal shellac which is wax free. Rustoleum, satin black is the final coat. After it had cured for 2-3 days I used craft paper to knock down the nibs from the spray. I used to use paper bags in the past but they’re not so easy to find these days! I prefer to apply a thin coat of Liberon paste wax with cotton balls as the final step.
Here are some pictures of the final project with paintings by my wife, Diane Eugster. It is a series she painted after visiting a rehearsal at the local ballet company. The titles are “The In Between” and “Take it From the Top”. Here are images of the final results:
Another frame and another challenge, this time it was carving peas into a bead on the outer edge of the profile. I did a small sample piece and held it by this painting — liked the results so decided to jump in and commit to an 18″ by 24″ frame! On the sample the sight edge was also gilded but as the work progressed I decided to paint that black instead to completely isolate the subject from the rest of the world, a definite barrier from the frame.
During my research I found a few different ways other’s have gone through to carve them. Chris Pye had an article showing his method and Tim Holton had a blog showing his technique. Chris Pye begins by using a router to create a bead but my preference is my small plow plane with a 1/4″ cutter. No dust and quiet and not really that long of a process. The layout is done using two calipers, this process takes some fiddling around to achieve equal spacing all around the frame. I tape a piece of masking tape to the bench and lay out the outside length of each side plus the center line. I arbitrarily decided on 6 peas in a segment and an approximate distance between each of the segments. The goal was to end up with approximately the same distance at the ends of both sides. Once satisfied, one caliper is set for that distance and the center of each segment in marked on the bead. I set the other caliper for 6mm which is the size of the #8 gouge used. Three marks from the center each way gave me 6 peas. As it turned out there are 9 segments on the 24″ leg and 7 on the 18″ leg. This slide show shows the basic procedure. Tim Holton used a v-chisel for separations between the beads but he used Oak rather than the softer basswood on my frame. The advantage is that the V gives you some clearance when making the first pass with the gouge — I only popped out one of the beads at the start because I tried to go vertical with the gouge too soon, thankfully it glued back in. By taking shallow cuts at the start and using a brush to clear out the waste the process went smoothly — about 4 hours of time needed for the entire frame.
Creating 1/4″ bead with small plow plane
Cut with double bevel 1F/8 on center line of pea
Cut in with 8/6mm gouge to center from one direction, use brush to remove chip and cut from other side
I took 2 shallow cuts, gradually going to center. Followed up with almost vertical outline of the pea.
Use a single bevel, 8mm chisel, goal is to remove the chip between each of the peas.
Final brushing to clear chips, the burnisher/sealer should fill in any remaining gouge marks.
I made it a point to not obsess about the shapes of the peas, trying to get them all “perfect”. Once I completed a set of six I told myself it is what it is — by the time all 192 are carved and the burnisher sealer is applied, the gold leaf is laid, and the toning is completed it will look fine!
The finishing process began with a coat of Zinsser wax free shellac on all surfaces. This was followed by a coat of Red Burnisher/Sealer from LA Gold Leaf. The primer was then burnished with 4/0 oil free steel wool (Liberon) and the panel was taped off so I could paint the sight edge black with Rosco Japan Drop Black. I realize I gave a bunch of links here for products that I use, obviously that’s all personal preference but if you’re unfamiliar with them thought I’d add the information. The wax free shellac and steel wool are critical in my opinion. As much time as it takes to create frames you don’t want to have a failure in the finishing step.
Next step is the gilding process. My preference is to use slow set, oil based size. The weather hasn’t been very warm but the frame was sized around 7:00 pm then covered to prevent too much dust. I began laying the leaf around 8:30 am and it worked well. The picture on the left shows the frame after knocking down the bright shine of metal leaf with 4/0, oil free, steel wool from Liberon. Only the top and right side are done in the picture. After allowing 2 days for the size to dry completely I air brushed on 2 coats of platinum shellac; it is wax free. The final step is toning, for this Titanium White casein, mixed with distilled water and a drop of alcohol was used. Brush on, then dry brush to achieve the look I was after — always a bit of an unknown! Iced Gold is what I call this and once the casein is thoroughly dry (24+ hours), I’ll protect it with a thin coat of Liberon Black Bison wax.
So that’s the process, I hope this helps anyone else on this process of making custom picture frames. It’s a process I’ve been on for over 15+ years. It’s been my goal to share what I’ve learned along the way with others on this journey.
Recently, I received a phone call from a relative of neighbors I had in the home we moved from about 8 years ago! He remembered visiting my shop then and contacted me for a project he had in mind. They have a family tradition of wagering on the outcome of the horse racing at Del Mar. The winner is honored by having his name on the trophy and showing it off in their home. As you can see, they’ve run out of room and rather than start all over with a new plaque my challenge was to create a base that they’d be able to use for several generations. Here are the results:
Before and After
The first logical step was to get the wood needed. I sent him some links from Woodworkers Source so he could see pictures of various woods which helped but in the end we met at Woodcraft here in Las Vegas so he could see the wood “up close and personal”. After checking what was available he chose this piece of Ebiara Gabon which I thought would be enough for the project based on my rough plans. It was just right, I had no usable piece left so had to plan my work carefully. It’s not like you can just go down to the big box store and buy more! This is a rare wood, one I’d never even heard of or used and it worked beautifully. After planing a square edge the rough layout began using chalk.
The size of the base was determined first by the size of the name plates and then by the amount of material I had available. As I was planning the work I realized that every side of the base would be visible at some time or another so it needed to be constructed in a way that end grain would be hidden. I chose mitered edges with full masonite splines for added strength. This was assembled with Old Brown Glue, my go to for any project where I don’t want any glue to show through the finish. It’s much easier to clean up than PVA glues.
Splined Miter
Clamped with packing tape and corner clamps
The next consideration was attaching the horse from their original trophy to the new base. Two things to consider here is that depending on which side of the base is shown you may be looking at the horse’s face, side, or rear end! For that reason, I attached the horse from the bottom with a wing nut so that not only can it be rotated it is also removable which makes shipping the trophy from one winner to the other easier. Since the bolt on the horse was short a larger hole was needed to allow clearance for the wing nut. The top is rabbeted so only a 1/4″ of end grain is visible on two edges.
The top was glued and clamped to the base. Having never worked with this species of wood I have no idea as to how much it may move due to humidity changes so left some space. I used a simple glue rub joint on the end grain of the top allow the wood to expand with the grain if humidity affects it — I don’t think it will though.
Top glued/clamped to the baseGlue rub joint pieces
Making the bottom from one piece of wood presented the same problem of the edge vs. end grain and there wasn’t enough wood to do that anyway. The solution was making the bottom from 4 pieces using the same technique I use for picture frames. This way no matter how the trophy faces, the edge of the base always presents a nice, profiled piece of edge grain. It was rabbeted to accept the base and attached with screws from the bottom. There are silicone feet embedded in each corner to help anchor and protect whatever it’s sitting on.
Bottom of trophy, unfinishedFinished with silicone feet and holes for assembly
For the finish I went with what I’ve been using for many years, Osmo 3043 which is a hard wax finish. Two coats applied 24 hours apart using abrasive nylon pads followed by a coat of Liberon Black Bison wax results in a glass smooth finish. They were finished separately and joined together once dry. I couldn’t resist taking this one picture of the project assembled and finished with the horse in place and texting it to my client! All in all, this was a good challenging project — just what I enjoy taking on. Glad he remembered me and my shop — thanks!
Bottom and base finished with Osmo #3043Completely assembled, ready for the nameplates
I’ve been seeing these boxes on Pinterest, Instagram, and other places on the net so decided to make a pair of them for my grandsons Christmas present this year. They both are collectors of “things” so think they will like Opa’s interpretations of them for their “treasure chests”! I mail ordered some Ash from Woodworkers Source and they sent some beautiful pieces, one especially will be destined for the lids. With this blog I’ll break down the process to not only illustrate it for anyone else that may build one of these but also to remind me in case I make another! I hope that Connor and Rory will look at this and possibly be inspired to explore this world of woodworking that their Opa loves so much.
Mortises:
Working with the Ash has been an experience, it is very hard and the grain structure also makes it difficult to scribe clean, crisp lines to work to. Mike Pekovich from Fine Woodworking Magazine has a video series where he uses tape along with marking gauges and spacer blocks to accomplish this. You may need to be a member of the magazine to access it. For my project I could only mark the outside of the boards because the inside has a dado cut to accept the side pieces, this meant I really needed to be accurate on the layout and his technique really worked great, the Ash — well that’s a different story!
Using spacer to set marking gauge for width of the mortises.
After penciling in the width, top and bottom of mortises scribed, note spacer.
Sides of mortise are scribed next, again using the spacer
Now that top & bottom are scribed the sides are scribed next.
Removing the tape reveals where the mortises are located.
3/16″ bit is used to remove bulk of mortise, spacer makes drilling easier since it locks in location of perimeter.
Chopping out waste difficult due to grain of Ash, chips not shavings! Helped to “nibble” small area rather than trying to get a full length cut.
Came up with using a cut-off that’s the exact width of dado for ends and carfully paring to fit.
Tenons:
If the mortises had cut cleanly each on them should have been exactly the same size, however; not being able to obtain clean cuts meant that they were slightly different so couldn’t use all of the techniques Mike Pekovich showed in his project.
Checking to ensure the sides of mortises are square
Scribing exact size of mortise on tenon board, tape made it easier to see
Saddle square used to scribe tenon width to the base line
Before assembly chamfered edges on tenons to prevent tear out
Success!
Used bandsaw to cut for splines, stop block limited depth
Assembly required some ingenuity, my glue of choice is Old Brown Glue. Even the splines were customized for each tenon.
Sliding Tray:
To add versatility each box will have a sliding tray made from 1/4″ thick Beech left over from another project. They’re about two thirds the length of the box and 1 3/4″ deep. No pictures but simple mitered construction using packing tape for assembly. The plywood bottom sits in a dado and the bottom of the box is covered with a heavy fabric on mat-board.
Lid, Battens, and Wedge:
There’s not a lot of exact information that I could find about the battens and the wedge. I’ve read that traditionally the boxes didn’t have a locking wedge. Tradition also has them assembled with nails and the bottom is nailed on. I chose to set the bottom in a dado and also join the battens with glue, screws, and plugs. Some show the wedge without an angled cut but I choose angling it make it more secure. Since these are going to a much more humid location than Las Vegas left a good 1/16″ gap between the lid and the sides of the box. The first step was creating the pieces for the top of the box and lid battens.
Box part, wedge, and lid batten. Holes marked to screws and plugs.
Bandsaw table tilted at 10° and wedge cut.
Used a block plane to remove ridges left by bandsaw.
After drilling holes for Mahogany plugs the box pieces were screwed & glued to the boxes
Lid pieces fitted to each box.
Attaching battens, the one with arrow is first, about 1/4″ from end. Here you can see the sliding/removable tray.
Fitting the lid required some experimentation. One end of it has a fixed batten that I located 1/4″ from one end. A spot of glue at the center and screws at each end secured that. I used a piece of plywood to fine tune the length of the lid and I’d recommend doing that if you make one of these. Much easier to screw up a scrap of plywood than a beautifully figured piece of Ash! Basically, after that first batten is attached you insert the lid and slide it so that it’s against the box piece. Then place the other lid batten and wedge in position, draw a line to locate it. A trick I saw and used was to put blocks inside of the box that held the lid at the right height. Now I was able to drill the pilot holes for the screws directly into the lid and attach it in place.
Final Steps:
One change I made was to drill a 3/8″ hole in the locking wedge piece and then glued in a short dowel. These boxes will probably not be stacked and with the higher humidity that wedge could become difficult to remove. I don’t want them tapping it with a hammer! My finish of choice is Osmo #3043, two coats applied with nylon scotch pads. This was a good, challenging process; here’s a slide show of the finished Japanese Toolboxes.
For almost the entire month of July and now well into August the weather for my location has been telling us we’re under an Excessive Heat Warning. Don’t get me wrong, I love living in the desert but this is getting to me!! My shop isn’t air conditioned and it’s not a possibility anyway but by lunch time temperatures are in the low 100’s and I’ve recorded a high of 118° many afternoons. Coolest is usually in high 80’s/low 90’s. I can tolerate the heat for the most part but am unable to do any finishing or gilding. Glue-ups can be done in the house but finishing creates too many fumes so I’m at a standstill for to complete two frames currently ready for finishing. One of them is this one with twisted feathers carved in the corners and I’m anxious to see how it will look when finished. Click on the link for a brief YouTube video of it.
In the meantime, I’ve tackled a few projects to keep myself in the shop and off of the couch! A friend approached me and said he needed a boot jack and wondered if I’d be able to help him out on that. Never one to turn down any project/challenge I told him sure and proceeded to educate myself on them. The internet is full of information (not all valid unfortunately) so you need some discernment. They’re basically a board with either a rounded or V-shaped hole at one end which is elevated a couple of inches to allow your boot to slip in and then pull your foot out of it. Here’s what I came up with:
Completed Boot JackView of leather monogram
I had some Peruvian Walnut (aka Tropical Walnut) which I thought would be a good choice for this project. If you follow my blogs you know I’ve recently been experimenting with leather so decided it would be a nice touch to add a monogram. I was able to copy/paste and then resize an alphabet from free internet sources and transfer that to a piece of 3/16″ vegetable tanned leather. For that authentic western look I had some small clavos which were nailed in each corner. The piece that elevates the boot jack is inserted into a dado then glued, screwed, and plugged. Although this wood is great to use hand tools on it can get splintery, especially when it’s in a hot shop in a dry climate; almost like a kiln! I could have used a router to cut out the inlay but prefer the quietness and process of using hand tools. Here’s a photo montage of that process:
Scribing template to get proper sizeOutline of monogram knifed into woodDepth chiseled on ends and one edgeAccurately placing monogram to scribe last edgeChiseled depth all around perimeter and then chiseled almost to itStanley No.71 router plane to bring to final depth
Once the perimeter was chiseled to depth I used a bench chisel to take out the center area, leaving it somewhat pillowed. When the depth was close to what it should be my antique Stanley 71 took care of getting the bottom flat and uniform to the required depth. That area was taped off and 3 coats of OSMO 3043 were applied. Once dry, the leather was installed with contact cement and the clavos. I enjoyed the look on my friends face and his appreciation when I gave him his boot jack — that’s what it’s all about
The other project I completed was this display board for Diane’s studio where she can put her in progress paintings. She tends to work on more than one painting at a time and would place them on the floor between sessions. There is a limited amount of wall space and it’s also possible to kick them accidently. It’s also difficult for her to really see her work as a potential buyer would too. The board was made from a 5’x5′ piece of 3/4″, pre-finished Baltic Birch. It’s located on a wall a good distance from her easel so she can study it at a distance. She’s mentioned a few times already how having it at this height and on a neutral background really helps her study her work. Many times I’ve seen her take a painting from our wall that’s already been framed to make some minor changes to that she hadn’t noticed at the easel.
Making this was fairly straight forward and as you may know Baltic Birch plywood is heavy! The first step was to layout and drill the holes for 1″ dowels. We decided on 6″ centers and 3″ from the edges. This worked out evenly for the 60″ dimension. I made a template from some MDF and drilled small holes in it to locate the center of each of the 100 holes. My first choice was to use a forstner bit since they make the most accurate holes, however; Baltic birch plywood is so dense and has lots of adhesive the bit I used was toast after about 4 holes! Next up I tried an auger style bit but it too had a difficult time even starting. Final resort was a spade bit that had a spur on each edge, this worked well as long as I kept the speed of the drill slow, matter of fact I used the screw setting on my Makita. To prevent blow out the plywood was placed on the cheapest piece of 1×4 I could find and this worked well. To finish off the holes I used a router to cut a slight chamfer in each one and also added that chamfer to the outside edge.
Next up was installation. I’ve always been a fan of French Cleats and saw that the largest internet retailer had 30″ aluminum ones. Great, or so I thought until I got them. Very flimsy and worst of all it came with flat head screws but the holes weren’t countersunk so when you attempt to slide them together the head of the screw stick out and prevents the cleat from seating!! Glad they have an easy return policy and proceeded to make my own cleat from a piece of Poplar. Actually was a blessing in disguise because the stud spacing on that wall isn’t the standard 16″ on center. Here’s some pictures to illustrate the process, click on them to see the entire photo.
Locating pilot holes1″ spade bit works bestChamfered vs. Original holeShop-made French Cleats
About six weeks ago Diane and I went to a free weekend class at Tandy Leather in Henderson that dealt with how to engrave leather using a swivel knife. We’re both always interested in learning about new processes “just because”. The piece on the bottom left is what we did in class and even though I’m not happy that I dyed it you can see all of the line work we did during the process. Fast forward to the past two weeks here in Las Vegas where the temperatures have gotten so hot which means I’m really unable to do the finishing and gilding on two frames currently in progress. How hot is it? … well the shop hasn’t cooled down below 88° at night and by early afternoon is as high as 117°. I can handle it to a point but applying sealers, mordants, or shellac isn’t possible so spending my time with the leather. Some of you may recall my Kumiko rabbit hole and I’m hoping this venture doesn’t get that intense!!
As I’m sure many of you do too, not being able to stay engaged in the woodworking I love means I spent some idle time looking through the internet and experimenting with the swivel knife which is on the left side of the picture above. At Tandy, they taught how you can take an image from the internet, print it out, and then cover the back of the page with packing tape. You then wet the leather; technically called casing; and use a ball shaped engraver to transfer the design to the leather so you can cut the design into the wet leather. There are numerous YouTube video’s showing leather working and if you’re like me you find some you like and other’s you can’t stand to listen to! One I like is Don Gonzales, a saddle maker from Texas. He offered a plan on how to make a cover for a Field Notes booklet so I decided this would be my first project. I use notebooks to sketch designs and also to keep notes on how I do things and these come in either lined or with a dotted paper which I like for sketching. I used the larger size so needed to expand the pattern from Don Gonzales but that wasn’t a problem.
After finding my designs (cat and a woodworking plane) they were printed out to make the patterns. I also wanted to put a border around them and a pattern was made for that as well. I learned that a straight edge can be used to guide the swivel knife. I also learned that if you make your leather too wet when casing it, it will shrink! Confession time, I was like the 3 little bears; my first was too small, the second was too big, and finally the third was just right. In any case it gave me good experience in learning how to do a saddle stitch using two needles and an awl! In this picture I’m cutting a groove to locate the stitches to attach the inside pockets. The tape marks the location of them on the inside of the cover. You can see that the pockets are bigger than the cover but they get trimmed after the stitching is done.
To make stitching easier I needed to make a stitching pony. After looking at many examples I came up with this design that allows me to use it either in my shop or Diane’s air conditioned studio. I can clamp it to whatever table or bench is available. The initial holes are laid out with a tool that has a toothed wheel to mark the spaces in the groove made previously. I then used punches to go through those holes and enlarged them with a diamond shaped awl as needed. Waxed thread is used which makes pulling through the leather easier, especially at the end when you back stitch to lock everything in place.
Here is a collage of pictures showing the completed project, learned a lot and created something useful!
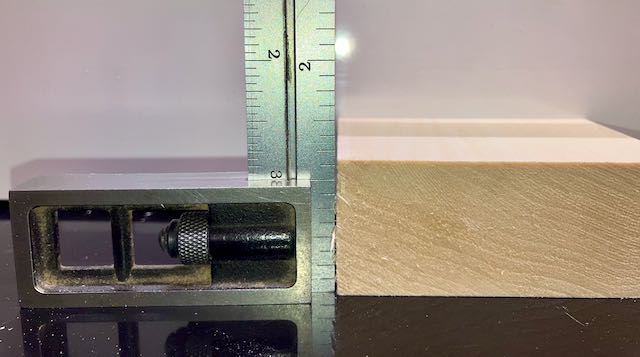
Before/After milling my 1″ thick stock so a 3/4″ stretched canvas will fit
If you make custom picture frames finding Basswood that is more than 4/4 thick leaves you with few choices. Peterman Lumber here in Las Vegas sometimes carries 1 1/16″ which is S2S but usually I end up getting their 5/4 rough Basswood. The next option is 8/4 which is pricier and usually too thick for my frames. In this blog I’ll show you how I use that to make this profile. You’ll need to surface the material first. My method is using a scrub plane to flatten one face then a Powermatic planer to surface it all to a uniform thickness. This batch I was able to get to just under 1 1/8″. My goal is to select boards at Peterman which will yield the widest width when ripped in half, I was only able to get 2 7/8″ from these.
I start by setting the tablesaw blade at 15° and then adjusting a small sliding bevel to it for layout. Cut at least on extra piece of your wood about 12″ or so to do practice cuts before milling your molding. Lay out both ends of the 12″+ piece. I cut the frame members plus length for miters first, easier to run shorter pieces against the fence. This looks confusing but I’ll explain each cut as we go. I’ve added a jpeg of my own handwritten notes at the end of this blog that you can print out.
All cuts are made at 15° so leave the blade set there.
Cut #1Cut #2Cut #3
Cut #1: This creates a taper to the sight edge, measure 1/2″ from the edge and adjust fence to cut on the waste side of the line.
Cut #2: Measure down from the sight edge 1/4″ and draw a 15° line parallel to the cut edge. My rabbet depth is 5/16″ so mark that and label it A as shown. I use a saddle square and set in on point A, extend this line on to the face of the board and use that to set the depth of this cut.
Cut #3: The depth of this is determined extending a line from point A to the sight edge with the saddle square. It’ll be done with the molding flat and the back edge against the fence. This is where I suggest having another scrap or two of your material to fine tune this cut. This is why you needed to do the layout on both ends. Once you’re satisfied that the rabbet is good cut all of your frame pieces. I recommend using a feather board to your stock tight against the fence.
At this point you can do any shaping, carving or other design work on your profile. I prefer a Veritas small plow plane with a 1/4″ beading cutter but routers work just as well — just more noise and dust!
Once any details are complete it’s time for the remaining two cuts.
Cut #4Cut #5
Cut #4:This cut gives you the angle, measure down 3/8″ to draw the 15° line using the bevel. The cut is made with the back edge on the table and the face against the fence. Again, use a feather board to keep it tight against the fence.
Cut #5: This cut is made with the face down on the table and the sight edge against the fence. You don’t need to make this cut but I do since is will give the profile a 90° edge when it’s sitting flat. I glue and clamp my frames and it can be done leaving the outside edge at an angle if you temporarily tape a cut off with a 15° angle to it so that your clamps register squarely against the frame. I’ve never used an under pinner but it work with an angled outside edge on the frame. I sneak up on this cut to take it as close as possible to my beads.
Just a note on cutting biscuit slots and also cutting the miters. Your biscuit cutter and sled must align with the angled cut on the back of the molding. This is the sled I built, the arrow indicates the beveled cut (#4), the biscuit is parallel to it. In case you’re wondering, the weight is to counterbalance the sled for long molding.
I’ve tried to make this write up as plain as possible. If you need any clarification don’t hesitate to contact me through this blog — happy to answer your questions. At the price of lumber these days buying 8/4 stock to get thick enough frame for stretched canvases. With this frame I was able to get a 1 1/8″ space for the painting. Since you’re using thinner material shipping costs are reduced too. Below are my handwritten notes.