

Preparing Sides, Note eraser for sanding block and Kumiko panel
This has been a wonderful challenging project that was inspired by blogs I had read by Mike Pekovich of Fine Woodworking Magazine and Greg Merritt of HillBilly Daiku. To start this journey “down the rabbit hole” as Greg puts it was making the various jigs needed to cut the precise angles called for in Kumiko. You can catch up on that process with this BLOG. Once they were done it was time to try my hand at making a Asa-no-ha which I described in this BLOG. My eventual goal is to incorporate this design element into some furniture pieces but for now designing a box with a Kumiko insert in the lid seemed to be a good beginning. I decided to make a double Asa-no-ha of the and then add some design of my own to surround it. Those of you familiar with my work know that I like to create box sides at various slants and angles which emphasizes the dovetail so for this I went one step further — lets’s do a coved side! This was accomplished on the tablesaw in a piece of Cherry. The lid was made to fit the Kumiko so then the box was made to fit the lid — kind of cart before the horse!
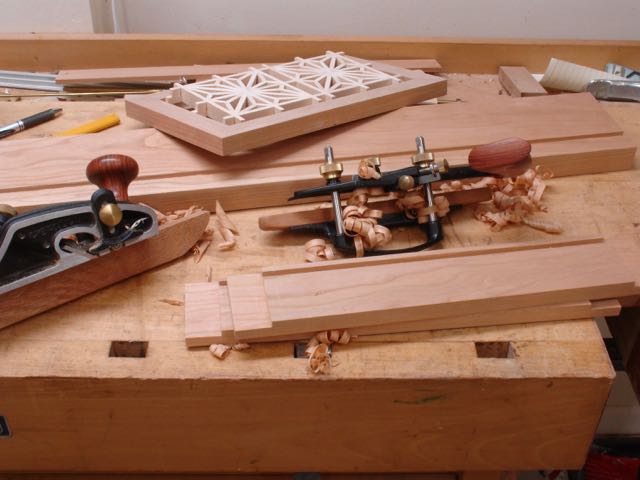
Preparing the Sides
Preparing the sides was done with plow and rabbet planes to do the bottom groove and overlay I use for the dovetails. The overlaid technique means you don’t have to cut stopped dados for the bottom. Always like using them for joinery work. I’m a tails first dovetailer and once the lay out was finalized both sides are clamped together and cut at the same time — pretty straight forward process. The coved sides which are the pin boards were a bit more challenging. After lining them up and scribing the location they were ready to cut and chop out. Once fitted, the curvature is penciled in and carefully cut with a coping saw. I imagined one of the tails cracking during this step but thankfully, that didn’t happen. Cauls were made to apply pressure to the tails only so they would seat completely — my glue of choice is Old Brown Glue.


To hinge this box I gave Lee Valley’s hidden pin hinge a try and was pleased with them, you do have to be exact but they work nicely and allow you to remove the lid for final fitting. One word of caution: they suggest and it’s a good idea to place a small washer on the hinge between the lid and box. Here’s what I learned about that, the washer will get stuck in the groove on the hinge pin and make taking it out a real hassle! I wrote them about it but my advice is do not put your washer in until all adjustments and finishing is done. That included mortising in a small piece of Ebony for a lid lift and chamfering the corners of the top. The Ebony was from that piano I salvaged some keys from awhile back!


This box was finished with Osmo Polyx oil and wax. The bottom is lined with deer skin and the dividers can be removed if desired. I’ve had a lot of interest in this box during its’ construction so sure there will be several more in the future!


Very nice John! A very classy use of you new kumiko skills.
LikeLike
Pingback: Sofa Table with Kumiko : Starting Point | Woodworks by John
Pingback: October was an Exciting Month! | Woodworks by John
Pingback: Frame #168 Trim and Roof | Woodworks by John