It has been an involved process getting to this point but here’s the first look at the Italian Marble placed into the top:

First Look at Marble and Top
The over-all measurement of the top is 20″ wide by 44″ long. The piece of marble is an 18″ square piece of Bianco Gioia Marble. The two pieces that currently have some Oak plywood in them is where the marble will be inlaid. These are approximately 8″ x 14″. The center section is where the mechanical cellarette will be housed. Since it measures approximately 12″ x 18″ there will be a 2″ wide inlaid section of marble at the front as well. The marble was purchased from Emser Tile here in Las Vegas at the recommendation of my tile guy. I was pleasantly surprised at the service I got from them, sometimes buying small quantities of material doesn’t bode will with retailers/wholesalers. He also suggested having a 1/2″ base for the marble due to their weight. That was the next problem that needed solving.
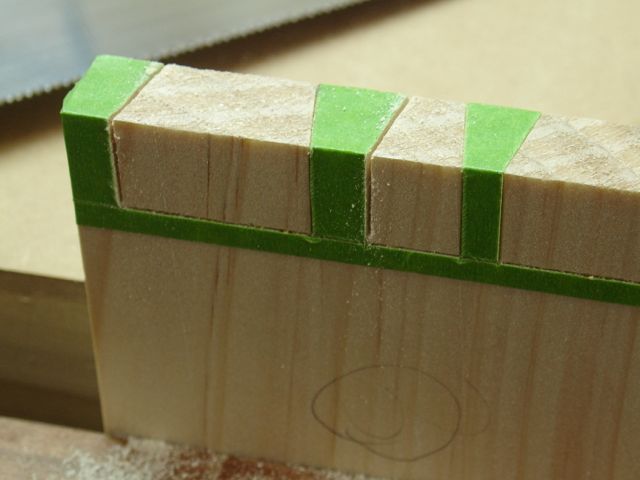
These pieces of 8/4 Bubinga have been particularly difficult to work. As I mentioned earlier, when a piece of lumber has beautiful and showy grain patterns, it usually means it’s going to be a tough one to work — oh so true for these! You may recall the reluctance it had to being planed smoothly and the joinery has been “hard fought”. The top measures 1 1/8″ in thickness so applying the rule of thumb, the tenons are 3/8; one third the thickness of the piece. A combination of machine work with a hollow chisel mortiser and a tenon jig on the tablesaw followed by hand work gave me an acceptable fit.


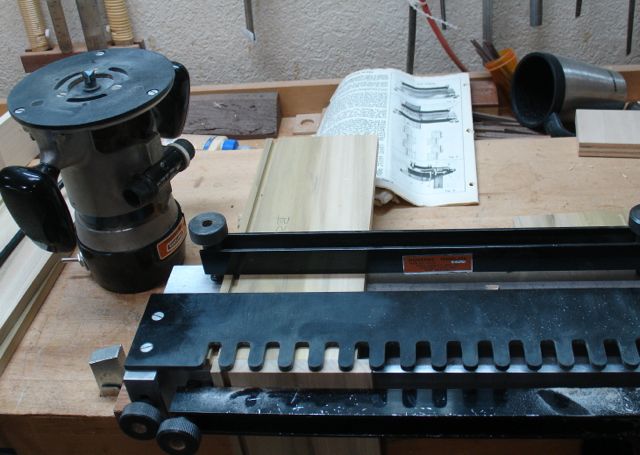
Router table to cut groove
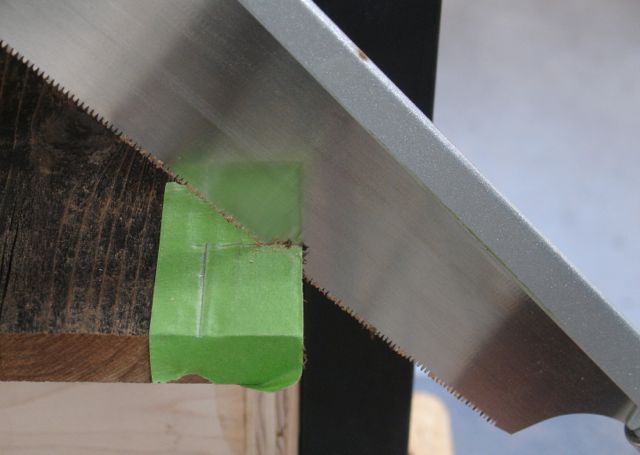
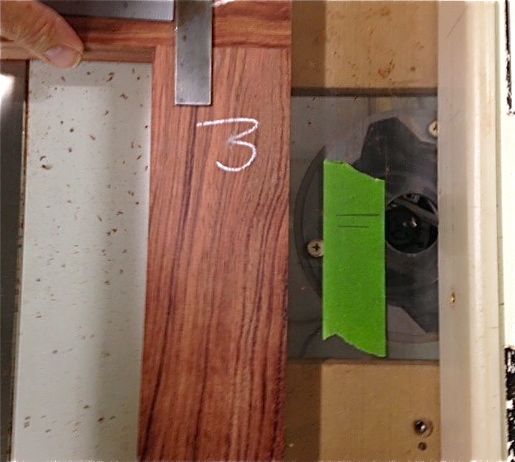
The next step to creating the top was to cut a groove that would house and support the plywood. The tricky thing here was keeping all of the pieces organized and make sure the proper face of each board was held against the fence. Let me explain what you’re looking at, the marks on the green tape indicate the beginning and starting point of the router bit. The groove doesn’t run the full length of the pieces so they will have to be dropped down and picked up from the cutter depending on the location. Since the groove depth is 3/8″ the edge of the board needs marking to tell me where to start and stop each cut. Due to the hardness of this wood the cut had to be made in two passes. The face of the board needs to go against the fence so the backside was marked with chalk — every time I picked up a board my mantra was: “see the chalk before you cut” and it worked!
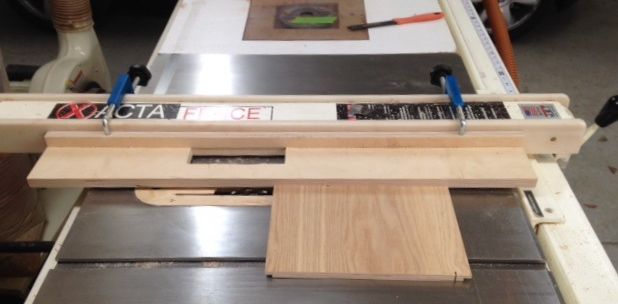
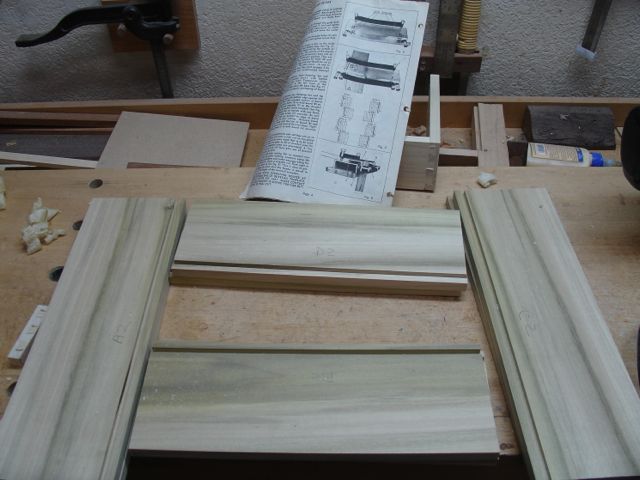
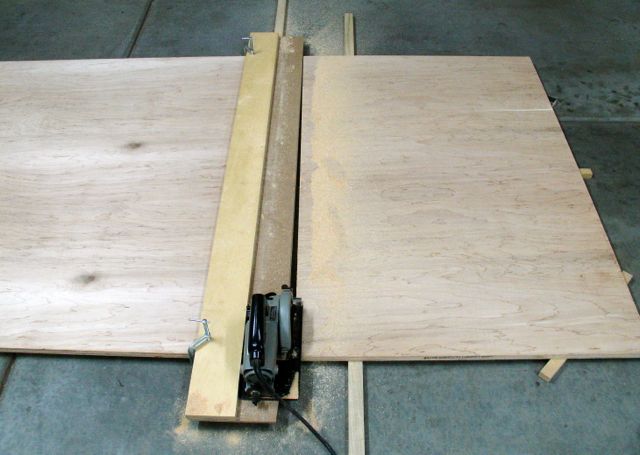
L-Fence on Tablesaw
Now that the grooves were properly located it was time to size the plywood. I had some quality, 1/2″ Oak ply in stock so that was the obvious choice, it’s a 7 ply material so plenty strong. After cutting them oversize to allow for the groove depth, they were rabbeted to slip into it. That was achieved using an L-shaped fence and a dado head in the tablesaw. Now it’s finally time to dry fit and glue this piece up!
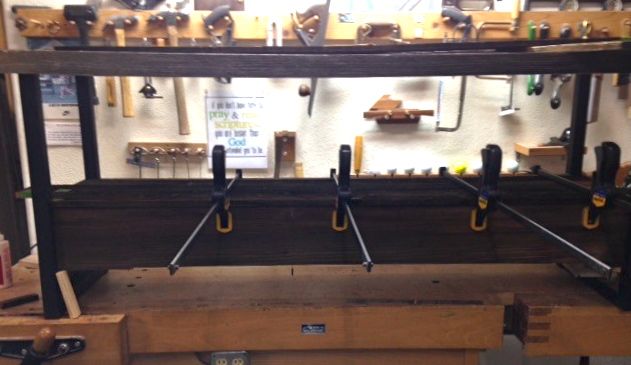
Glue ups are always stressful and this one was no exception. The flattest surface I have in the shop is the tablesaw so that became my assembly table. A combination of Gorilla glue and cabinetmakers glue from Lee Valley was used for this process. Because of the oily nature of Bubinga the Gorilla glue was used for the mortise and tenon joints while the cabinetmakers glue secures the plywood.
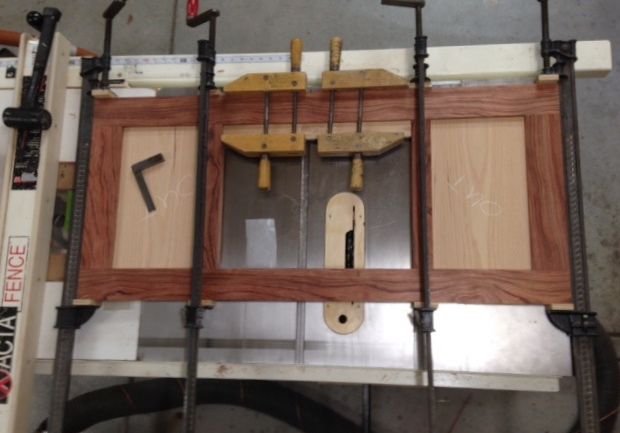
Glued up and curing
Just a side note on the glue from Lee Valley. I ordered a bottle to replenish my supply recently and when I opened it the consistency coming out was more like a tootsie roll than glue! I sent a picture to their customer service and they replaced the bottle for me, no questions asked. We were trying to figure out what could have happened to the glue and they suspect that it must have frozen and thawed several times in its journey from eastern Canada to here which ruined it! Moral of that story is to only order it during warmer temperatures!