Can Traditional Artists Skills Transfer to High Tech?

Tools of a Different Trade

Tools of a Different Trade

That was the question my wife and I asked each other recently and I’d like to share our experience with you.  Have to give you a spoiler alert though, there won’t be any woodworking or painting techniques anywhere in this blog!  If you already follow my work that’s where you can get my thoughts, techniques, and approaches to woodwork.  You already know that my preference lays with hand tool work and for me it’s all about the process not the speed at which I can accomplish things.


I’d guess that if you’re interested in my blog you may be interested in my wife’s work as well.  She’s a very successful artist and I’m lucky enough to be her framer, packing and shipping guy, and #1 Fan!  If you have the time and inclination you can check out her work at these gallery sites:

Okay, back to the computer high tech stuff!  In 2009 we decided that since our old PC had some issues and either crashed or picked up a virus it was time to replace it.  At the urging of our Apple infatuated son, our Christmas presents to each other that year were MacBook Pros.  Her’s is a 15″ while mine is 13″ but in any case; they are getting on in years, especially for electronics.  Things were slow and we got that constant, whirling beach ball of doom!  To replace both of them would have easily approached the $2500.00 threshold and I’m sure you’ve heard of the starving artist syndrome!

Once again, Adam came to the rescue with his solution.  Our MacBooks were outfitted with old style drives which create a lot of heat which equals slowness! He had replaced the drive in his girlfriends computer with solid state unit plus installed a new battery and said it made a huge difference.  Diane did what she does so well and started searching the net for parts and info.  A fantastic site she found was IFIXIT.  Not only did they have everything needed to update our laptops, it was very carefully laid out for each particular model.  Then, there are very clear video’s showing how to complete each step and they offer all of the tools — one stop shopping at its best!

Things went well with one exception, specific tools needed.  After backing up our hard drives to the new, solid state ones it was time to begin.  After unscrewing the back of Diane’s we discovered that this particular model (Mid-2009) used a Pentalobe #6 for the battery which wasn’t included in our deluxe 26 bit screwdriver set.  Definitely give IFIXIT credit for great phone support.  When Diane called them he offered to send that screwdriver out with free postage so that we got it in two days.  Incidentally, my battery was secured with a Y-shaped screw head!  After getting the needed screwdriver we spent a couple of hours yesterday afternoon on our high tech challenge.

What we accomplished was to replace our old drives with solid state units, both batteries have been renewed, and Diane increased her RAM from two, 2KB chips to two, 4KB chips.  My computer originally had two, 1KB chips so those were replaced with the original ones form Diane’s computer.  After the work was completed on Diane’s computer and the back screwed on tight we held our breath as the screen went from dark to grey after hitting the power button.  What a relief to see that Apple trademark appear and watch everything load up.  Seemed like an eternity for that to happen but now it is lightening fast.  Diane and I then went to work on mine, this went quicker since we’re now “pros”!  It too was a success and the difference in our computers operation is amazing.  For about $600.00 we updated and increased the speed of our computers immensely; money and time well spent.  Computer repair/update was an interesting endeavor but I think painting and woodwork will be our mainstay!

New use for the kitchen island

New use for the kitchen island

Posted in Uncategorized | Tagged , , , , , | Leave a comment

Cigar Presentation Tray — with a Cuban Influence!

I’ve finally made progress on this project, a cigar presentation tray commissioned to me by the same client I completed the Mechanical Cellarette for.  During that building process I had two other commissions that I had put on hold so I could concentrate on the Cellarette.  Those two are now complete so I could spend some concentrated time on this project.  They were the Stone Carvers Bench and the Gilded Cat Box.

Sarcastically, I’m beginning to think of the tray as a “twofer”; what do I mean by that?  Well, I’m sure you’re familiar with the two for one sales and coupons.  Here in Las Vegas they’re commonly referred to as “twofers”.  Seems as if each phase on this project has required two steps to complete one step!  The wood of choice was Walnut but when I first went to every one of our local lumber suppliers their Walnut was a few pieces of yellowish sap wood — not the rich Walnut tone I or my client wanted.  The second trip, a few days later rewarded me with some nice, dark Walnut.  After work began and I was ready to cut the recess for the Cuban Peso that will be embedded in it.  As luck would have it, the Peso measures about 1-1/16″ in diameter.  The needed forstner bits only come in increments of 1/8″ — where’s the “twofer”?  Well, although the store closest to me said they had a 1-1/8″ forstner bit they didn’t so the “twofer” was going to a store further away to find it!

Assembled Presentation Tray

Assembled Presentation Tray

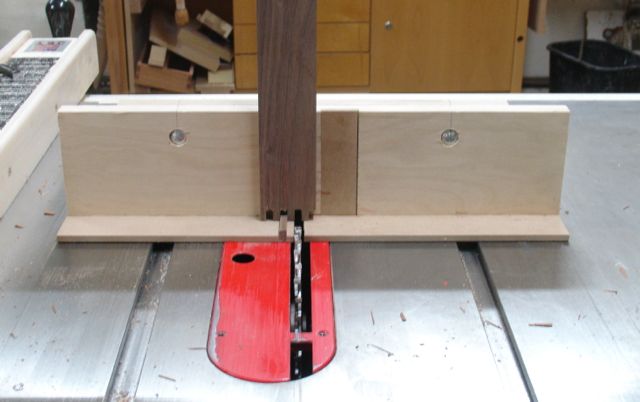
Well, after all of that this picture shows that persistence has once again, paid off.  For strength, the corners are finger jointed, a traditional method also  referred to as a box joint.  Using this type of joint exposes lots of face grain for gluing to give the needed strength.  You can see the main feature of this under the strap.  The front has been stylized  and the Cuban Peso will be embedded in the center of the arched section.

Finger Joint jig on Tablesaw

Finger Joint jig on Tablesaw

The finger joints were cut on the tablesaw using this jig.  I decided to make another box for the Etsy store out of some recycled fence boards since everything was set up anyway.  Although the use of this jig requires a bit of trial and error, once things are adjusted they are relatively easy to cut — just hard on the back as you bend over the tool!


Glass sample for tray bottom

Glass sample for tray bottom

The bottom of the tray is a piece of the same plywood used for the Mechanical Cellarette’s back.  To elevate the over-all appearance of this tray I’ve decided to have a piece of glass cut for the bottom.  I’ve used  Glass Art Studio here in Las Vegas for projects such as glass front doors because they have some really unique pieces.  In my opinion, the piece shown at the left has kind of an Art Deco flair to it that will work well in my clients office. Once his cigar box and the accruements are on the tray it should look great!

A challenging aspect of the tray was creating the stylized front.  My client had sketched out what he had in mind so that was my starting point.  When you design something that is symmetrical on both sides the challenge is making them both exactly the same.  I’ve learned that it’s best to make a pattern for one half and then simply flip it over to draw a mirror image.  That’s the approach taken for this.  Since it’s very visible I also chose to use a router with a ball bearing guide to ensure symmetry.  Here’s a slide show of that process:

This slideshow requires JavaScript.

Ideally, finger jointed boxes should have an odd number of fingers for best appearance.  Since these are 1/4″ fingers the final height of the tray should be 1-3/4″ to yield 7 fingers.  What complicated this though is that the arched section is 2″ at the center.  So, the process began by cutting all of the pieces 2″ tall at first,  then cut the finger joints, lay out and form the arch and cut the dado to support the bottom.  After that I still needed to reduce the two sides and back to the 1-3/4″ height.  This was done with the tablesaw and a plane.  To transition the sides to the front piece I found that my small spokeshave was the best choice.  This left sanding the insides prior to gluing the project together.  I used Old Brown Glue, my favorite for these things because of it’s working properties.  Let things dry for 24 hours or so then begin the finish process.

Posted in Current Commission, Uncategorized | Tagged , , , , , , , , , , , | 3 Comments

How to Add Keys or Splines to a Mitered Box — Cat Box Completed

A box constructed with miter joints, like everything else; has its plusses and minuses.  On the plus side it allows you to use a single piece of wood so that the grain pattern of it can flow around the corners.  In the first blog about this custom box I explained my method for doing that on the tablesaw.  You can then cut a slot across those mitered corners and insert a piece of contrasting material to reinforce the weak, end grain to end grain of the mitered joint — that is the primary minus to this type of joint.  There are a few different ways to go about this.

You can buy a specialized jig like this one from Rockler Woodworking or you can take the route I took and make your own.  Mine is made from some scrap pieces of MDF and 5/4 Poplar.  It’s important to use a blade such as rip cut to create a flat kerf  for the spline to glue in to.  As you can see in the center picture I’ve been using this one for quite some time!  Lines on the cradle allow me to line up the work, once the stop block is clamped down simply rotate the box to cut all four corners.  You can vary the depth to add even more of a stylized look to the work — being careful to not cut through the box!

After the cuts are made, plane down your material for the splines.  I start with a power planer then fine tune with a hand plane.  Here’s my spline cutting and gluing set up.

Needed "stuff" for cutting and glueing up the splines/keys.

Needed “stuff” for cutting and glueing up the splines/keys

Starting at the left is the Old Brown Glue which is my preference for this work.  Since it needs to be heated the coffee cup with hot tap water is used for that.  I use a small brush to get the glue into the cut without making a lot of mess.  A piece of Marlite is great for glue ups since it glue won’t stick to it.

Cutting spline/key

Cutting spline/key

To cut the spline/key I’ve found that a bench hook with an accurate 45 degree kerf paired with a Japanese razor saw is a good choice.  The glue is put on a piece of scrap wood and brushed into the cut, then a small amount is also applied to the spline/key.  Keep in mind that you want it to seat all the way in the cut and too much glue may prevent that.  Once dry, a block plane makes quick work of trimming it flush with the sides.  The grain of the key runs diagonally so take a light cut towards the box, not the outside. The corners of my blade have been radiused to prevent them from digging into the work.

Now that this step is complete it’s time to separate the lid from the box.  Again, I use the tablesaw for this.  The technique is to cut the long sides of the box completely through, then lower the blade so that you leave 1/16″ or so of the box uncut.  Doing that prevents the box from closing on the blade as the cut is finished which can result in a snip at least or a serious kick back at worst.  This remaining piece is easily cut with either a utility knife or flush cut saw and then planed flush.

Fitting Hinges

Fitting Hinges

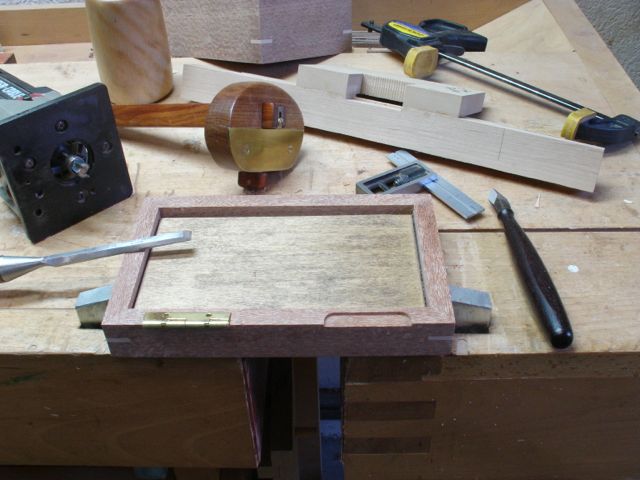
Other than the finishing process which in this case was Platinum Shellac and wax all that remains is the hardware.  The hardware was installed after the shellac was cured thoroughly, I use an air brush for my boxes.  Hinges were installed using a combination of a trim router and jig followed by fine tuning with hand chisels and marking gauge.  This is where all of your effort can be  lost so I tend to be very careful at this point.  Pretty difficult to conceal a hinge mortise that’s been misplaced!

Gimlet in use

Gimlet in use


For the tiny screws used for the hinges, hasp, and nameplate my preference is using a gimlet.  Much easier to control than an electric drill — that being said though I will use a small Vix bit to start the holes centered in the hinges followed by the gimlet.  Screws are always lubricated with beeswax since I don’t relish trying to drill them out should they break.  Also a wise choice to use a steel screw in the hole first if the hardware screws are brass.

Happy to say, all went well and the box was mailed out Thursday to my client in North Carolina.  This has been a while in the making and thankfully, she was very patient.  She knew she wanted the Leopardwood which took me a while to get plus the Mechanical Cellarette project had priority over this one.  Looking forward to getting back to work on my personal project, the Armoire.  I’ll end this post with a few pictures of this completed project.


Posted in Etsy custom order, Jess'sCatBox, Mitered Box, Tutorial | Tagged , , , , , , , | 1 Comment

How I Made a Stone Carvers Bench

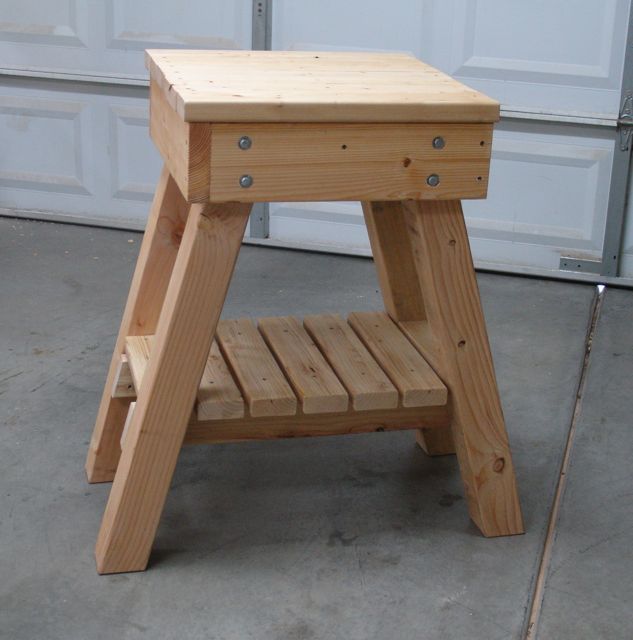
This is a modification of the plans created by Don Dougan.  He is a noted stone carver and also an instructor from the Atlanta, Georgia area.  A former client contacted me about this project.   A number of years ago I re-caned some chairs and did some restoration work on some other pieces for her.  To be honest, after the precise work, mortise and tenons, fitting marble, etc. of the Mechanical Cellarette I was ready for something a bit simpler — you know the type of work; chop saw, drills, glue, and screws! Here’s the beginning and ending of this project:


Just like anything else though, this piece wasn’t without its challenges and issues too!  For starters, he suggested using rough sawn, yellow Pine which he mentioned as being hard, durable, and easy to find — not so much here in the Southwestern desert!  My client and I decided to use construction grade Douglas Fir instead.

Squared Up Top Section

Squared Up Top Section

Apparently these were designed for his sculpture studio and as I read through the plans, he used a pneumatic wrench, a holding jig, and 5 1/2″ long lag bolts to attach the legs to the top section.  When I discussed this with my client I told her that I didn’t feel lag bolts were a good choice for our desert climate.  Knowing that this bench will be kept outside and that the wood will continue to shrink the lag bolts would soon work themselves loose and the hole would be worn out resulting in loose, wobbly legs!  His plan also called for simply nailing the structure you see pictured here together.

Admittedly, I tend to over-engineer things so those nailed joints were replaced with pre-drilled holes, Titebond III waterproof glue, and deck screws.  I also added a 2×4 to the center of that section.  Once this apron section was squared up, glued and screwed, it was  allowed to dry before attaching the legs.  These are 4×4’s and he used a spacer to achieve a 15 degree angle to splay them out for stability.  The plans called for lag bolting these in from either side of the apron but here is where I chose to use through bolts so that they could be tightened as the wood will eventually shrink.  I made a trellis in my back yard years ago with carriage bolts, those needed to be tightened yearly to compensate for the wood shrinkage and I want my client to be able to do the same thing with her bench.  Not wanting to cut this angle by hand, I used my Makita chop saw which only has a 7+ inch blade so that cut needed to be made in two passes as shown:

The reason for drawing two lines was an accuracy thing, I was able to center the blade between them to achieve the most accurate cut.

Marking legs to correct length

Marking legs to correct length

Now it was time to cut them to length.  The top will be made of 2×4’s which are actually 1 1/2″ thick.  Using a sliding bevel set at 15 degrees, I measured down from the top of the apron 34 1/2″ to get the 36″ total bench height.  I could now draw the leg location on the outside of the apron, take it to the drill press and drill the holes for the 3/8″ bolts.  Figured the best way to assure straight, accurate bolt holes was to use the drill press.

Transfer mounting holes from apron to legs

Transfer mounting holes from apron to legs

By laying the apron on a flat surface (tablesaw) and holding the legs firmly against it, those pre-drilled hole locations could be transferred to the legs.  I used the drill bit to locate their centers and then took them over to the drill press once again to maintain those straight holes.  The bolts were countersunk in the apron, washers were added and assembled loosely.

Front View

Angles and background make this appear catty-woumpus but it is square!

Next up was flipping the entire assembly over onto the legs so it could be leveled and tightened up.  Getting tables and chairs to sit flat on the ground can be challenging enough with dry, seasoned lumber.  Substitute that with green, select construction grade materials and it becomes even more fun!  On the assembly bench it was perfectly stable in the evening but the next day had a slight wobble.  By adding cross bracing (glued and screwed) to the lower portion of the legs plus an additional shelf I believe this will help it to stay stable for many years.

Although I’ve never really done any stone carving I did take an introductory lesson from Sharon Gainsburg, a very well known artist here in Las Vegas.  I don’t recall exactly how her carving benches were constructed but do recall that you use multiple bags of sand to anchor them.  These are placed on top to cradle the stone and also on the lower shelf to add ballast to it.  My client customized this to suit her requirements so the top is 22″ square and the over-all height is 36″.  A coat of Thompson’s Water Seal was applied to give some protection from our environment.  That too has been modified to meet EPA standards and doesn’t perform as it used to — but that’s another rant for another time!

Posted in Uncategorized | Tagged , , , , , | 11 Comments

Carving and Gilding a Cat for a Lid or Plaque

Free clip-art

Free clip-art

In my last blog about this Etsy custom order I shared my method of making a miter cornered box.  The client requested a copper gilded lid with an image of a cat.  We choose this one from free internet images available from the internet.  The first step you need to do is transfer this to a program on your computer that has rulers so you can size it to fit whatever you size you need.

Carving the Design

Transferring Design to Lid

Transferring Design to Lid

An image size of about 3″ x 5″ was needed for this box lid, once it was printed out center lines were drawn on it and the lid to position the image.  I used carbon paper.  My wood choice for carvings such as this is usually Basswood.  Because of its even grain it is a very popular wood for carving, works easily and holds detail well.

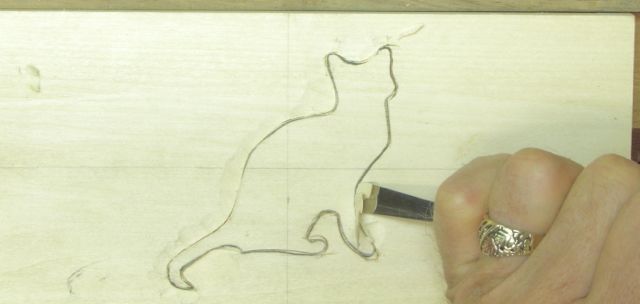
The first step to carving anything is to outline the desired shape.  There are a number of methods you can use to accomplish this. Some carvers use only a carving knife for this process which requires a pretty strong hand to control the cut.  Others will use a V-tool or parting tool, striking it either with a small mallet or simply pushing it in a very controlled manner, following the desired outline.

I didn’t mention my custom tool with the golf ball handle yet!  When trying to outline with just a carving knife I found it difficult to see the line when making curves — my hand was in the way.  It’s also hard making a tight radius because of the way your hand is positioned.  My solution was to take a double bevel skew chisel (garage sale find) that needed a handle.  I love using golf balls on files so did likewise for this.  Now you can hold the chisel upright with only the tip cutting the outline.  Because you’re vertical, not only can you see the line but the ball handle allows you to pivot around curves quite nicely!

Gronding out design

Gronding out design

Once it’s completely outlined the next step is “grounding out” the design.  What that means is you remove the wood to make the design stand proud.  There are any number of tools you can use to accomplish this.  My personal preference is a small, shallow gouge (#3/10mm) but your design will dictate which tool will work best for you.  Once the image has been outlined it’s time to work on the background.  This step is pretty personalized, you want it to look hand worked but not so rough that it looks “hand worked”!  As a general rule I prefer to remove all of the original surface using a variety of gouges, generally #7, #8, and #9.  My goal is to evoke a sense of motion, kind of like you’d see in a cartoon picture where they want to indicate something’s moving.  Again, very personal and you should develop your own style.

Gilding the Design

For projects such as these I use oil gilding and Dutch gold.  Now just so you know, Dutch gold leaf is one of several terms for what’s commonly known as composition metal leaf.  Since I’m a Dutchman I like that term but it can also be called composition metal, scalage metal, gold foil leaf, metal leaf, etc.  Anything to differentiate it from actual gold leaf and the water gilding process which is much more complex and time consuming than using metal leaf and oil gilding size as I will discuss here.

Burnisher/Sealer

Burnisher/Sealer

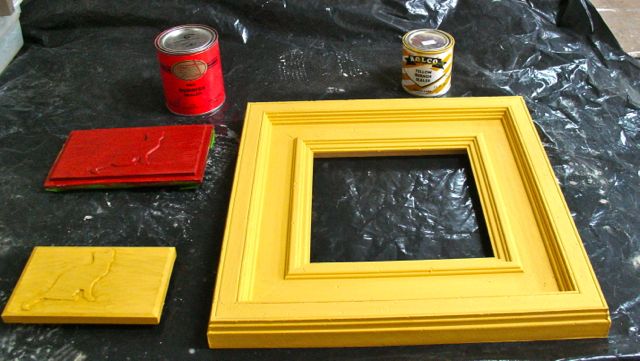
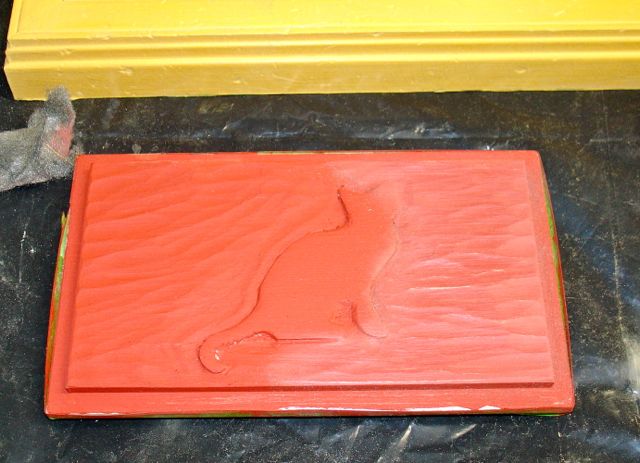
The first step is sealing the wood to attain a smooth surface.  You leaf will telegraph anything through it.  I decided that since I was in a carving/gilding mood I would do a frame and another lid at the same time.  The lid for the box will be copper gilded so used a red, burnisher sealer from LA Gold Wholesalers.  The yellow is from Rolco Labs.

Steel wooled burnisher/sealer

Steel wooled burnisher/sealer

After this dries you can burnish it with 4/0 steel wool to give it a shine.  I recommend using only oil free steel will for this such as Liberon’s.  You can see the difference here.  This is where oil gilding and water gilding differ.  Oil gilding can not be burnished once it’s applied whereas in water gilding the gold leaf is burnished with an agate stone to get that true gold shine on your work.  In any case, for this application oil gilding is just fine.

Now it’s time to apply the gilding oil to the project.  My preference is the slow set which sets up in 10-12 hours and gives you a long window of application, they say up to 24 hours.  You can also use a quick set oil that sets in about 1-3 hours.  The major problem with them is that dust will settle on the surface so the longer time means more dust possible — especially true since we had a wind storm but all that being said it seems to me that the slow set provides a better bond.  Once ready for gilding it’s a matter of laying the leaf on the surface.  Metal leaf allows you to handle it with your fingers and I use my leaf layer (piece of waxed MDF) to accomplish it as you can see in this slideshow:

This slideshow requires JavaScript.

Assembled Box

Assembled Box

One thing about composition metals is that they will tarnish so need to be sealed.  I use platinum, wax free shellac that is mixed up fresh and apply it with an air brush.  Wait at least 24 hours for the oil size to dry completely.  That’s done so the box was glued up as you can see.  Next step will be cutting the slots for the keys in the corners, sanding, separating the lid from the box, attaching the hardware, and then final finishing.  But that’s for the next blog!

Posted in Carving, Etsy custom order, Gilding, Jess'sCatBox, Mitered Box, Tutorial | Tagged , , , , , , , , , , , | Leave a comment

How to Make a Mitered Box on the Tablesaw

Now that the Mechanical Cellarette can be put on the completed list it’s time to concentrate on a custom order for an Etsy client.  This particular order has been one I’ve been doing convo’s on for quite a while.  The lady is in no rush, thank goodness, because I did tell her how involved I was with the Cellarette.  The purpose of this box is to hold keepsakes of her cat:

AtticusThis is the nameplate for it and if you notice the little defect between the I and the C, so did I!  They’re making a new one at Trophies of Las Vegas with no questions asked.  I’ve been using them for years and Whitney thought that perhaps a piece of metal lodged underneath the nameplate as it was being cut.  Good excuse for a bike ride to pick it up when it’s done!

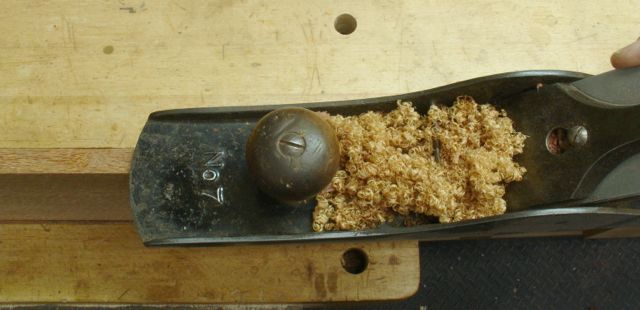
Planing edge on Leopardwood

Planing edge on Leopardwood

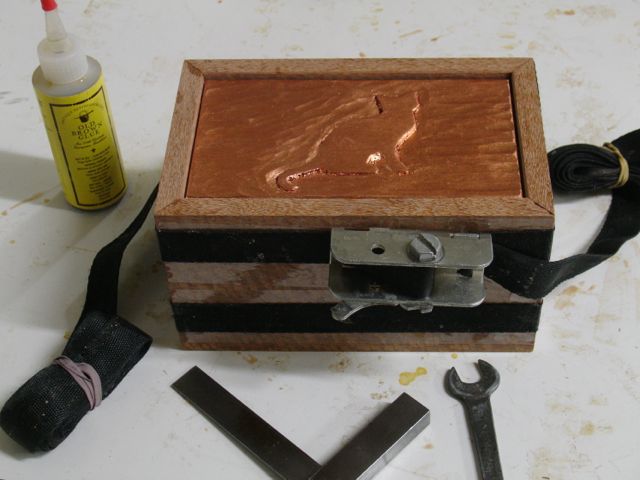
My client had seen this listing on my Etsy store which started a series of convo’s for a custom one made to her specifications.  Being a cat owner myself (Ali is on my lap as we speak/type?) it was easy to imagine the bond she felt towards hers and the mementos she wanted to keep.  I had some difficulty getting the Leopardwood but as luck would have it, a good friend was headed to Phoenix and offered to stop at Woodworkers Source and pick a piece of it up for me.  It is a beautiful wood but feels rather waxy and as you can see in the picture, has a very indistinct grain structure.  The plane creates dust rather than a shaving and this is edge grain!  The box will be constructed using mitered corners with Maple splines for added strength and decoration.  It’ll have a hinged top and a heart shaped lock made of brass.  Size is approximately 5″ wide by 8″ long and just under 5″ tall.

Since mitered corners can be tricky to assemble and cut I thought I’d share my method with this pictorial essay.  Using a sled that slides in both miter gauge slots for stability is the first thing I believe is important.  Also you need to be certain your blade is tilted at 45 degrees, I use a electronic angle gauge for that.  You may notice that the fence of the sled is adjustable.  Always check for 90 degrees before you start to cut your stock on a scrap piece of wood.                                                                                                                                 Note: click on the first picture and you will see it full size plus the caption, you can also click the next arrow to advance the tutorial.

Since you want your grain to be continuous as it goes around the corners you need to constantly flip the board over after each cut.  The first piece is cut with the show side down, then a stop block is placed for its length.  By using a spacer that is equal to the difference in the box sides you’ll be able to have exactly the same length pieces.  In this instance the long side = 8″ and the short = 5″.  That makes the size of the spacer 3″.  Always lay your pieces down the same way they come off the saw, this board was selected for the light streak about one third of the way up.

Free clip-art

Free clip-art

The lid of this box will be a carved and copper gilded cat image.  It looks like this.  After scaling it to the top panel it was carved out and is in the process of being gilded with Copper.  The unusual aspect of the construction is that this panel will need to be gilded and sealed before the box is assembled.  The way to build a good box with a nicely fitted lid is to build it as a cube and then separate the two later.  Here’s what it looks like now, the next step is gilding it which is scheduled for tomorrow morning.  I’ll do a separate blog about the carving and gilding of this cat in the next blog.

All the parts fit

All the parts fit


Posted in Carved LId, Carving, Etsy custom order, Gilding, Jess'sCatBox, Mitered Box, Tutorial | Tagged , , , , , , , | 1 Comment

Mechanical Cellarette Complete

With the help of my friend Randy, and a rented truck from U-Haul the Cellarette made its way home.  After about 115 hours of actual work and countless hours of planning and worrying I’m very pleased to have it complete.  My client was excited to get the piece and told me it was more than he expected.  Having never seen one of these in person I think we collaborated well and came up with a great design.  I took a few pictures inside of his office but they didn’t turn out the greatest.  He took many more and promised to send them to me and I’ll be more than happy to share them on this blog.   I did want to take a video and post it to YouTube before delivery.  The inside of the shop isn’t the most elegant setting for this beautiful (if I do say so myself!) piece but didn’t want to attempt taking it in my clients office.  It took me a number of “takes” to get the video you see here:

There are always a few final details to work complete.  Once the lift unit was centered and level as possible it was time to attach the back. The final step before buttoning things up was to make some type of cable management system which you see in the left hand photo.  Needed to make sure of clearance and no possibility of pinching the wiring.  The back is a piece of furniture grade, Mahogany plywood which needs to be removable in the remote possibility the unit needing service.  It was finished with Danish oil; I chose to attach it using slotted, oval head brass screws and finishing washers.  This adds to the authenticity — I didn’t think that a masonite back attached with a nail gun would be true to the Victorian Era of this piece!


Installation of the Leg Tips

Installation of the Leg Tips

One other detail was to attach the leg tips from Lee Valley to the legs.  In one of the posts about this piece I explained the process needed to get them fitted.  Now that they’re installed I really like how they enhance the Victorian/Edwardian Era appearance of the unit.  In the previous post I discussed how their tapered fit was achieved.  Although they are supposed to be a friction fit and held on with a single brad my I decided to use a thin coating of silicon seal in case there is any wood movement as our seasons change.  Usually not much of an issue in the desert but — you know me!  Also played it safe by pre-drilling that hard Bubinga.

Auton Adjustment Tool

Auton Adjustment Tool

This left me with the dilemma of what to do with the adjusting tool for the lift unit.  First of all, I doubt it will ever be needed due to the quality of the lift mechanism from Auton.  But …… what if?  Knowing that if I gave it to the owner it would be in a drawer somewhere, someone would look at it and wonder what in the world it was before tossing it into the nearest garbage can!  Using some hardware for mounting pictures in their frame I created a secure, hidden place for the tool under the lower, left corner.

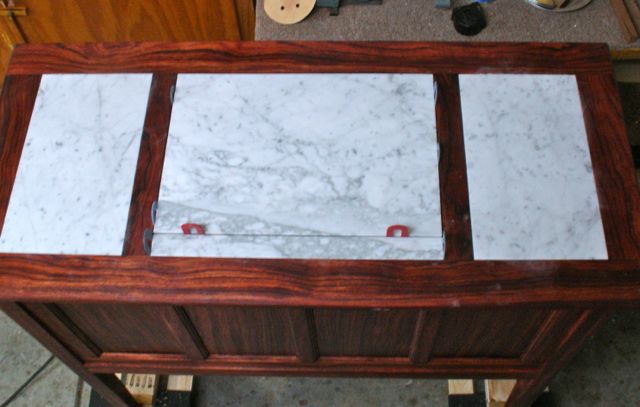
Italian Marble Set in Place

Italian Marble Set in Place

Now it was just a wait and see for the tile man to come over to fit and set the top and we’re good to go.  I like how that vein runs through the center section where it opens.  After allowing things to cure overnight the unit was given its final cleaning and coat of Liberon Black Bison wax.  All in all, a very complex but rewarding project to build.  Nothing like a challenge to keep you motivated and awake at nights wondering how it’ll all come together.  The most rewarding thing about any project comes when it’s obvious the client is more than pleased with the work.

Glad I was able to share this project with you, my blog readers and I’d welcome your comments about how it came out.  Not sure I’d want to go into production on it but at least now I know more about it than I did several months ago!

Posted in Mechanical Cellarette, Uncategorized, YouTubeVideo | Tagged , , , , , | 7 Comments

Mechanical Cellarette — Final Details

I’ve used this before in my writing but it’s worth repeating!  Many years ago Diane and I were having a discussion about her paintings and she told me that: “I work until I get to a problem area, solve that, and then continue on to the next problem”.  That may not be the exact quote but her concept has always stuck with me.  Woodworking projects, whether it’s a complex furniture project such as the Mechanical Cellarette or a simple mitered box are much the same.  Come to think of it;  life in general is like that too!

Here are some of the final problems and solutions for this project.  First of all, now that the casework is done it was time to install the mechanics.  Not being 100% certain of the interior space needed for the Auton 1001 Lift I allowed extra.  The overall proportions of the cabinet were taken into consideration as well.  The unit sits in a 3/4″ Maple plywood box.  It is supported by 4, Poplar “beams” that span the bottom of the case.  These were sized to bring the unit level with the case top.  This brief slide shows the installation:

This slideshow requires JavaScript.

Squaring top to lift

Squaring top to lift

Now that the Auton is in position the next step is centering the top over it.  It’s customary to center a cabinet top to the cabinet sides but in this instance it needed to be centered over the lift.  Oversized holes were drilled in the corner blocks installed earlier and the top was then attached with brackets to the housing for the lift.  The process was similar to squaring a tablesaw top to the blade — the corner screws were left snug and then the top was adjusted to fit square to the opening.  Just like squaring the tablesaw top, a mallet was used to accomplish that.

Side Clearance

Side Clearance


Now the unit needs to be positioned and centered.  Here’s a concern now that the box is at Davis Glass and Mirror.  There was more play in the mechanism than I expected and in my perfectionism quest I may not have allowed enough space for the mirror on the sides of the box.  I used spacers of 3/16″+ on either side to mimic the mirror thickness — won’t know until I get the box back from them at the end of next week!

The last step before taking it to have the mirror installed is fitting the top — another potential problem that took some head scratching to solve.  Essentially, once the location was established it’s a matter of drilling holes accurately.  The top is attached with dowels as a safety feature.  If there is an obstruction between the cellarette and the top as it is going to the stored position, the dowels will allow the top to separate from the bottom.  Small, 1/16″ holes were drilled through the top into the bottom and then 1/4″ holes were drilled on the drill press for the dowels, here’s that process:

This slideshow requires JavaScript.

That leaves me with a waiting game.  Now that the box is at the glass shop I can’t go any further until that is ready.   They estimated that will be at the end of next week.  I’ll be worrying about the clearance but since no good ever comes from worry I’ll try to contain myself!  In the meantime I can apply the final coat of Danish oil to the entire project so it’ll fully cure.  The last thing will be having the tile cut, polished, and installed.  Hopefully I can schedule that quickly.  When that’s complete all that remains is the final coat of wax and delivery.  Seems like this has been a lengthy process but we knew that going in.

Posted in Mechanical Cellarette | Tagged , , , | Leave a comment

Now where is my tape measure? — Time to clean!


I tend to keep a pretty clean shop, something needed when it’s as compact in size as mine is.  As a general rule, everything is in it’s place, that’s how I function the best.  However; when you can’t find common tools like a tape, square, or pencil it’s time to clean!

Time to Clean!

Time to Clean!

It seemed like every horizontal surface was covered with something as this panoramic view shows.  Not only is it dangerous, I hate to waste time looking for something just to find it’s “hiding in plain sight!”

Work has progressed on the Mechanical Cellarette to where I see that proverbial  light at the end of the tunnel.  Whenever I’m involved in a complex project my mind usually goes back to my running days.  Until an unsuccessful knee surgery in 2011 I was an ultra mountain runner.  My favorite race is one I did on about 4, even numbered years in Prescott Valley, Arizona.  It’s called Man against Horse and as the name implies, you run the 50 mile course against folks on horses!  Projects are like races, you do the training/research and you’re pumped up and going along strong.  About 15-20 miles into it things start to slow down as you realize this is a long one and there are many obstacles yet to overcome.  In this particular race, you can see the finish line when you’re about 6-7 miles from it and that’s where I feel I am now on this project.  There are a myriad of little details I need to be aware of to complete the project successfully.

First off, once the casework was assembled I needed to have a way to maneuver it around the shop.  A pair of furniture dollies from Harbor Freight with cross pieces that support and incase the legs was just the right thing.  Don’t know how they sell them so cheaply, you can’t even buy a set of casters for their price!

This will allow me to get around all 4 sides for the final sanding, finishing, and installation of the top and mechanics.  The final location for this piece is in a second story office and thankfully, there is an elevator but these dollies will make getting it in position much easier.

The next detail was to make corner blocks.  These serve two purposes, one to reinforce the corners and the other is to attach the top via oversized holes.  This allows for wood movement as humidity levels change.  These needed to be notched around the legs.  You can make these with a simple rub glue joint but for this project they are glued and screwed.  Adds a little more to the process but with the reputation Bubinga has of being difficult to glue it was worth it.  This meant drilling and countersinking the angled bracket.  Is Bubinga a hard wood?  Check it out, this is the first time I ever broke one of these screws and I’m using hand power, not a powered screwdriver.  Even with pre-drilled holes and beeswax coated screws I managed to snap one off!

All that remains is drilling the oversized hole to attach the top.

Housing for Auton 1000-A

Housing for Auton 1000-A

The Auton lift needs to be encased in a box like structure which, due to the design of the cabinet; had to be built in place!  When used as an appliance lift the installation is relatively straight forward.  Simply create an opening in the counter top, locate the unit on a shelf below, center it in that hole, and you’re good to go!  Details here are a little different.  Once the correct height below the top was calculated with the four “support beams” you see below the box, the entire unit will be installed onto it.  Next the top will be fastened securely to the sides of the box to maintain the correct clearance between it and the lift unit.  The outer edges of the top will be secured in oversized holes in the corner blocks to allow for any wood movement.

Blacked out

Blacked out

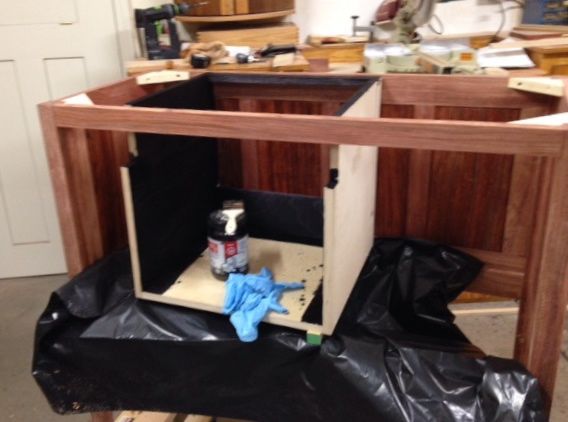
Yet another detail at this stage is the box i.e. Mechanical Cellarette that is attached to the lift.  Essentially this is a five sided box, mirrored on the inside and the two outer faces.  The back will have a black laminate to help make it disappear.  Speaking of disappearing, black dye was used on all visible interior parts to make them go away!  Just like a set for a play, if it’s flat black your eye won’t be drawn to it.  Unlike a TV lift system that has a single lifting point at the back where it is unseen, this lift has the mechanism at each side which is exposed when the unit is open.  I had some black dye left over from a picture framing project which serves this purpose well.

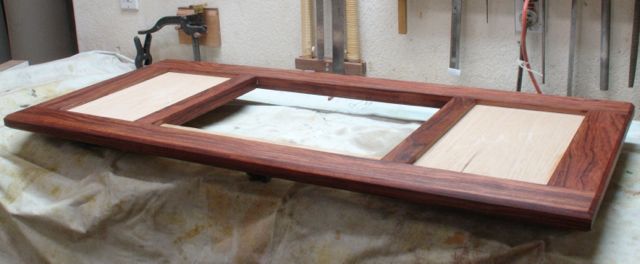
As far as the box itself goes, it is made of 3/4″ plywood.  The construction is butt joints, glued and screwed together.  The top needs to be able to give way in case there is an obstruction as it closes.  This will be accomplished by attaching it to the box with dowels. Once everything is installed and adjusted it will be taken to a glass shop for the installation of the mirror.  The bottom piece of mirror needs to be removable to access the lift adjustments.

This slideshow requires JavaScript.

To wrap up this detail, mounting holes need to be drilled into the Auton lift framework –they forgot this step before the unit was shipped!

So what’s left?  The lid needs to be banded prior to installing the marble to conceal that plywood edge.  Final sanding and double checking for any flaws needs to be done before  applying the oil which is next on my schedule.  The finish will take more than a week, allowing 24 hours drying time between each coat.  The box section needs to be mirrored which will be outsourced.  My tile man needs to cut and attach the marble to the top and inner panels.  Like I mentioned at the beginning of this blog; I see the finish line but there are still a number of miles to go and mountains to cross before I get there!

Posted in Mechanical Cellarette | Tagged , , , , | 2 Comments

TGIF: Assembled — Can’t Wait until Tomorrow!


Coat 1 of many!  Tried and True Danish Oil

Coat 1 of many! Tried and True Danish Oil

I’ve mentioned the stress of glue ups and this one was no exception.  Before I get into that though I’d like to share this picture showing the first coat of the Tried & True, Danish oil on the top.  I think it looks phenomenal!  It really brings out the beauty of the Bubinga chosen for this project.  The large, open section in the center is where the hidden bar compartment will come up.  It, along with the two side areas will be inlaid with the Italian Marble.  For the last 50 years or so the finish of choice for me was Watco brand Danish oil.  I used it during my public school teaching career, private students, and pretty much every project made by me from boxes to furniture.  The top coat is one I learned about at San Francisco State during the 70’s from a workshop taught by Art Espenet Carpenter, a well known artist/woodworker of the time.  So, if this is such a great finish, why do I now go to the Tried and True brand?  Blame it on the EPA and their restrictions on solvents, emissions, etc. for forcing the company to change the formulation to meet their requirements.  I’ve been in contact with the people at Watco and they admit to the changes but also say it’s essentially the same product — my hands on experience tells me different!  It’s now stinky, oily, and doesn’t act the same so it’s time to try another product.  In my test samples I’ve been impressed with this product and will use it on my personal Armoire as well.  Many advantages but mainly it contains no solvents or petroleum products.  It comes from flax seeds and uses natural honey as a wax and is 100% food safe.  I suppose that over-all the EPA has our safety in mind but it’s very hard to find the original finishing products that have proven themselves over the years — okay, time to get off my soapbox!

1/2" Mortise for legs

1/2″ Mortise for legs

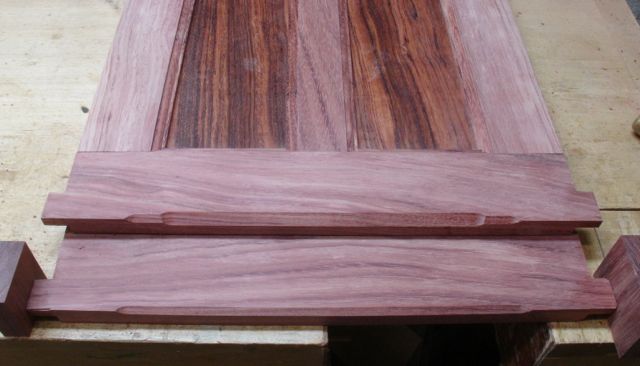
Prior to final assembly the main crossmember needed to be mortised into the legs.  This piece will be the main support for the mechanics of the cellarette so is quite substantial.  The mortise is 1/2″ thick by 1″ deep and about 1 1/4″ wide.  After cutting them with the hollow chisel mortiser the tenons were cut on the tablesaw with the dado set which was still installed from the previous operation.

Trimming Tenons

Trimming Tenons

They were cut slightly oversized as I like to trim them to final fit with hand tools like this rabbet block plane shown in the picture at the left.  The assembly went in stages, first the back which is made up of the two legs, bottom and top stretchers.  Gorilla glue is used for this assembly.  The next day the front was assembled, this time Gorilla glue for the mortise and tenon joints and the Lee Valley Cabinetmakers glue for the long tongue and groove joints.

Bottom Apron

Bottom Apron

The initial intent was to use a beading tool for some decorative bead work on the piece.  Unfortunately, this wild grained Bubinga just didn’t respond well to the beading tool so that plan had to be modified.  After experimenting with various router bits I found that the safest one for this particular batch of Bubinga were straight cuts rather than coves and rounds.  I ended up using a 45 degree chamfer to create this design on the bottom apron.  The design was almost accidental.  After making a few shallow passes the stop blocks were moved closer together which resulted in this interesting arch design.  It’s mimicked on the front as well.  The same bit is used on both sides of the top edge so everything is cohesive.

After some final fitting of the joinery and several dry fits it was time to “go for it”.  My preference would have been to assemble it with the legs down on the floor but there was just too many pieces to juggle and  finagle into position.  Here is the results, even though most glues say you can remove the clamps after an hour or less my preference is leaving it clamped overnight.  Can’t wait until tomorrow!

Posted in Mechanical Cellarette | Tagged , , , , , , , | 2 Comments