So what’s missing?
Not a good time for a quiz but my shop certainly looks a bit different now — seems much larger without my Jet cabinet saw with the 52″ out feed table! This is the first time I’ve been without a tablesaw since my first Craftsman, 10″ tablesaw purchased back in 1977 as a graduation present to myself. That is when I earned my teaching credential from San Francisco State and began my career of teaching. The Craftsman was a quality piece of cast iron equipment, if you’re old enough to recall those days that was probably one of the main brands for homeowners to buy. I used that saw until replacing it with the Jet in April of 2000. Since I tend to keep receipts and owners manuals those dates and prices I mention are valid. That Craftsman followed me to Las Vegas and Boulder City and was used to build my house there plus countless furniture pieces for myself and others that sparked my passion as a custom furniture maker.

Jet sold in 2 Days on Craigslist
Since I was becoming more involved with building furniture and projects for others, it was time to upgrade the contractor style Craftsman with a more powerful, cabinet style of saw. I don’t recall the price of that saw but do remember that after listing it on Craigslist it sold within a day’s time. I had two people at the house and another on the phone which resulted in a bidding war. I sold it for what I paid back in 1977. This was in 2000 and that price was under $500.00. Enter the Jet Cabinetsaw, 3 hp, 220 volt, and 52″ table. This picture is from the listing and it went to a young man that was very excited to take it home. Since I rarely use sheet goods the long table served more time as an assembly table than it did to support wood being cut. Besides, with a shop made sliding table long pieces were manageable. Some of its accuracy has diminished over the years, bearings and belts have been replaced, and I thought it was time to purchase my last tablesaw. Comparing the initial purchase price of the Jet back in 2000 with what I sold it for now (15 years later) showed me that it cost about $45.00 a year to own that tool — not a bad return if I do say so myself!
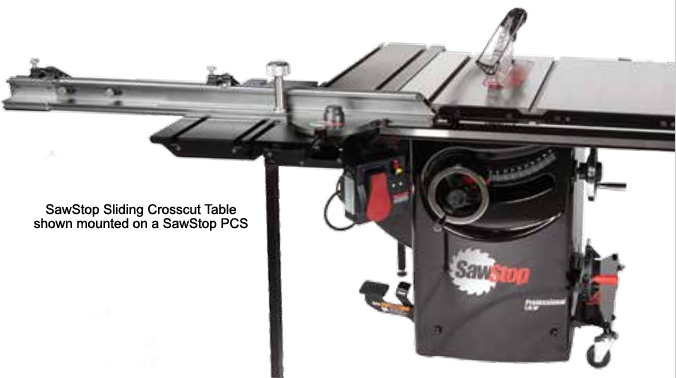
SawStop with Sliding Table
So, now what do I do? This was more of a dilemma than I thought it would be. Some of me said that this was the time to really go back to all hand tool woodworking; something I truly enjoy but wasn’t quite ready to commit to. As you know I consider myself a “hybrid woodworker”, one that uses the power tools much as the craftsman of old used their apprentices. Let them do the heavy grunt work of roughly dimensioning the material and I’ll concentrate on the hand cut joinery and planed surfaces. That decision being made, next was which saw to buy. I considered the Powermatic brand, one that was used in all of my school woodshops and a proven workhorse. Reviews on it weren’t all favorable and it was generally priced higher than the SawStop. If you’re familiar with the SawStop, it’s been popularized as the Hot Dog Saw because of the safety feature where the blade automatically stops and retracts the minute it senses flesh: http://www.sawstop.com/why-sawstop/the-technology
Admittedly, I had some negative feelings about this saw due to the way the inventor of it tried to have legislation passed that would require every saw to have this technology. That just didn’t set well with me, I saw it as greed on his part which offset the obvious safety features this tool has. Although I’ve been working with table saws for over 50 years and can still count to ten on my fingers — all it takes is one mishap to lose one or more of them! I guess I’ve mellowed in my initial feelings about his attempts to legislate safety and after research discovered that this is a quality tool with nothing but positive reviews on the internet. They recently introduced a sliding table which I’ve seen at Woodworkers Emporium and decided to go ahead with purchasing this machine. I chose their Professional 3hp, 220volt model with a 36″ table but added the sliding table to it. The saw will be delivered Monday but the slider is on backorder for 2-3 weeks. As a service, Woodworkers will cut the rails to the needed length to accommodate the slider, install the mobile base, and deliver free to my shop. I do prefer to support local businesses rather than internet. They’ve always been good to me, not only in sales but also by referring clients and students to me and arranging any warranty work when needed.
So, now I wait until Monday morning to have the saw delivered. They will install the mobile base and also cut the rails to the needed lengths for the sliding table. That won’t be here for 2-3 weeks and I’m really looking forward to getting used to that feature. If you’re unfamiliar with a sliding table, traditionally they are huge and take up an enormous amount of floor space. SawStops version is compact and very smooth, they have one set up at Woodworkers Emporium that I’ve handled. Here is a video about it:
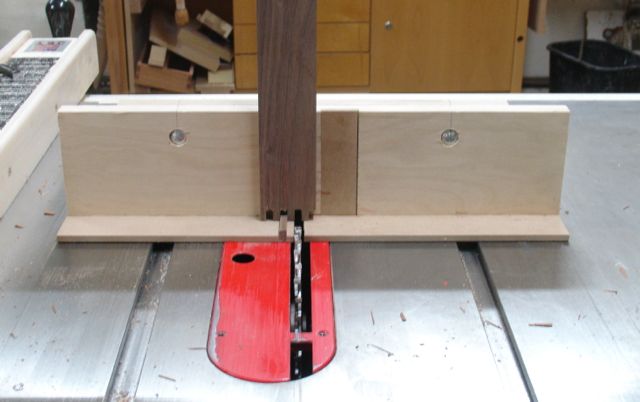
Very anxious to see how this will all fit into my limited shop space and I’m sure I’ll need to do some reconfiguring. The saw’s mobile base will make that easier, all of my tools are mobile which is a “must have” when your space is limited. My hope is that with the dedicated sliding table I’ll be able to achieve more accuracy with mitered and bevel cuts and also with finger joint jigs. Yes, I’ll need to re-make that but it’s time — they’ve served me well over the years and have been tweaked many, many times so it’s probably past time to remake them.