Not Quite Easter but here’s my Egg!

EggCarving-WoodworksbyJohn-LasVegas-FurnitureMaker-10

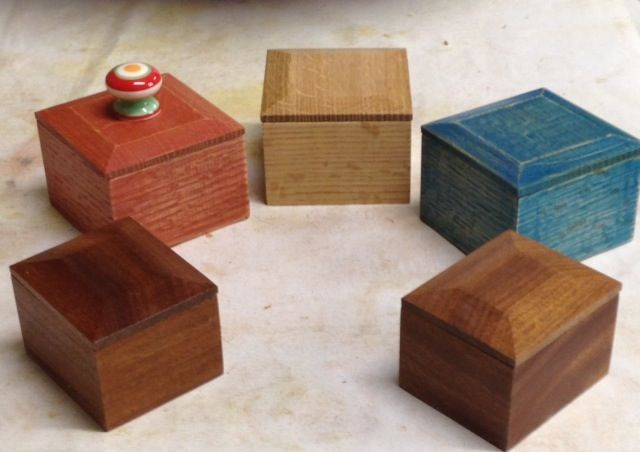
So, pretty sure you can tell which is mine and which is China’s finest!

A new woodworking group has started that will meet the fourth Saturday of every month at Woodworkers Emporium here in Las Vegas.  It’s the same place where I teach one day seminars on usage and set up of hand planes and also dovetails.  This group, as if you can’t tell by the picture, will deal with wood carving.  I’ve done some relief carving in the past but this is my first attempt at “in the round” work since my Boy Scout days!  I still recall Mr. Hinkle telling us to just cut away everything that doesn’t look like a fish.  We were using bars of soap then.

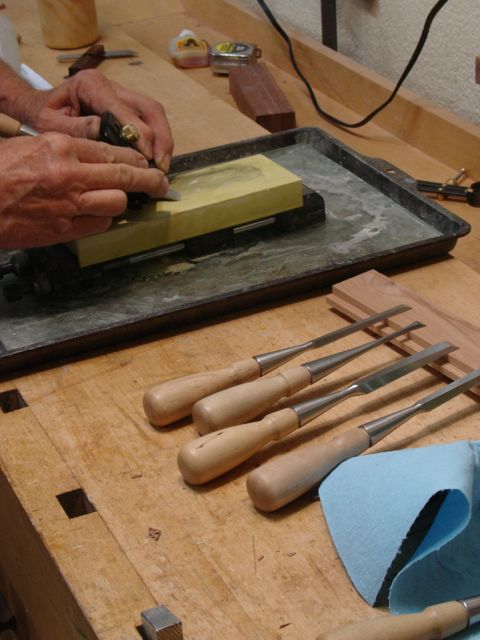
This group met on the 22nd. of March and there were 12-15 people there so we’re off to a good start.  Some were very experienced and a few, like myself, were rank beginners.  The group is headed by two friends of mine from the Sin City Woodworkers group (Dennis & Randy) and Randy especially urged me to try it out.  Well, he may have to become my mentor whether he wants to or not but I must give him credit for egging me on to come to this meeting.  Some of the guys with more experience showed off their work and we discussed several different styles of carving.  Dennis had brought his sharpening set up to demonstrate that so there was something for everyone.   The two of them had prepared some blocks of Basswood prior to the meeting.  The challenge was to take one of them and turn it into an egg for the next meeting.  NO sandpaper can be used to accomplish it either.  I took two pieces not knowing what I was getting myself into!

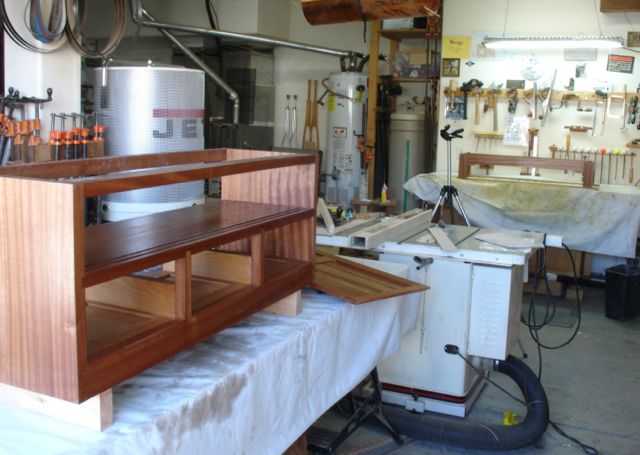
Actually, I let them sit on my workbench while working on the TV cabinet as if they’d magically turn into eggs on their own.  After a few days, I called Randy to see if he had a pattern I was interested.  He did so I asked if I could get it from him and secretly hoped he’d give me a few one on one pointers for getting this square chunk of wood to look like an egg.  Thankfully not only did I get a good cup of coffee, he also gave me quite a few pointers.  He has quite an impressive  collection of things he’s carved so he knows what he’s talking about for sure.  Here’s a little montage of how the square block of wood became the egg (more of less) that you see in the top picture.
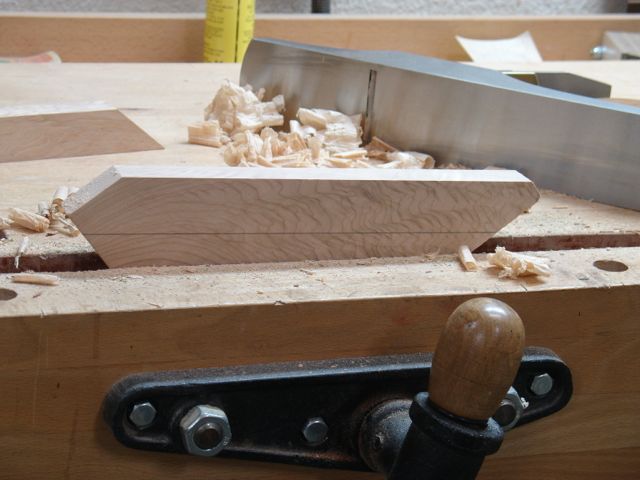
Lower half complete

Lower half complete

Using the knife in the fulcrum method took some getting used to but once I got the hang of it there was more control.  Even though I use my hands all day this used muscles I wasn’t aware I had that were sore the next couple of days.  Using a plastic Easter egg as my model it seemed that the lower, fatter part of the egg takes up about one third so a line was drawn there.  The lower half was completed first.

Not having any hard directions to completing the egg what worked for me was to draw a circle on the end to use as a guide to carve to.  A bench hook was used to hold the egg at first so I could hog off the bulk of the material without too much risk of cutting myself.

By using a template from my drafting tools it was easier to draw the circle guide on the end of the egg.  Probably drew 3-4 circles of diminishing diameters and used them as guides to carve down to.  The hard part is knowing when to stop, it’d be real easy to turn this into a Robin’s egg by trying to smooth out all of the facets — remember: NO SANDPAPER!

I have my friend and neighbor, Richard, almost talked into giving the other block of wood a try and joining the carving group.  He painted an unflattering picture of the two of us sitting on the porch in rocking chairs making chips and spitting into the wind!

I don’t think so !!Screen Shot 2014-04-03 at 8.43.40 PM

Posted in Carving | 1 Comment

Lesson Learned —- Drawer Woes!

WoodworksbyJohn-LessonLearned-DovetailedDrawers-1

See the light?

I’m willing to bet that I’m not the only woodworker that re-saws 6/4 or 5/4  stock to get materials for making 1/2″ thick drawer sides —- am I right?  I’ve done it in the past and had good results but now that I’m working on my challenge project the results are dismal!

When I was in Arizona I was able to find a 6/4 piece of Maple that was almost 7″ wide.  Great, or so I thought; I would be able to resaw it and get all of the drawer sides and backs from it.  The same goes for the drawer bottoms.  I had some 5/4 Alder that I used in a planing seminar at Woodworkers Emporium.  I cut these long enough so that I could use them for the bottoms after my students used them for practicing their plane set up and use on.  Seemed like such a good plan, that is until the wood did what it wanted to do and cupped like you see in that picture.

Surfacing with my bronze smoother

Surfacing with my bronze smoother

So, you know what that means?  If this was a project for a paying client I’m pretty sure I would have scrapped these pieces and started anew.  But, since I’m living on a retired teacher’s pension decided to do the best work I possibly can with them.  That means lots of planing to try and flatten them which, by no means, guarantees they’ll remain flat once glued up.  For my insurance I’m using liquid hide glue  which is my preferred glue for dovetails and box joints anyway.  Should worse come to worse at least it’s reversible so I’ll be able to save the drawer fronts.  I assembled the middle drawer this evening so we’ll see how things look in the morning.

RR = right side of right drawer

RR = right side of right drawer

There are numerous ways to mark the parts of a piece of furniture during construction.  I’ve done chalk and pencil but find that the best markings are made with a set of machinists stamps.  I’ll put them on either the bottom of parts like this drawer or else directly on a tenon and them mark the corresponding mortise in such a way that the assembled joint covers over it.  That takes care of the drawer sides.

As for the bottoms, as I mentioned they were made from a piece of resawn Alder.  I had a 1/4″ blade in my bandsaw so rather than changing to a wider blade these pieces were initially cut on the tablesaw, about 1/2″ deep to make it easier for the narrow blade to track through the full, 7″+ width of the board.

So what’s the lesson learned from all of this?  I think that it may be false economy to resaw my own lumber for drawer sides, especially ones this large that are 6+” x 15″.  I know that quarter sawn lumber is preferred for drawer sides but it’s darn near impossible to find.  Resawing to make sides for smaller drawers or boxes should be just fine but next time I have drawers of this size I’ll buy 4/4 stock and it through the planer, alternating sides for each pass.  Then, after they sit in the shop for a week or more they should be stabilized.  I honestly didn’t think I’d have this much trouble with the Maple.  Figured it came from Phoenix which is almost as dry as Las Vegas so the differences wouldn’t be big deal, guess I was wrong!

Posted in HDTV Stand | Tagged , , , | Leave a comment

Half-Blind Dovetails in Sapele: The Challenge Continues!

Not being one to complain too much but these dovetails in this paticular chunk of Sapele are proving to be quite the challenge!  The hall table I made last year was of Sapele as well and the dovetailing on those drawers went much easier.

Does not cut Cleanly

Does not cut Cleanly

After doing one drawer side the chisels had a very noticeable burr on the backs of them.  These are Lie-Nielsen bench chisels which I sharpen at a 30 degree angle — I mean there’s only 4 sockets to cut.  I have a fine waterstone and water ready to remove that burr after several cuts.  As you can see in the picture above, the grain doesn’t cut cleanly at all.  I tried the method of cutting down to the bottom of the web with a smaller chisel but the grain seems to be somewhat brittle and will split beyond the line.  This seems to be the best way to remove the socket material other than a router bit and borrowing  someone’s Leigh jig!  I’ll cut the back side with a wide chisel then remove the material with a smaller one that’s angled.  Keeping the cuts shallow without trying to hog out too much wood a t a time is helpful too.  When cleaning the socket out, the grain doesn’t cut cleanly so it’s very difficult getting a smooth surface.  Glad this is a personal project because I’m not satisfied with the quality so far but am committed to it.

A technique that helps is the one I use to locate the bottom of the web.  It begins by setting the marking gauge to the thickness of 1/4″ piece of polyethylene I use for glue ups.  This is then used to guide the chisel when paring to the line.  Even with this as an aid, the grain of the wood will allow the wood to split below the scribed line.

WoodworksbyJohn-lasVegas-furniture-halfblinddovetails-Tail layout-6Speaking of techniques, unfortunately the Maple I resawed for the drawer sides cupped on a few of the pieces.  I cut dovetails first and clamp them together.  By placing them on the tablesaw they are even.  I had an auxiliary fence which kept them square as well.  At this point the pieces were still identified with green tape but I have a set of machinists metal stamps that are used to permanently mark each piece.  Too easy to get them confused!


Ready to cut the tails

Ready to cut the tails

I will keep the clamp on the two drawer sides and put them into the vise on my carving bench to lay out and cut the tails. This has been slow going to say the least. At times I wish I had a shop that had racks of lumber just waiting to be used.  Sort of like the pictures of James Krenov’s shop.  That way if I have a difficult board I can just go and find another!  Well, my Dad used to say that you can wish in one hand and spit (or something else) in the other and see which one fills up first — better be satisfied with what I have and make it work the best I can.

Posted in HDTV Stand | Tagged , , , , | Leave a comment

Sapele + Half-Blind Dovetails = Sharpening Time

Sapele D/T

Sapele Half-Blind Dovetail

In one of my past posts on the construction of the TV stand I’m currently working on I discussed how the Sapele is a difficult wood to work with.  Saying that though, I’ve made other pieces from it so maybe it’s just these particular pieces.  In any case, challenging projects will either improve your skills or frustrate you to take up knitting or something!!


sharpeningNotice that the wood doesn’t split cleanly or evenly.  It seems to be more successful to use a smaller chisel (3/8″ or so) and cut down on the end grain stopping just shy of the scribed line.  This is the end of the piece of wood I have chosen to use for the drawer fronts.  In any case, I’ll need to bring my A-game to the bench when I start to work on them.  As you know, when making drawer fronts it’s best to have the grain continue all the way across the front of the cabinet so that leaves no room for error.  Once the three drawer fronts are cut from the board you just can’t start over.  Other than being extremely careful when working the tools should be as sharp so it’s time to hone my chisels.

I use the Veritas Mk. II honing guide and water stones for sharpening my tools.  After trying other systems I really like this and the only problems I encounter is that sometimes a narrow chisel will move in the guide.  If you have that problem it’s usually caused by not having the bar that locks the chisel tightened up evenly.  In the background you can see the dovetail lay-out I chose.  The drawer is 6″ high so I think that’s too wide for only two tails.  Three tails looked too uniform and machine-cut but after all of the difficulties I may change the lay-out.  I do like how this looks though — any opinions?

In the meantime I’ve been working on a small series of boxes.  During the last month, a consignment gallery that’s located in Container Park has accepted my work for their store.  They specialize in glass jewelry so I approached them on making some boxes for them.  It was great to bring in four and have two of them sell within 2 weeks!  The replacement ones I brought in were a little large so the owner suggested making some smaller boxes instead.  I’m looking at this as an opportunity to utilize left-over materials from other work, with a 60/40 split on the sale there isn’t a lot of profit but it’s still fun to make some money on these:

BoxesThe ones in the back are quarter sawn White Oak, the ones in front are left over pieces of Sapele from the TV stand.  This has given me a chance to experiment with colored shellac (tinted with Mixol) and it’s given them an aged look very similar to milk paint.  They’re almost ready to take to them so hopefully they will accept them into the shop.


Posted in HDTV Stand | Tagged , , , , , | 3 Comments

Back to Work, Don’t get the pull before the drawer!

Cardboard DrawersIn my latest post I mentioned how I allowed myself to get side-tracked and began to design a pull for the drawers.  I think I needed a artistic break after all of the technical work of the joinery.  The pull I made was very functional but as Diane suggested, it was too predictable.  Her thought (which I respect) was that this piece needed some type of “wow factor” to set it apart from the crowd.  She suggested making pulls that mimic the dovetail joinery of the drawer dividers so that’s what I did.

Facebook is a wonderful tool to use when you’re looking for feedback or suggestions for your work.  I posted the picture above and asked for opinions.  I’d say that 85% were positive which is good.  The negatives I received echoed some of my concerns about the size and practicality of the design.  My neighbor Mike, came over to get a first hand look at it and suggested making the pull a little bit thicker so that it’s easier to grip.  He specializes in kitchen and bathroom designs and installations so his comment made sense from a practical point of view.  That was one of my concerns too so I plan to make a thicker version and form it so that it’s easier to grip.  If this were a kitchen or bath cabinet it would make sense to install the drawers with metal slides and easily gripped pulls since the drawers would be used many times a day.  For this application I’m doing traditional drawers.  Time to put it to rest and get on with building the drawers — does the phrase “putting the cart before the horse” make sense here?

Now that the cabinet was completely assembled it was time to tackle the sliding doors.  You may recall that one was made of MDF which functioned as it should.  The basic design has a rabbet cut on the bottom that allows the door to set into the groove without making contact with the bottom of the groove.  The only place of contact is a narrow section at the top of the groove.  The upper rabbet is larger and the front of the door is chamfered so you can install the door from the rear of the cabinet.  This set of pictures shows the process but you can get full details from this previous POST.

Once the fit and action of these doors was what I wanted 3/4″ finger holes were drilled at the outer edge of each one.  In the meantime work has started to finish the base and the cabinet.  The finish is platinum blonde shellac which is padded on.  After two coats, the surface was lightly sanded with 400 grit paper and another coat padded on.  This will probably be the drill for the next week or so — pad on a fresh coat of shellac, allow it to dry, and then cover the project while working on dovetailing the drawers and building those.  There will be 5-7 coats of shellac at least and then after curing for a week they will be rubbed out and finished.

Rabbeted back for cabinet

Rabbeted back for cabinet

One other part of the cabinet that is now done is a panel and frame section for the back.  The frame is tongue and groove, made of Sapele with plywood panels.  The panels are 1/4″  Cherry plywood from another project that was backed by either Sapele or ribbon grained Mahogany.  Using the back as the show side blends in with the rest of the cabinet.  The Cherry side is inside of it and won’t be visible.  This will be screwed into rabbets cut on the edge of the cabinet sides.

Finishing Room?

Finishing Room?

I’m saving the grunt work for last which is planing the top.  That promises to be a lot of work!  It is 1 1/4″ thick now with a very slight wind to it.  At 17″ wide it is too large for my planer (15″) so it will be entirely finished with hand planes beginning with the scrub plane to remove that wind.

Posted in HDTV Stand | Tagged , , , , , , | Leave a comment

Whoops, Got Ahead of Myself!

DrawerPull-BigLeafMaple-4grooved

Drawer Pull, Big Leaf Maple

I just couldn’t help myself, as I began preparing the Big Leaf Maple board for the sliding doors I tried to envision what and how the pulls could look like.  The board was one of the Extra Special Boards  from Woodworkers Source in Arizona.  These are unique and beautiful boards they feature on their mail order site.  As far as the completed cabinet and base go I’ve begun the shellac process which means 10 minutes or so of padding it on and then hours of drying time.  That’s why work starts on the sliding doors.

DrawerPull-BigLeafMaple-1There was this one piece at the end of the board with some really wild grain.  As I studied this area I couldn’t help but wonder what would happen if it was cut at an angle. The picture doesn’t begin to capture the grain.  First, I cut a small section at 45 degrees on the chop saw to play with.  Since I was able to plane it the next step was laying out these lines to go across the grain diagonally.

DrawerPull-BigLeafMaple-2

After the first cut, the edge was planed square.  Then each piece was cut parallel on the bandsaw, planed square, and repeated until I had 3 sections of the wood.  They are 3/4″ in thickness so a 3/8″ tongue was cut on one of the edges.  I will mortise the drawer fronts and the drawer pulls will be glued into it.


DrawerPull-BigLeafMaple-3Next up was giving it some shape and design.  This was accomplished with a block plane.  After penciling in guide lines, chamfers were cut on the outside edge.  If you look closely at the shavings that came off the plane you may notice that they are “crinkled”.  I think that has to do with the grain structure of the Maple.  Once that shape was finished I just had to see what the piece would look like so proceeded to mortise a scrap of Sapele and stick it in.  Since I was this far off track I might as well run a coat of shellac and see what that would look like as well!  Looked pretty good but I felt it needed something else, the grip wasn’t quite right.  That was remedied by cutting a shallow groove with a core box router bit.  Here you can see the difference but the real difference comes in the feel.

Now that this is done it’s time to go back to the real work.  The drawers need to be built, there are three of them approximately 6″ high by 13″ wide and 12″ deep.  They will have half blind dovetails and to be honest, I suspect the stringy Sapele will want to give me some problems on that step.  The back will be a panel and frame section, attached with screws into a rabbet.  Then finally will be the planing and sizing of the top.  I can probably skip my gym workout for a day or so  after that’s done!

Posted in HDTV Stand | Tagged , , , | 5 Comments

Cabinet is Taking Shape

 So this is one of those moments you wait for to see the results of all of your work.  So far there are 30+ hours into this project.  I was very anxious to  get the base assembled so that I could put it together and here it is!  If you click on the pictures they will become full sized and you can see how the cabinet is pretty close to the cardboard mockup. Can’t wait to replace that high quality MDF sliding door with the Big Leaf Maple though.

To get to this point I needed to assemble the base.  Essentially it’s all mortise and tenon joinery for connecting the sides to the front and then a glued/screwed support mortised into the back leg for the rear stretcher.  As I’ve mentioned in prior posts, I consider myself to be a hybrid woodworker. What I mean by that is machines are used to perform most of the grunt work and then hand tools do the final work.  For example, tenons are first cut with the table saw.  I begin by setting up a stop block on a sled to cut the shoulders.  That is followed with a tenoning jig to cut them ever so slightly over-sized and then the using chisels, back saws, and a rabbet block plane to achieve that final fit.

After the joinery work was complete I turned my attention to the curve at the bottom.  The first step was to lay out the design on a piece of graph paper and then transfer that to a piece of masonite.  Once that was cut out it needed to be drawn onto the wood.  By using a piece of green masking tape I was able to see the lines making it easier to cut on the bandsaw.  The blade I used for this is 1/4″ wide with 6 tpi.  Spokeshaves and a block plane were used to smooth the bandsaws cut.

One side, ready to be assembled

One side, ready to be assembled


It is very easy to get your parts mixed up, especially during the stress of glue up.  Standard advice is always to do a dry fit with your clamps, cauls, etc. but I find it’s helpful to mark the pieces with a more permanent marking system than a pencil.  I use a set of metal working alphabet stamps and mark corresponding pieces where they won’t show but are obvious during assembly.  The strategy was to first assemble the two sides allowing them to dry overnight.  Next the back stretcher was fitted while the front piece was clamped between the sides.


Finish without a flash

Finish without a flash

Finish with a flash

Finish with a flash


So, what’s next?  I need to build the panel and frame section for the back, dovetail the drawers, create the sliding doors, and of course, finish the top.  Before I start any other phase of this project I decided it would be wise to begin some of the finishing.  If I wait until all of the work,  finishing all of those parts will seem overwhelming to me.  As much as I prefer my Danish Oil, hand rubbed finish I really want to preserve the natural coloration of this wood.  The ribbon stripe grain is beautiful!  The best choice for that will be using a super platinum or blonde shellac.  With most of the cabinet being flat panels the technique to use will be padding on the finish.  These pictures show my sample board with about 4 coats of shellac padded on.  I’ve never attempted doing so much surface area at one time with shellac so this will add to the challenge of the piece!  I get my shellac on line from a place called Shellac.Net  and have always been pleased with their products and customer service.  They’re located near Napa, California.

I taught a plane class today at Woodworker’s Emporium which showed me my smoothing plane needed to be sharpened.  That’s now done so it’s on to the wood.


Posted in HDTV Stand | Tagged , , , | 1 Comment

Beginning the Base: Mitered Legs

Sketch of HDTV Stand

Sketch of HDTV Stand

Work continues on this project and I’m finding the fact that there isn’t a deadline refreshing!  Of course, it would be nice for it to be for a paying client but the lack of deadline stress is refreshing.  Now that the basic cabinet and drawer web are done it’s time to get away from the dovetails and work on the base it will sit upon.  Like everything else, this will be made of 1 1/8″ thick Sapele.

The total height of this base is 8+ inches and there will be a ledge that the cabinet sits on.  The top of each leg and the base is rabbeted out to a depth of 3/8″ with 1/4″ lip for the cabinet to drop down into.  That will receive a small chamfer to relieve that corner.  First order of business was cutting a 45 degree angle on the end of a board long enough to make the four sides of the legs.  This piece is 3″ wide.  After the angle was cut, the blade was lowered and the fence placed to the left of it to cut a slot for a reinforcing spline.  Just a side note here; the usual position for the fence is to the right of the blade.  Luckily I discovered this on my set up cut or it could have been a disaster!  When I ran it through, my body was pressed against the fence lock which loosened and the fence moved — that cut was very crooked and would have ruined the whole piece.  I was sure to keep clear of that when cutting the actual piece.  It took very little work to true up the angled cut after which they were cut to length.

Next up was rabbeting the tops to accept the case.  This was done with a dado set and the L-Shaped fence for the tablesaw.

This led to the challenge of how to glue and clamp all of this together and maintain a nice, tight joint.  As usual, a practice set up was done prior to the real thing — you know how stressful glue-ups can be!  The spline is made of a piece of plywood that was used on a bathroom remodel subfloor, it just happens to be the right side to fit the kerf of my blade.  The glue I used was Old Brown Glue which allows a longer open time and doesn’t cause the wood fibers to swell up like polyvinyl glues do.

All that remained for the legs was to reinforce the backs of them.  This was done with the piece that was cut off the edge to create the miter.  After relieving the inner edge with a block plane, a simple rubbed glue joint reinforced the legs.  Now comes fitting them to the bottom of the case with mortise and tenon joinery.

Setting up hollow chisel mortiser

Setting up hollow chisel mortiser

Pretty straight forward but I’ll share how I set the mortiser up.  The cut needs to be centered exactly in the width of the board.  It is a 3/8″ thick mortise with a haunch and about 2 1/2″ wide.  Using a piece of scrap I mark and set the mortising chisel to the center of the board.  After making a test cut, use a caliper to measure the wall thickness on either side of the mortise.  Once they’re the same you’re centered.  Lucked out today and only needed to make a couple of cuts to get it right.  Once it’s set the table is locked and I make sure not to turn that wheel while cutting.  I’ve also found that using a set up block like the one on the table is a great way to square the bit to the fence.  There’s more surface area on the block to line things up with compared to using a try-square.  Next up, measuring very careful and cutting/fitting the tenons for the rest of the base.

Posted in HDTV Stand | Tagged , , , , , | Leave a comment

Drawer Frames, Webs, and Sliding Doors — Oh My!

At the onset I knew this project would have its share of challenges but that’s what it’s all about!  I wanted to use techniques that I hadn’t used a lot before in other my work.  Making a cabinet of this size with solid material changes the construction techniques.  One another challenge was figuring out the sequence of assembly.  After several “dry runs” this seemed to be my best course of action.

The sliding, bare faced dovetail used on the shelf was the first thing to consider.  I found it was easiest to slide the side down onto the tail portion of the shelf.  I then used a block of wood about 3″ long hold the side up so that glue could be spread inside the socket.  This way the front edge of the shelf will be glued flush with the front of the sides but still be able to move within the socket to adjust for humidity changes.  The other piece to be glued during the first phase was the bottom stretcher with the front, drawer web already glued in place.

After that assembly was unclamped making the drawer frame/web was next.  I decided to use Alder for my secondary wood since I had some of it on hand plus a partial sheet of 1/4″ plywood left from another project.  The plywood will be used for the dust panels and the back of the case.  Just as with the front stretcher, the back stretcher has the rear drawer web glued in place.  The web is tongue and groove construction and since it’s completely held captive inside of the case and it needs to be able to move, only a spot or two of  glue was applied to the center pieces that will have the drawer guides attached.

In the pictures you can see how the side of the cabinet has a shallow 1/4″ dado for the web to sit in.  The dust panels were also shellacked prior to assembly.  So now the dust panel, drawer frame/web, and also the top rear stretcher are glued up.

Last detail on the case was to add the drawer guides between the three drawers.  The sides of the cabinet will be the outer guides but the inner guides were added afterwards.  I used a piece of Alder that is the same thickness as the dovetailed in, drawer dividers.  After planing them to match the dividers they were installed with screws only.  They are screwed through the bottom of the drawer frame and were a bit tricky to hold squarely in position so clamping it in place helped a lot.  I had considered glueing them but decided that just in case things didn’t work out the way I visualize it in my mind, I better be able to change them!

With the assembled unit sitting on top of the workbench I just couldn’t help myself!  Earlier I discussed my design considerations to access the electronics.  Since everything is controlled by remotes these days your options are:

  1. Open shelves
  2. Glass doors
  3. Solid doors with some type of relay system $$$

Since neither of those options appealed to me I investigated the possibility of using sliding doors.  If you’ve ever seen the plastic track that’s available for them it’s quite ugly!  I found an article in Fine Woodworking (Sept/Oct. 2004) written by Seth Janofsky showing how to make your own sliding door track.  I decided to go on faith and build follow the plans without making any type of mock up and you know what —- it works and I’m so happy!

I just had to make a mock up door out of some MDF and it works great.  The actual doors will be made out of a piece of Big Leaf Maple and should be stunning.  The concept is that the door slides on a very small portion of the bottom edge without bottoming out in the track.  I’ll do a more detailed post on it when I get to that part of the project.  I have my choice on where to go next; the pedestal base, the drawers, the sliding doors, or the top.  I do need to build up my inventory on the Etsy store and not get so obsessed with this project but it’s keeping me engaged for sure!


Posted in HDTV Stand | Tagged , , , , , , | 4 Comments

Dovetails in Sapele — Tough, Fibrous Wood For Sure!

HDTV Stand

Sketch of HDTV Stand

I’ve been working and experimenting with the cutting of dovetails in this Sapele that I’m using for the HDTV stand.  Although I’ve cut a fair share of dovetails, this material is proving to be a tough one to work.  Refer to the sketch at the left and there are dovetails on the dividers between the drawers and also on the bottom stretcher.  It dawned on me that besides the interlocking grain and generally fibrous nature of the Sapele I’m also cutting the sockets into edge grain which adds to the difficulty.  Usually, dovetails are cut into the end grain of the board which, as a general rule, reacts better to chisel work.

Honing my chisels

Honing my chisels

For starters I decided to make the work as easy as possible by first honing the chisels with an 8,000 grit water stone.  Only the micro edge of the bevel was touched up along with polishing the back.  My method of cutting details is to do the tails first.  The drawer dividers were the first to be cut this morning.  Cutting the tails wasn’t much of a problem since these are cut in end grain, it’s the sockets that present a challenge dud to the nature of the Sapele.

To match the barefaced dovetail used on the upper shelf, these needed to be cut at a 14 degree angle.  The joint for the upper shelf is a sliding one so I felt the need to use a router bit on that.  Once these were cut they were checked and squared up as needed.  If your shoulders and sides aren’t square it’ll be almost impossible to achieve a good joint.

After carefully laying out the location of the drawer dividers work began on the sockets.  The two outer drawers are 13 1/4″ wide and the center one will be slightly wider.  Hard to divide 40″ equally into 3 parts!  Even after several practice dovetails I was very careful to saw to the line and mark out accurately.  This Sapele (have I mentioned it’s tough to work?) wants to split at the slightest provocation.  Being from Holland makes me a Dutchman and I must admit there are a few in this work!  Don’t know if you can see it or not, but one of the sockets ended up right in the middle of a swirl of contrasting grain.

I found that for this work the Stanley #271, small router plane is great to set the depth of the socket.  Although this is rather unorthodox, it really works well.  Since you’re cutting with the grain a marking knife or gauge line is hard to see.  The router plane leaves a thicker line that is easy to follow when marking with the grain.  It’s set just shy of the required depth so that I can fine tune it with a chisel.

I have a friend by the name of Bill who asked me whether my work would be completed quicker if I didn’t take the time to photograph the progress and yes Bill — it would but then I couldn’t share my trials and tribulations with the world.  Now that one is done I’m hunkering down and working on the rest!

I do want to acknowledge a tool maker.  He is Robert Zajicek and he makes beautiful woodworking tools.  Here is a LINK to his website.  Whenever possible I prefer to buy from small shops and especially avoid big box stores and all of the Chinese imported junk.   Since I’m a very small business that appreciates people seeking me out I like to do the same.  Recently I ordered one of his quality marking knives, the Kerf Cadet II and although it works great in most woods this Sapele hasn’t cut as well.  I emailed him this morning and he responded within a few hours.  He mentioned that Sapele is a tough wood to work and suggested I re-hone the knife on a fine stone which I did at the same time the chisels were honed.  The point is, try getting that kind of response from your local Big Box store or internet purchase from China!  I’ll gladly pay a little bit more for a quality product and real customer service.  Here’s a few of the lay-out work:

It’s difficult to really see the lines but at least they are visible.  I use the trick of sharpening a pencil to a sharp point with a chisel to fill in the scribed line and even with my eyesight, I can see to cut sockets.

Posted in Hand Cut Dovetails, HDTV Stand, Tutorial | Tagged , , , | 1 Comment