Integral Dust Check

A feature I like to add to boxes is a dust check.  Essential for an unhinged box like this prototype and an added feature on a hinged one.  Just as the name implies; a dust check prevents dust from getting into the box!  I use the term “dust check” but it’s also referred to as a rabbeted lid.  The easiest way to picture it is a like a step that locks the lid and box together.  Quite a while ago, Fine Woodworking Magazine had an article on this method which I’ve used on several boxes; let me show you how it’s done.

Dado cut inside box, dust check material in foreground

Dado cut inside box, dust check material in foreground

The process begins before you assemble the box.  You’ll need to locate where the two separate and cut a 3/4″ wide dado that is roughly centered on the separation.  The depth of this will be determined by the thickness of the material you use for the dust check.  I make that first, generally about  1/8″ – 3/16″ thick with a radiused edge.


Cleaning up separation cut

Cleaning up separation cut

After assembling the box, separate the two pieces.  I use my tablesaw cutting completely through on two sides then lowering the blade to leave a thin section of the box intact. That thin section can easily be cut with a utility knife and prevents kickbacks since the cut won’t close up and pinch on the saw blade.


Fitting the dust check

Fitting the dust check


Next up is mitering the dust check and gluing it in place.  Remember that the radiused edge goes to the outside of the box.


All that remains is gluing everything into place.  Thanks goodness Harbor Freight has these little spring clamps at a good price!  Although this goes against my philosophy of buying American made but sometimes the wallet has to win out!

All that remains is to sand, stain, and finish this box.  It may take some fine tuning to achieve a good fit but that’s easily attained by sanding the mating surfaces.  If you’re familiar with the process involved with rabbeting the box and lid to fit you’ll appreciate this technique.  It still requires some planing and careful measurements but the results are worth it.

Posted in Splined Miter Plywood, Tutorial | Tagged , , , | Leave a comment

Lidded Plywood Box — Project in Progress

I’ve been in correspondence with an arts center that specializes in ceramics.  What they have in mind are foam lined boxes used to display, ship, and protect some of their finer pieces.  Thankfully, they would be responsible for the foam inserts since I know how labor intensive it can be fitting items into boxes.  My work creating the  pistol cases showed me that.  In those, the pistol is fit into a wooden panel and is supported by a layer of foam and deer hide.  So, on this project my responsibility is focused on making the boxes of specific sizes.

I prefer using solid wood rather than plywood  but the size of some of the items would make that difficult and quite expensive.  Can’t deny that it’s much easier and cost efficient to make a 6″ deep by 14″ square box out of a cabinet grade plywood than gluing up panels to make it from solid material.  Another huge plus is that with plywood you don’t need to be concerned with the seasonal changes and movement of wood. The disadvantage to plywoods is their extremely thin outer veneer on today’s products.  I’ve been working with wood since the 60’s and have seen how much thinner the show face is on a piece of plywood.  Nowadays it’s paper thin; it used to be at least 1/16″ or more.  Well, just need to be extra careful when working on this project.  I’m making this prototype for them out of some Red Oak plywood that I had on hand but we may go to a Maple for less pronounced grain.  These will need to be stained and then top coated with a polyurethane so they can be handled.

Exact 45 degrees angle is crucial

Exact 45 degrees angle is crucial

Much of the initial work will be done with machinery.  The first thing is to make sure the tablesaw blade is set at exactly 45 degrees and opposite pieces are the same exact size.  I purchased a CMT, 80 tooth blade especially for this project.  It comes highly rated and I need to get the cleanest cuts possible on the plywood.  By using a miter sled and stop blocks the pieces will be cut to size as required.


It’s a pretty straight forward process I’ll illustrate with this slide show:

This slideshow requires JavaScript.

Just an aside, did you happen to notice the miter square in the first photo?  I’ve always wanted a small one to use when making  boxes and fitting small moldings.  The large, 12″ combo square I have is too awkward and the small sized sliding bevel square tends to change and the body gets in the way when drawing a line.  Mitered lines don’t need the precision of a knife edge so I thought a wooden one would work out.  Priced some and couldn’t really justify buying something I thought I could make so made this one from some Canarywood, Purpleheart, and Birch for the tongue.   Check it out!

AssembledAfter  the box is assembled I’ll need to radius the corners and then comes the tricky part — separating the lid from the bottom.  In my next post I’ll demonstrate how to make an integral dust check by dadoing out the inside of the box before assembly.  The weather has really cooperated with me on this one!  Glue ups are always stressful and doing 4 corners, splines, and top and bottom is a lot of glue to spread.  The temps have been in the mid 80’s giving me plenty of time to get it all done.  On a box of this size I’ll use packing tape to begin the process and then add some band clamps as a final step.  The top and bottom are attached and clamped to dry overnight.  Here’s a shot of the piece clamped and waiting for the next steps!

Posted in Splined Miter Plywood, Tutorial | Tagged , , , , , , | Leave a comment

Juried In !!!

DesigninWood-WoodworksbyJohn-FrontViewI received an email from  the San Diego County Fair the other day telling me that the HDTV stand was accepted into the Design in Wood competition.  Wow is all I can say to that!  The Design in Wood is sponsored by the San Diego Fine Woodworkers Association and this is the 33rd. annual show.  It is held in conjunction with the San Diego County Fair.  According to the literature, this is one of the largest woodworking events on the west coast so, needless to say; I feel honored to just have my work juried in.

There are many categories and prizes awarded at this show but just having my work juried into it by fellow woodworkers is enough for me.  Not sure how many entries they receive for the show but there’s only so much floor space in the exhibit hall.  It is possible to sell through this as well; something Diane hopes doesn’t happen but I’d be fine with it. I think I learned a lot from the mistakes made along the way and would be happy to build this project again.

DesigninWood-WoodworksbyJohn-SideView


Application to the show required the submission of  three photographs. One of them is the photo at the top of this blog.   To show the sliding door and drawer details, this photograph was submitted.


DesigninWood-WoodworksbyJohn-Details


The final photo I choose was this one.  In it I hoped to illustrate how the dovetail theme was carried on through-out the piece.  The shelf and bottom stretcher are joined to the sides with dovetails as are the drawer dividers.  The theme was continued with the pulls made of Birdseye Maple.


The fair and shows opening day is June 6th. and it closes on July 7th.  I’ll need to deliver the piece to the fairgrounds on the 29th. of this month which makes for a good road trip; I enjoy driving.  My ex brother-in-law will meet me there and help me unload the cabinet and then we’ll have lunch together before I head back to Las Vegas.  I’m looking forward to having this cabinet exhibited and getting some time to catch up with Lee in San Diego.  It’s a good five hour trip one way and will make for a nice weekend get away  for Diane and I to go to the show opening.

Posted in HDTV Stand | Tagged , , , , | 6 Comments

Why I Like Old Brown Glue

Glue technology has come a long way from the days where you’d have to keep a glue pot warm in the shop.  That was the first thing you probably did — “put on the glue” so that it was ready for use during the day.  Then came the PVA glues and things became easier, just so the bottle was at room temperature it was ready as soon as you took it off the shelf.  For the majority of cabinet and furniture work PVA glues are great, however; some applications call for a different strategy.  One example is bent laminations, for that I prefer a plastic resorcinol glue that requires mixing but won’t creep like the PVA glue will.

Screen Shot 2014-05-13 at 4.55.50 PM
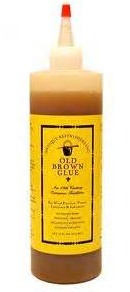
For construction involving dovetails, finger joints, and splines I’ve found that you just can’t beat the properties of liquid hide glue.  Now that it’s available pre-mixed you don’t have to heat and mix it in your glue pot.  There are a couple of products on the market, notably one by Titebond and another called Old Brown Glue.  I’ve used both but really prefer the Old Brown Glue for a couple of reasons.  First and foremost, it’s made in the USA by a man named Patrick Edwards.  That kind of goes with my philosophy of buying local, buying USA, and supporting smaller craftsman such as myself.  It’s probably why prefer to shop on ETSY rather than a large chain store.  I’ve actually written emails with questions about the glue to Patrick and received  a response within a day’s time.

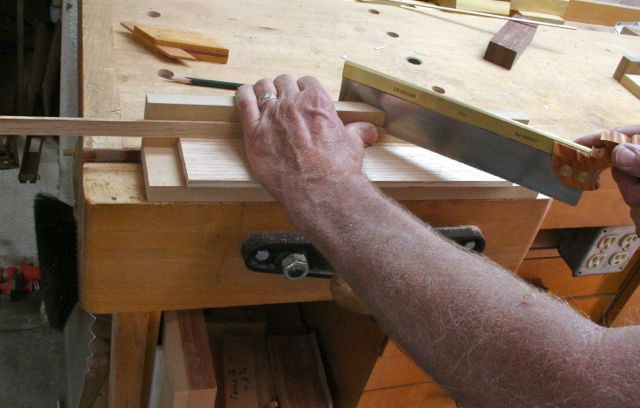
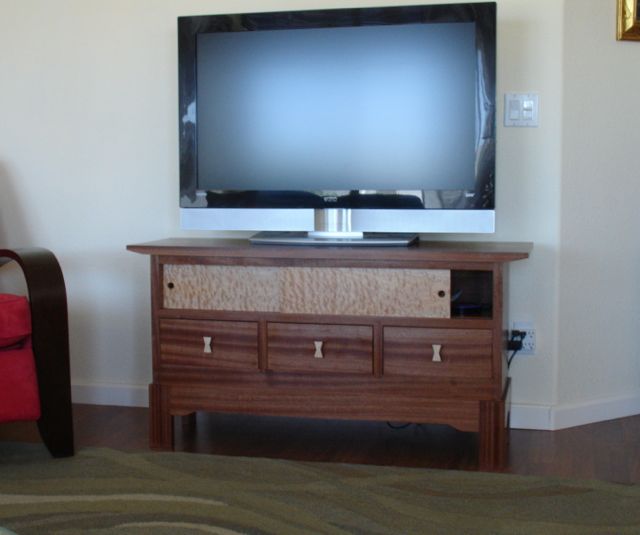
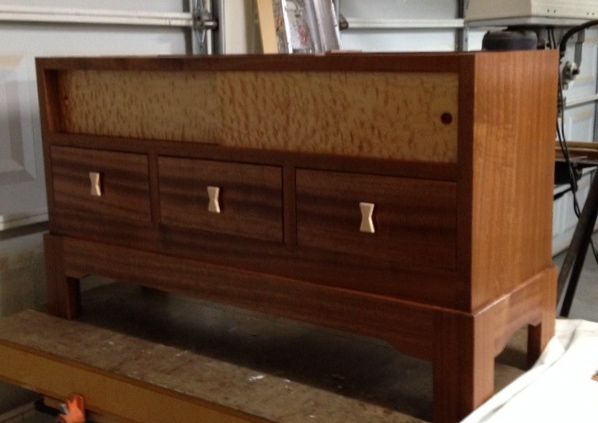
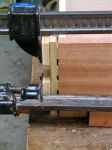
In any case, what prompted me to write this blog and Ode to liquid hide glue is a prototype box design I’m working on plus a fellow woodworking friend of mine ran into some difficulties on a splined, mitered corner box she was making.  This was mentioned on her Facebook and being the retired teacher-dude that I am I saw the need for writing this.  She mentioned what a devil of a time she had assembling that box because the PVA glue has a tendency to swell the wood fibers — this makes bringing the corners together once the glue is applied very difficult to say the least!  Liquid hide glue does not cause the wood fibers to swell.  That’s a huge plus for that application and also doing a finger jointed box.  Maybe you’ve attempted that and the joints that went together nicely during your dry fit needed a mallet and some choice words to go together once the PVA was applied.  Compared to most PVA glues, liquid hide has a much longer open time too.  The only preparation modern hide glue requires is to warm it up prior to use.  I use an insulated coffee cup filled with hot tap water.  The last disadvantage to liquid hide I can think of is a shelf life of about 6 months which can be extended by storing it in the refrigerator.  I generally buy the smallest quantity to avoid waste.

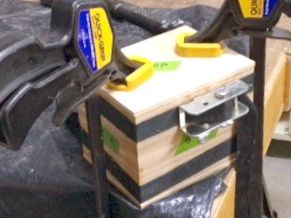
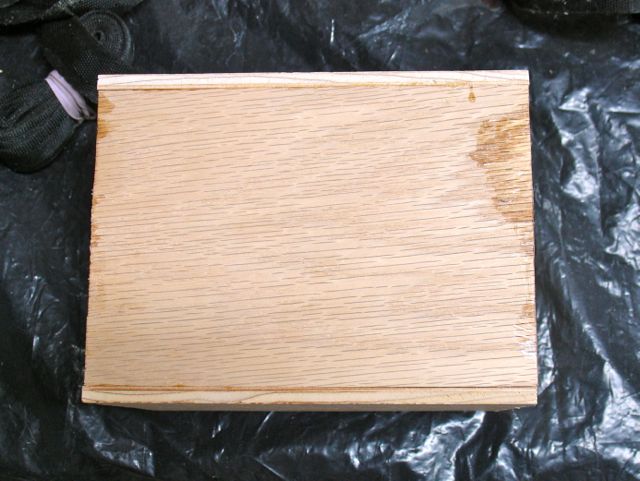
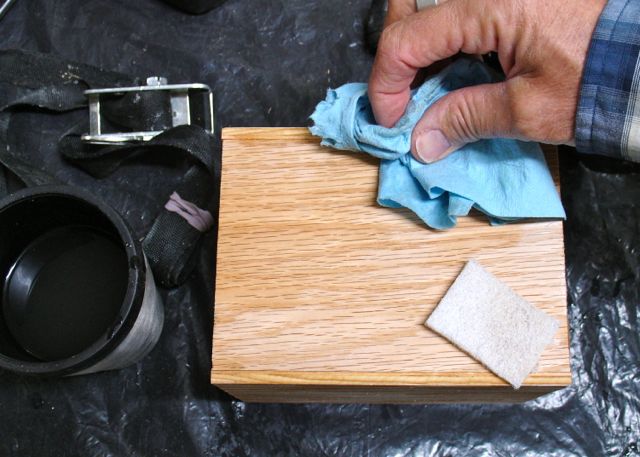
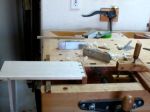
The prototype boxes I’m currently working on for a ceramic arts collective will be made of plywood and probably require staining.  If you’re familiar with my work you’ll know I don’t stain as a general rule but this will be one of those exceptions.  Among the reasons I don’t like staining is the fact that if you get glue on the surface, that part won’t accept the stain.  This was one of the main reasons I wanted to make a prototype.  The boxes in question will probably be made of 1/2″ Maple plywood.  I had some 1/2″ Oak on hand so that’s what I used.  The box was assembled by first securing the sides with packing tape and then adding a band clamp but I made no attempt to wipe off any excess glue squeeze out:

OaK Ply box -- glued up

OaK Ply box — glued up

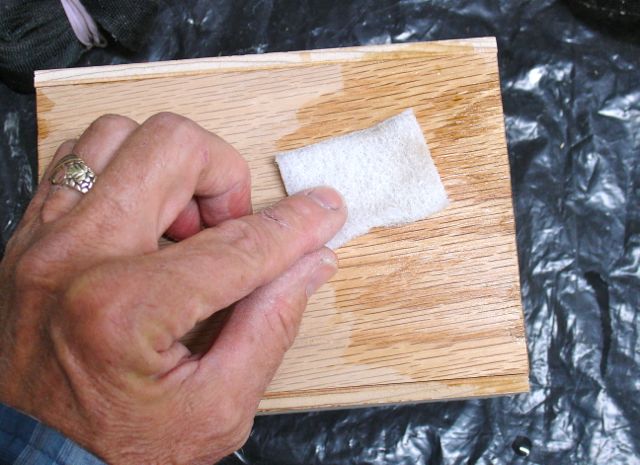
The glue spot is pretty evident on the upper, right hand corner.  Next, I took a white scotch pad, dipped it in clean water and proceeded to scrub away at the glue.  The water was replenished every time the surface got gummy:

Scrubbing away the glue

Scrubbing away the glue

Once all of the gummy stuff was gone, a shop towel wiped the surface dry:

Drying the surface

Drying the surface

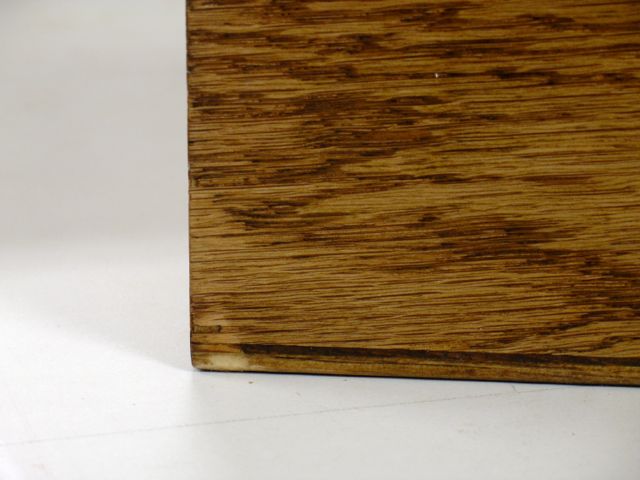
The box was stained with a Minwax Early American stain once it was thoroughly dry.  This was top coated with a wipe on poly the next day and here’s the result.

Stained with one coat of wipe on poly

Stained with one coat of wipe on poly

CA glue rejected stain!

CA glue rejected stain!

As you can see, there is no evidence of glue staining where excess glue squeezed out of the joints.  By comparison this picture shows a little section I attempted to repair with CA glue.  The plywood was pretty brittle and a small sliver developed on the corner.  I gave it a squirt of the CA glue to hold it in place and that rejected the stain!

If you’ve never tried Old Brown Glue I’d encourage you to go on line and order a small bottle of it.  The link I gave at the beginning of this blog has all of the usual FAQ’s plus video’s of the product being used.  You just may find it’s the answer to any hassles you may have had gluing up finger joints, dovetails, and splined miters in your work.  When you consider the longer open time and ease of clean up with it there are a lot of advantages over PVA glues.

Posted in Splined Miter Plywood | Tagged , , , , , , | 4 Comments

Two Fingered Typist Blog!

DSC02638Well, I suppose I should explain that strange sounding title to you.  Now that the HDTV cabinet is complete I decided it was time to delve into some less intense work. I don’t know about the rest of you but when I get into a project I’ll eat, sleep, dream, and pretty much do nothing else — in other words; I get pretty intense on things.  That probably explains my running addiction of 4 decades that began with 10k’s and ended with 100 milers!  I wanted to spread my time around more than one project.  Before I get into those, this picture explains the title of this post.  During the lighting upgrades of Diane’s’ studio (one of my projects) I needed to drill a hole into a metal junction box on the drill press.  I suppose (NO, now I know!) the clamp wasn’t positioned quite right because the box broke free and spun into the nearest digit when the bit exited the other side.  After an hour or so of direct pressure, elevation, etc. I wasn’t able to stop the bleeding so off to QuickCare I went.  Four stitches later and we’re home again.  I did manage to work on Friday and completed the installation but will hold off until the stitches are removed to paint the area the old, flourescent fixture was.  Now Diane has wonderful light with very little shadows as these pictures show.  Pretty amazing, the expected life span of these bulbs is 22.8 years based on average 3 hour daily use.


Egg to ManBefore that episode there was some experimental carving.  Carving isn’t quite as intense; as the guys in the carving club say: “it’s only wood”.  One of the guys, Randy, who is an accomplished carver; showed me how he put a stocking cap and face on his egg so I followed his lead and came up with this little character — fun!


In the meantime another project to tackle was adding boxes to my inventory on Etsy Store.  There’s a series of boxes I’ve named Slanted Dovetails because of the construction technique.  Combining a piece of Brazilian Satinwood with some Black Limba should be a nice contrast.  One of the boxes (if all goes according to plan) will be called the Pear Box, the other the Yin/Yan Box.  I was able to start on them before my accident so here’s a little pictorial.

Anxious to see how these will develop.  By using the tenoning jig it’s probably the safest way to cut a shoulder on the box sides.  This is a technique used that will result in clean corners on the inside of a box or drawer.  The Stanley 140 is a skewed, rabbet block plane that was initially used to remove the material.  Not having a pair of them, this is what I use instead.  The box sides are already grooved for the bottom so after tracing the shape of the end pieces the tails can be visualized and laid out.  They are then roughly cut to shape to make cutting the tails easier.  Notice the tweezers?  Satinwood gives many fine splinters which makes me question the name of Satinwood!

During this time I also had an inquiry from the website regarding presentation boxes for a ceramics studio in California.  We’re close to the final design and I was concerned that I wouldn’t heal up soon enough to meet their time frame.  Thankfully, there is no big rush on them so these will probably be similar to this Black Dyed Box done previously.  These are made of quality plywood and feature an integral dust stop and lift off lid.  I also received this inquiry from the website but think it may be fictitious or at least a spam:

Talk to me about your project.: I am Mr.Paul and would like to order(Furniture) and what would be the price for each unit so that i can Quote you with the Quantity i want to order.. Also what type of payment do you accept, Thank you and reply
ASAP

Would you agree?

Posted in Home Remodel, Slanted Dovetail Box, Uncategorized | Tagged , , , , , , | 3 Comments

In the House — Diane is Happy!! (me too)


Woodworks by John: HDTV Stand

Woodworks by John: HDTV Stands

It seems as if this project has taken a long time but I was never in a huge rush to complete it, rather; I wanted to enjoy the process and learn as much as I possibly could from it.  And learn I did!  These particular pieces of Sapele proved to be quite difficult to work.  Cutting the dovetails was challenging due to the interlocked and sinewy grain.  All the surfaces were hand planed, the only abrasives used was some 600-1000 grit paper to rub out the shellac finish.  There is evidence of some tear out in a few places but knowing that we tend to be our own worst critics and being satisfied that I gave it my all I’m going to live with that.  The Big Leaf Maple on the sliding doors was easier to work with than I thought and they came out beautifully.

Access for Control Box

Access for Control Box

The piece fits exactly where intended but Diane mentioned that the chair needs to be re-positioned a bit but no big deal.  My main goal was to have a central place for our limited media.  You may recall I didn’t want the control box and DVD player on open shelves or behind glass doors — they need to be hidden!  In this picture you can see how little the door needs to be slid open to access the control box.

As far as the over-all design I think the upsweep on the edge of the top gives it an Asian feel.  The Sapele, although difficult to work, has some beautiful grain patterns that flow across the drawer fronts.  Hard to photograph the top but the grain mimics the drawers with a bit of swirl on the front edge to add even more interest.  At 26 1/2″ high, the televisions viewing height is just right.  Ideally I’d love to make a cabinet that incorporates a  TV lift but having done one for a client I know the price of a quality lift is just not in our budget!

So, what’s next?  Until the next paying commission I’ll probably work on some new box designs for the Etsy store.  This seems to be a fairly slow time there so it’ll give me a chance to build up inventory.  Diane’s studio is due for a lighting make over too.  Ever since I did the recessed LED lighting in our kitchen it’s been a strong contender for the studio.  Time to get rid of the fluorescent fixture, upgrade, and save on energy costs there as well.

Hope you ( my WordPress followers) have enjoyed watching this cabinet come to life and I appreciate your comments and interest along the way.  Actual work time was roughly 90 hours but in my opinion, my time couldn’t have been spent in any better way.

Posted in HDTV Stand, Uncategorized | Tagged , , | 2 Comments

So Close I Can Almost Taste It!!

85+ Hours and a few to go!

85+ Hours and a few to go!

You wouldn’t believe how happy I am to be at this stage.  The top is completely roughed out and now that I see it laying on the rest of the cabinet my vision and sketches have come to life — great!

I knew going into this project that there would be challenges.  Working with these particular boards of Sapele proved to be one of the biggest.  In my opinion, the ribbon grain and coloration are beautiful and the platinum shellac shows it to its best advantage. Planing the interlocked grain and cutting dovetails in it was tough.  The top consists of two boards and there was a considerable amount of winding after they were glued up.  Flattening began with the scrub plane and progressed to jack and jointer. I did some work with the smooth plane just to see what I’d be up against but wanted to get it to the stage you see in the picture before final work was done.

Once the board was prepared it was time to cut it to size.  The width is 15 3/4″ and the length is 50 1/2″ which allows for a 3″ overhang on each side.

That’s done so it’s time to taper the ends.  After placing some green tape on it I began to draw in different angles.  My neighbors stopped by to see what I was up to and she really admired the pulls calling them “bow-ties”.  I mentioned that they were supposed to mimic the 14 degree angle of the dovetails so she suggested tapering the ends at that same angle — problem solved; thanks Ann!  Now to figure out how to go about accomplishing that.

Being a hand tool aficionado  my first thought was to hand plance them completely.  After some experimentation on the cut off piece I realized that the grain would fight me every step of the way.  Too large to try beveling or tapering it on the bandsaw so after experimenting on the cut off I came up with this method using a router and a 1/2″ straight bit.  After drawing the bevel on the edge plus the starting and ending point of the taper, successive cuts of about 3/16″ were taken from each end.  To simplify holding the board it was clamped to the tablesaw rip fence.  Now I could get to it from both sides.  After the initial roughing out work with the router I needed to see what I was working to and that’s the purpose of the green tape.  I found that it easier and more controllable to plane across the grain.  Once it was close to the lines, the jack plane finished it off nicely.

Next week will find me doing the final smooth work and finishing —-

Happy Easter to All of  You — John

Posted in HDTV Stand | Tagged , , , , , , , , | 5 Comments

Psst, wanna see a topless cabinet?

Topless HDTV Cabinet

Topless HDTV Cabinet

The excitement continues as the cabinet is really starting to take shape and I must admit I’m very pleased with the outcome.  This has been quite a challenge and I continue to learn from this project.  To me, the motivation and interest in building things is as much about the process as it is with the final results.  I’ve kept track of my time on this project since that’s something that usually comes up when someone sees work like this.  Not counting the design time and “mental pondering” there are somewhere around 75 hours of actual work time on this so far.

Time required to make furniture (or anything for that matter) is hard to explain to those not familiar with the process.  For example, my wife is an outstanding seamstress and artist.  If I thought of making something like a skirt, I’d think just take two pieces of material, sew them together, add a waistband and a button and you’re done — right!!  The steps needed to create things from scratch are numerous.  With the mindset of consumers keyed in to Ikea, Macy’s or Target level of goods what we do as custom makers is hard to comprehend.

Top Mounting Blocks

Top Mounting Blocks

To illustrate that, here are the pieces needed to attach the top to the cabinet.  The top will be anchored to the front to maintain that reveal but since it’s solid wood a way for it to move seasonally is needed to prevent it from splitting.  Although this photo is kind of distorted I think you can see what I’m talking about.  The mounting blocks are attached with screws to the cabinets sides and back. Note the slot in each one, they run from front to back since any wood movement will be across the the face of the top.  I suppose a kerf could have been made in the sides to use metal clips similar to those in this LINK but I decided to stay more traditional.

Top Mounting Blocks

Top Mounting Blocks

Here are the blocks, they take a good amount of time to fabricate.  First of all a recess is drilled to accommodate the head of the attaching screw.  I’m using drawer front screws which have a large, washer style head.  Then, an oversized slot needed to be centered in that recess so the screw can move freely.  Next up is drilling the hole for mounting — actually two holes; the pilot and the counterbore to recess the screw into the block.  Finally, all surfaces were block planed smooth before attaching them to the cabinet.  Time consuming — yes; but so worthwhile in my opinion!

WoodworksbyJohn-HDTVStand-Dovetails-relationship-1The design concept of this piece was the use of dovetails through-out.  That’s the unifying detail.  The pulls were based on that design element and here you can see how it all works together.  Obviously the pull is shaped like a dovetail, then the drawer dividers is dovetailed into the shelf and bottom stretcher.  That stretcher is joined to the side with twin dovetails.  I think one of the more challenging aspects was hand cutting these joints into the Sapele!  It’s beautiful in my opinion but the interlocked grain was difficult to work with chisels but that’s okay, just adds to the challenge.

WoodworksbyJohn-HDTVStand-TopAttachmentBlocks-3


The entire case and drawers are finished with shellac which was padded on;  somewhere in the neighborhood of 6-8 coats.  Once that was cured, mineral oil and 800 grit wet/dry paper was used to rub everything out and a final coat of Liberon Black Bison wax was applied with a white abrasive pad.  My wife keeps wanting to know when this can be brought in and put to use, soon as I finish the top.  This promises to be a good arm and shoulder work out!  As luck would have it, it has twisted ever so slightly so will require a bit of work with the scrub plane followed with jointer and smooth.  At 17″ wide it won’t fit in my 15″ planer so I’ll be doing the entire piece by hand.  Guess I better quit pushing keys on the laptop and go to planing!

Posted in HDTV Stand | Tagged , , , , , , | 3 Comments

Hardware = Jewelry for the Cabinet

A few posts ago (here’s a LINK), I allowed myself to get off track and worked on what I thought would be a good pull for this project.  Well, the pull was good but just didn’t fit into the over-all character and design I wanted for this piece.  At the suggestion of my wife I began playing around with a design that would incorporate the dovetail joinery and here’s what developed:

Dovetail inspired, Birdseye Maple Drawer Pulls

Dovetail inspired, Birdseye Maple Drawer Pulls

I thought I’d taken a picture of the beginning stages but if I did they’re floating somewhere out in the electronic world!  I think it’s easy enough to understand if I explain the process.  The pull will be mortised into the drawer front so the over-all thickness needed to be about an inch to begin with.  I had a 1/4″ thick piece of Birdseye Maple that was about an inch wide and 10″ long.  This was first laminated onto a piece of Sapele to give a total thickness of an inch.  Once that was thoroughly dry a dado head was used on the tablesaw to remove most of the Sapele leaving a 1/4″+ wide section centered in the Maple — this is a T-shape.  You can see that piece in the upper left-hand corner of this picture:

Template for Pulls

Template for Pulls

The template is a piece of 1/4″ MDF and the pulls were cut out on the bandsaw, then filed and sanded to final shape.  Here are the four, I know there’s only 3 drawers but just in case!  Ever notice when you make an extra piece for a project you seldom need it but if you don’t have it you will?

Four pulls, One coat of Shellac

Four pulls, One coat of Shellac

Final fitting of Pull

Final fitting of Pull

I chose three of them for the project and fitted them to the drawer front.  A slight dilemma here was the finishing process.  It would be difficult to finish with the pull in place as I’m doing combination brush and padding with the shellac.  My concern was getting shellac in the mortise and on the tenon.  To solve that dilemma I will wait until the shellacking process is done, then trim the mortise/tenon to fit and glue them together before the finish is rubbed out.  After fitting the pull it was marked for the drawer and an arrow to show which direction faces down.  Here I’m using setting the distance from the top of the drawer to the top of the pull (2″).

The tenon was wrapped with tape to keep the shellac off and they are now being finished. Right now they look like the top photo and I’m liking it!

Posted in HDTV Stand | Tagged , , , , | Leave a comment

Fitting Drawers and Such

In my last post you noticed I took a break from the cabinet and played around with carving an egg!  That was a fun break but I knew the drawers weren’t going to assemble and install themselves so that is now almost complete.  It’s really no wonder that most contemporary furniture pieces have metal slides for the drawer systems.  By comparison, they’re a snap to install with their slotted screw holes for easy adjustment.  Make it a box with a separate face to adjust your reveal and you can understand why wooden drawers and guides are so much more expensive unless, of course, it’s found at places like Cost Plus where the drawers barely open!

Drawer Assembly

After the struggle I had with flattening out the drawer sides I knew I needed to pay careful attention to how these go together.  The middle drawer is about 1/4″ wider than the two on the side so that was assembled first.  A piece of 1/4″ plywood was temporarily slid into the drawer during assembly to maintain squareness.  The front corners were mitered off and a cut out at the junction of the sides and back prevented any glue from permanently attaching that plywood piece.  After assembling the middle drawer, that plywood piece was cut to fit the two outer ones.  Once assembled they were planed to size.

Fitting Drawers

Aligning drawer guide

Aligning drawer guide

This was made a bit more difficult due to the nature of the sides, I’ve lamented about them enough so I have to leave it at “it is what it is”!  This was my first attempt at these large sized drawers.  In the past the traditional drawers I’ve done were single ones in a table and much smaller than these 6″ tall by 13″ wide ones.  Rather than using separate runners and kickers for them, this cabinet has a drawer web that is dadoed into the sides. To separate the inner drawers I screwed a piece of Alder to it.  This turned out to be a good decision as I was able to loosen the screws and tap them perfectly square.

Smoothing out the drawer web

Smoothing out the drawer web

Where the panel and frame pieces had a little bit of a discrepancy, a rabbet block plane smoothed out that transition.  Just a side note here, many times my students will ask for tool recommendations and my usual response is to wait until you have the need for a specific tool and then buy the very best quality you can afford.  A quality tool won’t necessarily make you a better woodworker but they do make your work more enjoyable and a bit easier to attain.

Installing drawer stop

Installing drawer stop

It’s been quite a process getting the drawers to what I considered being acceptable.  Are they perfect? —  not quite but I know I’ve given it all that I can to get them as close as possible.  Seasonal changes will affect their look too.  The final step to the installation was making a drawer stop.  What I came up with was a plywood strip, attached with screws through oversized holes.  The drawer was installed and the strip aligned with the back of it.  After marking the holes with a gimlet the holes were pre-drilled.  Sometimes an “old fashioned” method is the best!  The strip was then screwed down snug but loose enough to put the drawer in and move to the desired position.  Once there, the screws were tightened.  Love the gleam on the wood and the backs of the Big Leaf Maple doors!

Drawer fitting complete

Drawer fitting complete

Here’s a shot of all the drawer stops in place.  The back of the cabinet is panel and frame and will be attached with screws.  That way, if needed it can be removed for access to the drawers.  Never know, once the piece is in the house humidity changes may make that something I’ll need to do but I hope not!  Plan to begin the finishing process on the drawers and mortising in the pulls.  Using platinum shellac, rubbed out with mineral oil, then waxed.

Posted in Hand Cut Dovetails, HDTV Stand | Tagged , , , , | 1 Comment