Custom Baseboard — No Problem!

HomeRemodel-CustomBaseboardMolding-5

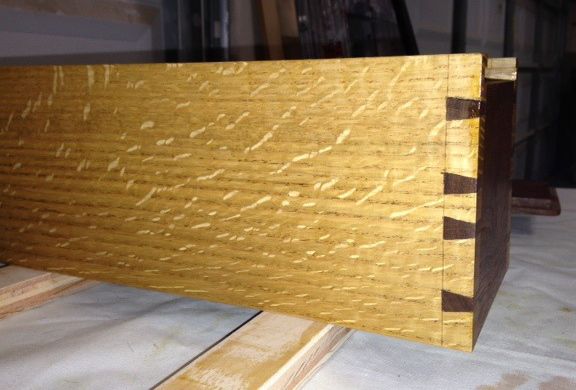
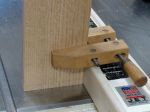
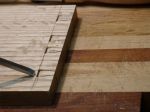
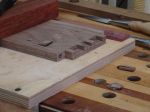
Custom profile on left, original on right.

Since the location of the television is changed from the west wall to the north wall it also meant relocating the cable.  I mentioned that we’ll use an antenna which, combined with Roku satisfies our viewing needs.  It would have been fairly simple to run the coaxial cable behind the new wall but that still left the question of how to bring it the rest of the way to the center of the north wall.  The goal is to not have that ugly coax snaking along the floor!  My first thought was to simply cut a section out of the the drywall, maybe 5″-6″ wide to allow access for a drill and then snake the cable through holes in the studs.  Even though we’re getting a professional guy to texture the drywall it’s still more work and matching the texture pattern would be nearly impossible.  With my anal eye for detail I’m sure it would always go to the patch job so that idea was eliminated.

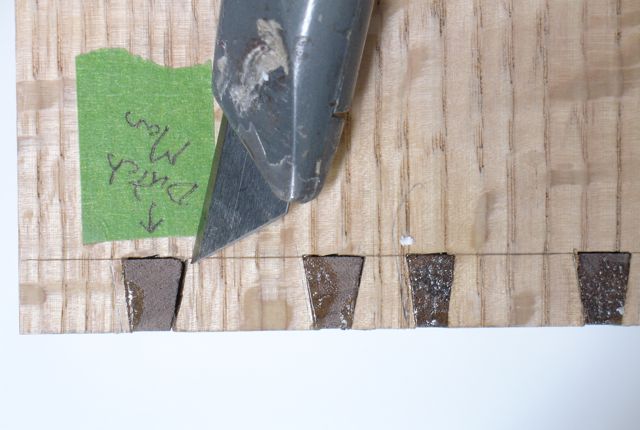
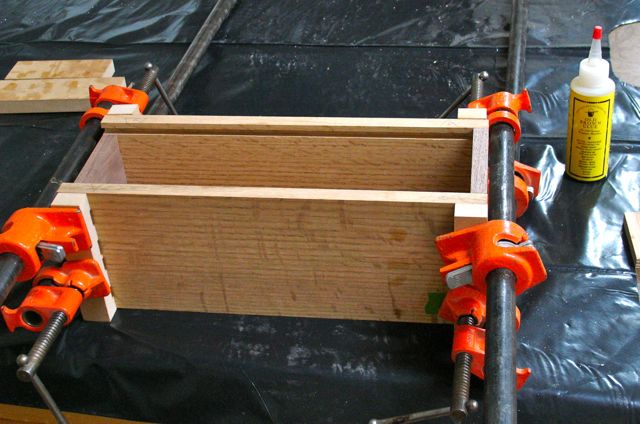
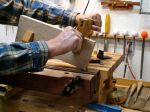
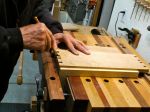
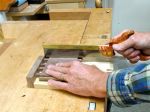
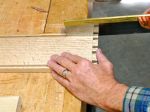
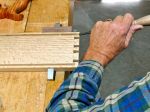
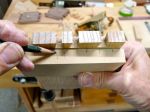
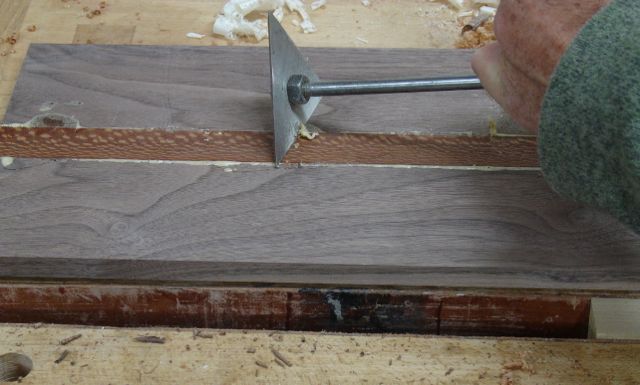
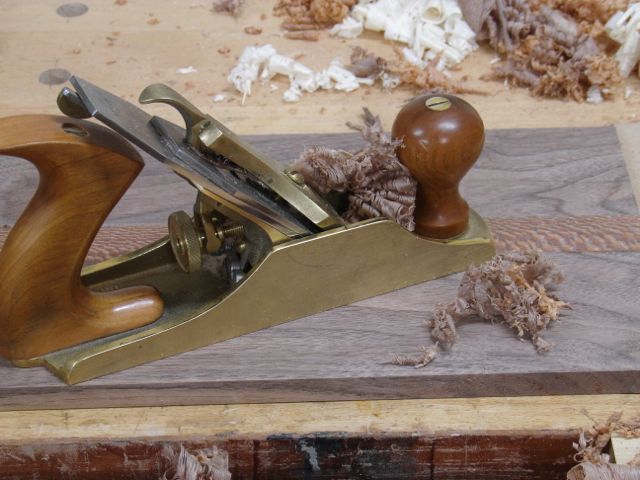
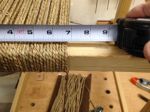
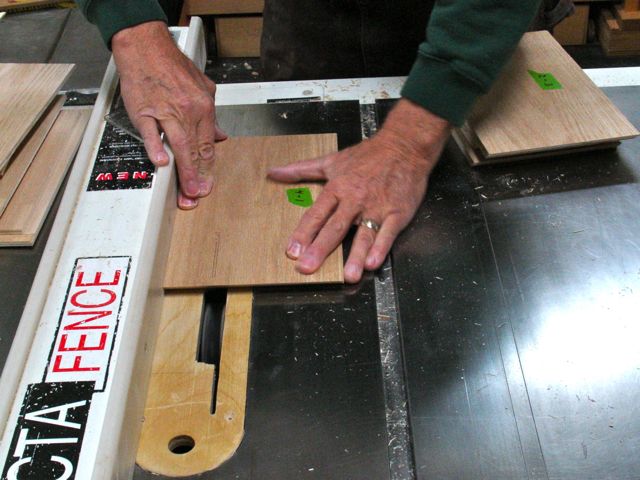
My next thought was to make my own baseboard that has a chase in it for the coax cable.  It began with some 4/4 Poplar ripped to 3 5/16″ wide.  A channel was cut on the back side that is about 3/8″ deep by 3/4″ wide which allows ample room to run the cable.  The profile I cut is as close to the rest of the baseboard as I could get.  Heck, I like hand work so it’ll be an interesting challenge seeing how to cope the two profiles and have them blend.  The kind of hand work I’m not too crazy about is this:

HomeRemodel-CustomBaseboardMolding-1
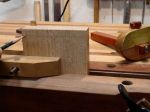
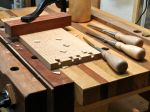
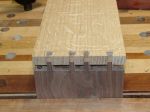
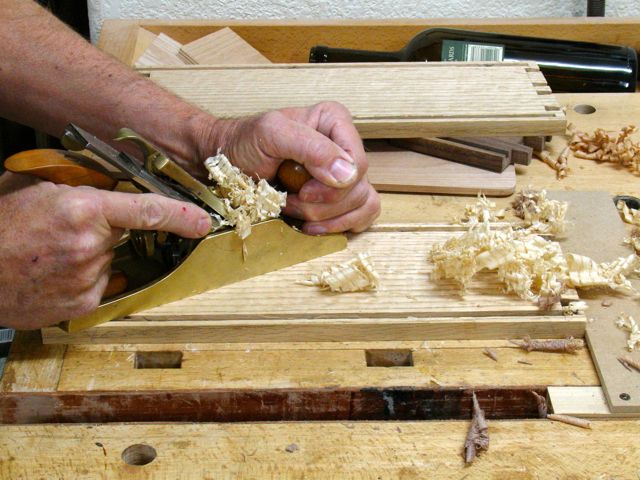
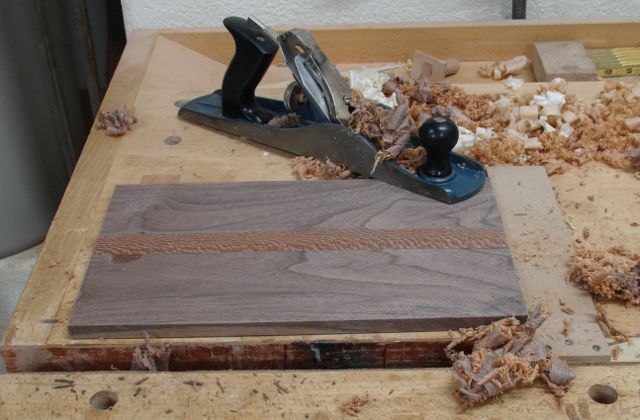
Between the ripping, dadoing, routing, and sanding it makes quite a mess but the easiest way to go about it.  A couple of coats of paint in the morning and it’ll be ready for installation.

!" hole through OSB for cable

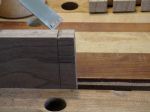
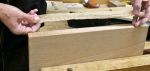
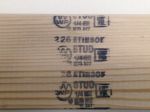
!” hole through OSB for cable

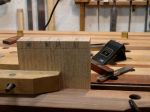
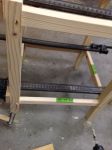
Here’s the plan for running the coaxial cable, first a hole was drilled through the wall just above the sill plate.  When the drywall is applied I’ll just notch it to fit over the hole.  I made it large so the cable doesn’t have to be kinked to bend through it.  I still need to do the same at the location on the north wall for the new cable connection.  Haven’t gotten to that yet.  Here you can see how the baseboard will cover everything.  Obviously, the drywall will be in place, textured and painted before the molding goes on.

Tomorrow will see the baseboard painted and the drywall guy is supposed to come by to bid the job.  There is a little bit of work to be done on the ceiling but essentially there is a 9′ x 11′ area that needs to be rocked, taped, and textured.  I’ll do the painting and finish work once he completes that end of it.  Things are kind of a mess right now but I do have the habit of cleaning up at the end of each day to keep the house livable but how’s that saying go; if you want an omelet you have to crack some eggs?  Something like that, hope that makes sense to you!

Posted in Home Remodel, Uncategorized | Tagged , , , | 2 Comments

Ready for Drywall & Paint

Room Remodel-3At day’s end, I had completely removed the drywall, cleaned out the empties, and was ready to frame things in and cover up my work.  The first thing that needed to be done was to insulate that back wall.  Still can’t get over that it wasn’t done when the house was built.  As Jay mentioned in his comment, the building inspector was pretty lax here!  The handles were removed from the glass doors and the gas was shut off tight.  There is an outlet in the left hand niche that needed to be extended to the new wall.  That was turned into a junction box and a pigtail was brought out to accomplish that.  We’re going to install a HDTV antennae outside so a coaxial cable was run at the lower corner for that.  We’ve cut our cable a while back and use Roku for our TV.  Currently an indoor antennae allows us to get all of the local channels but it’s not the best.  An outdoor mounted one will fill the bill and satisfy our viewing habits.

Next up was framing the openings.  These pictures show the now insulated fireplace hole. The flue was stuffed with as much insulation as I could get up it.

One area that was a bit of a problem is below the firebox.  There wasn’t enough depth for any wood but I was able to run a half dozen big, sheet metal screws through the OSB board and into the bottom of the firebox.  All that remained was to add some framing members to the left hand, upper niche and the wall is complete.  I’ll make our own base board with a channel to conceal the coaxial cable needed for the antenna and have one of Mike’s crew come in to apply the drywall, tape, and texture it.  We’ll paint the walls and probably replace the lighting and the next project on my list will be a new media center.  It’ll be nice to get into the furniture work again rather than construction!

finished

A modern, smooth wall — good bye 90’s!

Posted in Home Remodel | Tagged , , , | Leave a comment

Twice in 18 Years = Get Rid of It!!

Room Remodel-7Here’s a picture of what our family room has looked like for the past 18 years, ever since Diane and I purchased this house new.  Some of you may recall a year or so ago we completely remodeled the kitchen which had that huge, double tiered, radiused cornered light structure as its main feature.  Well, this room has always been somewhat of a problem for furniture arrangement and the moving men are Diane’s friends for sure!  You can see that over the years we’ve added a shelf for stereo and the TV sat below but it can only accommodate about a 30″ flat screen and you know the trend with televisions.  Then there’s the fireplace.  Many years ago the old pink tiles were removed and I updated it with the mosaics you see here but, here’s the thing!  We figure we’ve used this thing twice in 18 years.  It’s not placed well, it costs an enormous amount of $$ for the gas to run it, and then it hardly puts out any heat at all.  For the most part I believe more heat escaped through the flue than we ever gained.

WallProgressOur first thought was to remove the radiused corners and niches, flatten the wall, and try to make the fireplace a more attractive item.  Have you heard the expression “Putting lipstick on a Pig”?  That’s how we felt so, in the end; we decided to board it over completely, why try to enhance something you don’t use? I began work on this project last Monday.  Started by ripping off the drywall along with the radiused corners on the left side of the room thinking that would be the easiest place to see what I would be up against.

Room Remodel-6At days end, all of the drywall and the radiused corners had been removed.  The truck was loaded and ready for a trip to the transfer station in Henderson the next afternoon.  As you can see, the center part above the fireplace is still there.  My thought was that since it was recessed anyway I could simply add some nailers and then drywall over the entire wall.  The more I looked at that the less I thought of that idea.  Most of all, there wasn’t enough supporting members to suit me and the wood was all in pretty bad shape.  Looks like whoever framed it in went nuts with their hammer — yikes, what a mess!

Wednesday I began taking out the drywall above the fireplace and noticed first of all that there wasn’t any insulation behind it and that’s a west facing, exterior wall.  Did I mention we live in the desert and it’s regularly 115+ degrees!  If that wasn’t enough, check out these two pictures.  I thought I smelled some beer back there and here’s the cause of that:

Well, it’s just about days end and all of those empty beer cases tells me it must be close to Wine Time, more tomorrow.

Posted in Home Remodel | Tagged , , , , , | 1 Comment

Dovetails & Dutchmen

Assembled with one coat of  shellac, bottom has Dutchman.

Assembled with one coat of shellac, bottom has Dutchman.

If there is one thing I’ve learned about woodwork it’s that using woodwork and perfection in the same sentence is a rarity!  Let’s face it, wood being a natural material is unpredictable and apt to move on its own whenever it wants to.  Working here in the desert the humidity changes aren’t much of a problem but I recall that at San Francisco State guys would have a wood joint that fit perfectly at the end of the day but in the morning the fog rolled in (with its humidity) and that joint no longer fit.  Here the problem seems to be the other way around, it is so dry the wood tends to shrink a bit and become more brittle.  All this is leading up to a gap in a dovetail on the wine presentation box.

Dovetail-Dutchman-1Having never dovetailed quarter sawn White Oak before I was curious to see how it would work.  I always marvel at woodworkers that can cut a perfectly fit dovetail in mere minutes!  It doesn’t take much to be off your line ever so slightly and have a tiny gap like this one.  It may have been the result of moving the saw away from the line or a little chunk of the tail breaking off due to the character of the wood.  If this were a drawer I might have let it go but since this is in a presentation box it needed to be fixed.

Cutting Dutchman, tablesaw and rip fence.

Cutting Dutchman, tablesaw and rip fence.

I took a small piece of the Walnut and scribed a line of the required thickness.  The way I cut a Dutchman on the tablesaw is probably not OSHA approved but works so remember all of the disclaimers about woodworking being an inherently dangerous activity and pay attention to what you’re doing.  Carefully wrap your hand around the fence and have the blade just barely protrude above the wood.  Guide the wood into the blade, cut about 2″ or so and then turn off the saw.  You can either wait until the blade stops before removing the wood but I prefer to lower the blade as it coasts to a stop to avoid any possibility of a kick back.

Dovetail-Dutchman-3

Dutchman ready to be removed

This is what the piece will look like after you cut it.  Use a chisel or a utility knife to separate it from the rest of the wood.  Now it’s a matter of trial and error.  If you’re lucky your first attempt will fit as it should, if not you’ll need to completely remove the piece and try again.  This fix is called a Dutchman and since I’m Dutch and born in Amsterdam I like the name.  I’m certain that it comes from my heritage of being frugal.  Frugal sounds so much better than being cheap doesn’t it?

Fine tuning the Dutchman with sandpaper

Fine tuning the Dutchman with sandpaper

Once the piece is pretty close to fitting you may need to do some sanding to fine tune it to the gap.  Use liquid hide glue to prevent swelling of the wood which would make it difficult to insert into the gap.  After the glue has set for 10 minutes or so, trim off the excess but leave enough to block plane off flush after the glue is fully cured.

This presentation box is finished with a shellac called Kusmi Button #2.  This product is one of the many shellacs available from Shellac.Net and the top photo gives you an idea of how it will look.  I’m padding it on and used a brush to get into the corners.  All of that will be followed by hand rubbing the shellac out and I’ll post some pictures of that when it’s done.

Posted in Tutorial, Wine Presentation Box | Tagged , , , , , | Leave a comment

First of the Year, First Glue Up!

Welcome to the New Year, 2014.  Although I’m not one to make resolutions (too easy to break) I do have a couple of major projects I’d like to complete this year.  If I share them that will make me accountable so here goes.  First of all, our family room needs to be updated by removing the architectural features of the 90’s.  That TV media niche and bull-nosed corners just doesn’t work anymore.  The plan is to blank off the wall which is more carpentry but then build a unit to hold whatever technology is needed underneath a wall hung flat screen.  My thoughts are for this to be hung from the wall with French Cleats.  Secondly, I’d like to replace my bedroom chest of drawers and Diane’s armoire with two chests based on a design by Thos Moser and possibly make the first one with the hopes of having it accepted into the Design In Wood competition in San Diego.  Last major goal is to do the Summerlin Art Fair again in October.  There; I’ve said it so now I’m going to be held accountable!

HandcutDovetails-Walnut-QuarterSawnWhiteOak-Assy-The current project is a wine presentation box.  You may recall that one of the entries in the 2 x 4 x 8 Challenge was a finger jointed one and I decided I’d like to try one with dovetails.  I glued it up this morning and here’s the picture of it.  Kind of hard to really see what it will look like so you’ll just have to be patient!  More than likely this will be finished with shellac and wax and that will bring out the fleck of the QS White Oak.

Dovetails: Tails First

Cutting dovetails is a subject that is one written about quite a bit.  When teaching it I’ll emphasize that as a woodworker everyone will develop their own style but it’s based on the methods of others that you’ve seen in person, on video, or taken instruction from.  I do tails first 90% of the time.  One main advantage is being able to cut both boards at the same time.  Here’s a pictorial sequence of my method:

Dovetails: Pins

Now that the tails are done it’s time to transfer them to the pin board.  Whenever possible I will leave the board longer than needed just in case of a major goof up.  Kind of like Murphy’s Law.  You know, if you’re making a project and decide to cut an extra piece or two “just in case” you rarely need them but; should you not cut that extra one, it’s for sure you will!  What I did here was to leave the pin board long and cut the pins on both ends.  After they were fit to the tails they were cut to length so that’s why they look way long in some of the pictures.  The box measures 5″ wide by 14″ long.

Final Steps

HandcutDovetails-Walnut-QuarterSawnWhiteOak-Assy-1The majority of this project is hand work.  I like to use this router bit from Lee Valley.  The way it works is that you assemble the box and clamp it if needed.  The bit is put in a table mounted router, mine is 1/2″ above the table.  Now you simply place the box over the bit and cut around the inside.  I’ve found it easier to make the cut in two passes.  Since this box has a sliding lid, both top and bottom was slotted.  The corners of the bottom and lid need to be radiused to compensate for the router bit but this is much easier than cutting stopped dados.

The front of the box needed to be cut away so the lid can slide in and out.  Careful work with a rip saw, block plane, and chisel to finish it off is all that’s required.

HandcutDovetails-Walnut-QuarterSawnWhiteOak-Assy-5Last of all,  the inside surfaces were planed to remove any marks and prepare them for  finish.  Not only does this give the interior of the box a smooth surface it also gives me an idea of how difficult the outside of the box may be to plane after assembly.  Happy to say, the boards planed nicely.


Gluing up dovetails can be somewhat tricky.  If you leave your pins slightly proud, which is a standard practice, it is difficult to get full contact with the clamps.  I find that it’s worth the 10 minutes or so to make some custom cauls.  Using a piece of 3/4″ MDF I first lay out where the tails are.  This piece is the height of the box and about 7″ long.  The material is removed by making multiple passes on the tablesaw with the blade raised about 1/8″.  After all the cuts were made you simply cut the board into 1″ wide pieces.  A quick coat of wax and you’re good to go.

Posted in Hand Cut Dovetails, Hand Planes, Sliding Lid Box, Tutorial, Wine Presentation Box | Leave a comment

Love Hand Planes

WoodworksbyJohn-CustomFurniture-LasVegas-Handplaning-1

Planes & Shavings

One of the processes of wood working I really like is the art of taking a plane and using it to create a smooth and square surface.  There’s something very satisfying to watching that shaving of wood exit the planes throat  and seeing the progress you’ve made right there before your eyes!  Is it time consuming and labor intensive?  yes indeed; but for someone who enjoys the process of the work as much as the final results it’s a welcomed process.

One of the members of  Sin City Woodworkers made a really nice, wine bottle presentation box from a single 2×4  which inspired me to make one of my own.  I’ll be using a piece of quarter sawn white Oak for the sides along with Walnut for the front and back.  My plan is to have a sliding lid of Walnut with a piece of Leopardwood laminated in the center.  The first step to wood preparation is planing.  In Marc Spagnuolo’s new book titled Hybrid Woodworking goes into his philosophy of blending power tools with hand tools to produce his work.  I actually emailed him about the term of hybrid woodworking because it’s one I use in my blog as well.  He was very gracious in his reply and showed me where he’s used it years ago.  My interpretation of hybrid follows his pretty much in that I use the power tools I have as my apprentices, in other words; they perform the grunt work!  There’s a saying we have that if you ask 10 woodworkers the same question you’ll get 12 answers and this concept is no different.  One area he and I differ on is using a jointer to create a square edge and the difference is simple; he has one and I don’t!

So, after creating a flat face on one surface of your board the next step is creating an edge that is smooth and square to it.  For me that means using a jointer plane.  I always enjoy watching my students  eyes light up after they’ve set up their plane blade and created a long, thing shaving.

WoodworksbyJohn-CustomFurniture-LasVegas-Handplaning-6It’s very important that your edges are square and true before you can laminate boards together.  If they aren’t the glue joint will fail — you need to have full contact the entire length of the boards being joined.  Sometimes we create what’s called a spring joint to compensate for moisture and humidity changes but here in the desert that’s usually not an issue.  For laminating I have a set of clamps I picked up many years ago from a cabinet shop that was going out of business.  I love them!  They have no markings or brands on them but they hold the boards flat while the edges are securely clamped.   This is the lid for the future wine presentation box.

The glue of choice for me when I laminate boards is Gorilla Glue.  The Leopardwood is somewhat oily so before glue up it was wiped down with acetone.  After allowing the glue to set up overnight it’s time to prepare the surface.  That begins with scraping the excess glue, this is one thing I like about the Gorilla Glue, the excess foams up and is easy to remove:WoodworksbyJohn-CustomFurniture-LasVegas-Handplaning-7After that, it’s time to plane the boards level.  It’s important to check your grain direction whenever you laminate boards together.  If at all possible the grain should be oriented in the same direction on each board to make planing easier and avoid tear out.  The first plane used is my old Stanley that will soon be on eBay!  This has been my go-to plane since I bought it at the lumberyard I worked at as a teenager in the 60’s!  I love this plane and it’s served me well but Santa has given me some gift certificates to Lee Valley so it’s time to buy one of their junior Jack plane — honestly a tough decision to make.

WoodworksbyJohn-CustomFurniture-LasVegas-Handplaning-8After working both sides with this plane it was time for my favorite plane of all, a Lie-Nielsen bronze smoother.  The Walnut is easy enough to smooth but the Leopardwood with it’s interlocking grain was more of a challenge.  By setting a very tight mouth and a light cut the board is finished as I like.WoodworksbyJohn-CustomFurniture-LasVegas-Handplaning-9

Completed lid

Completed lid

The final work done on this project is squaring the edge of the Oak that will become the sides of the box.

Squaring the edge for the sides.

Squaring the edge for the sides.

I plan to dovetail this project and will use it as a challenge box to see how creative and small I can get with that joinery.  I suppose I’ve put the cart before the horse by doing the lid first but hey, you’ve got to start somewhere!

Posted in Hand Planes, Tutorial, Wine Presentation Box | Tagged , , , , , | 1 Comment

2 x 4 x 8′ Challenge; December 2013 Sin City Woodworkers

I’ve been wanting to blog about this project since starting it several months ago but since the challenge was judged by the members of the Sin City Woodworkers group anonymously had to hold back on that.  We had our annual Christmas party last night so now I can share this project.

JamieChallengeLogoTowards the end of the summer, Jamie Yocono; who is the founder of the club and runs a successful woodworking school here in Las Vegas; issued this challenge.  What can we make with one construction grade 2×4 purchased from our local big box store?  There were 14 entries brought in and mine came in 3rd. based on the judging of the 40+ members in attendance at the party.  The winning entry received a $100.00 gift card to Lee Valley and I’ll be blogging about that when I do the Sin City Newsletter.  My entry was this stool I designed to practice playing my dulcimer on, since I’m so tall I needed a taller than average stool to hold that instrument level across my legs.

2x4x8 Challenge-WoodworksbyJohn-SinCityWoodworkers-StoolI certainly don’t need to go into lots of detail on this but will hit the highlights. The types of projects I enjoy doing are those that challenge me and throw something new into my skill set.  First off, all of these pictures were taken with my iPhone which is a totally new trick for this old dog!  When we were in Kentucky, one of the Appalachian  arts that caught my attention was this style of woven seat so this seemed like the perfect time to attempt it and face the challenge!

Leg Preparation:

Selecting a “choice” piece of material from the pile of crappy 2×4’s available at Home Depot was the first hurdle to overcome.  I did my best to visualize where the knots and defects would fall and still have decent material left to work with.

Since hand planed surfaces is what I prefer, that’s how the roughed out tapers and every other piece of this project was smoothed out.  Quite a difference planing construction grade lumber compared to a nice piece of Walnut or Cherry!

Joinery:

Mortises were cut with the hollow chisel mortiser.  Tenons on the tablesaw but left slightly oversized so they can be fitted using a rabbet block plane.  All mortises are pegged with dowels made from some Chakte Kok which really isn’t all that straight grained and easy to form.

Assembly:

Assembly was pretty straight forward.  The upper stretchers were easy enough to label and keep track of.  I usually mark them with machinists stamps on the tenon and face of the mortise.  Once assembled, these marks disappear.  The bottom stretchers though were too small so were marked with painters tape.  Once pegged, the clamps could be removed.  The Douglas Fir is pretty soft so draw boring wasn’t a real difficult option.  In any case though, clamps were left in place until completely dry.

After finishing with Watco and my three part top coat it was time to begin the weaving.  I buy caning and weaving supplies from Frank’s Cane and Rush Supply  in Huntington Beach, CA.  Always a pleasure doing business with him and he’s quick to answer any questions either on the phone or via email.  The material used is Hong Kong sea grass and a book purchased from Frank’s gave me the guidance I needed.  The title of the book is Making Chair Seats by Ruth B. Comstock.  It gives a fairly good explanation of how to go about weaving chairs with different materials.  It’s one of those things you just have to get in and try!

This is a time consuming process but being someone who enjoys the process of the work as much or more than the end result I enjoyed it — for the most part!  It was a great learning experience and makes you appreciate a woven seat and the work that goes into creating it.  Very comfortable surface to sit on with just the right amount of give and support.  The pattern is determined by trying to separate the warp strands into even groupings.  The question came up several times as to how long it took to complete but since I didn’t keep close track of time my best answer is about 3 days of on and off work on it.

Posted in Uncategorized | Tagged , , , , , , , | 1 Comment

Dyed Box is in the Mail!

DyedBox-InspirationYou may recall the beginnings of this project, a lady found my Etsy store and requested a custom box that was black and made of wood.  The size she requested was 5″ wide by 7″ tall and 11″ long.  Here’s the picture she sent to illustrate what she was after. Well, right off the bat I knew I couldn’t replicate the “bling” on top but she assured me that would be her department — thank goodness!

After several convo’s back and forth to make sure of what she wanted I told her I’d like to make a sample box before committing to her project.  Luckily she wasn’t in a rush for it so that was no problem.  The box is of splined, mitered construction and made of 1/2″ thick, plywood core, Oak plywood.  If you’d like a re-cap of the construction of this box you can search for each post listed in the Splined Miter Plywood category.  The dye I used for this project is water based so the box was sanded to 220 grit paper after pre-raising the grain with distilled water.  Since it’s been quite cold here lately I allowed two days for the dye to dry completely.  Next was multiple applications of Platinum shellac applied with an air brush.  Again, due to the weather I allowed extra time for this finish to cure before rubbing it out with Liberon Black Bison wax.  Here are some photos of the finished box, I really like how the grain of the wood still shows in spite of the darkness of the finish, you can’t get that look with a stain or paint.

Box Closed

Box Closed

Box Open

Box Open

Next up is a possible project making an overlay for a game table, something called Mexican Train which I must admit is a game I’m not familiar with at all.  Also continuing to work on the Tools of the Trade series of relief carvings.  Currently working on a hand drill (aka egg beater) and a brace.  Pictures to follow.


Posted in Splined Miter Plywood, Types of Boxes | Tagged , , , , , | Leave a comment

Dyed Black Box — Built in Dust Check

DustCheck-Precut-DyedBox-2You may recall this photograph from a previous blog where I explained how to make a built in dust check.  To re-cap that,  a dado was cut inside of the box where the lid will separate.  The thickness of the piece that will become the dust check determines how deep the cut will be.  The box was completely assembled as a cube and then cut apart.  I’ve mentioned that we’ve had some very, unseasonably cold weather here in Las Vegas so work is slightly behind schedule — more on that later.

DustCheck-WoodworksbyJohn-LasVegas-1When boxes are made this way I use the tablesaw to cut the lid off.  To prevent them from binding during the final cut the process is to make the cuts go completely through the sides for the long sides but then lower the blade so the end cuts do not go all the way through.  This will leave a thin piece of wood that will not allow the two pieces to close, bind on the saw blade, and possibly kick back.  This thin piece can easily be cut with a utility knife or zero set saw, in this instance a utility knife was used.

DustCheck-WoodworksbyJohn-LasVegas-2Now you can see how this all works.  I carefully marked the location of the dado and set the rip fence so I’d leave about 2/3’s of it for the box and the remainder inside of the lid.  This is the first time I’ve done this with a plywood box and it works okay.  Solid wood will leave a smoother cut but I think this will be acceptable. Next up fitting the dust check into the dado.


Here’s that process:

I mentioned that we’ve had some unseasonably cold weather and my shop only has a portable propane heater.  This has slowed things down a little bit. Usually with a project this small I’m able to assemble it inside the house but I won’t be able to do the finish that way.  It’s finally warmed up enough to where I think spraying the shellac will be safe.  If you ever need shellac I’m going to recommend Shellac.net out of Ukiah, California.  I prefer to mix my own so that it is a fresh product.  I ordered some new flakes from them and asked a question regarding the temperature problems.  Within one hour of placing the order via the internet I received a phone call from Ron, the owner of the company.  In my order I asked if he could send me an email to answer the question.  Instead, he called me directly saying it was easier to answer questions like that over the phone rather than email.  That’s what I call customer service!  This was early evening and not regular business hours.  To me, in this world of internet businesses, to receive this kind of service is a rarity so I’d like to recommend Shellac.net highly to any of you that use shellac.  Ron carries many different colors of shellac as well as related sundry items.  I doubt I spend $75.00 a year with him but he still takes the time to service and give advice.

Oh yes, his advice was to bring the shellac and the item being finished in the house to let them warm up completely.  Tomorrow is supposed to be in the upper 40’s so after applying the shellac he suggested waiting until it was “gnat dry” — what’s that you ask?  Well, if a gnat lands on it it won’t get stuck to the surface!  Makes sense to me.  At that point he suggested using infra red lamps which I don’t have but due to the size of this box I can easily move it into the house to cure.  I’ll repeat that for multiple coats then leave it in the house to fully cure before rubbing the finish out.  Here’s what the box and lid look like now that it’s been dyed.

DustCheck-WoodworksbyJohn-LasVegas-DyedBox

Posted in Splined Miter Plywood, Tutorial, Types of Boxes | Tagged , , , , | Leave a comment

Dyed Plywood Box Assembled in Spite of Cold Shop!

DustCheck-Precut-DyedBox-AssembledYou’re right, that looks more like a kitchen than a woodshop!  It’s been pretty cold here in Las Vegas as it has been through-out our country this week.  It hasn’t risen much above the low 40’s even with my portable propane heater and that is just not good conditions to glue up in.  I did one of the additional boxes and the glue squeeze out looked more like whitewash than glue!  I decided it would be wise to bring the pieces for this commissioned box into the house, let them and the glue acclimate to “room temperature” and then glue it up using the breadboard as a temporary work bench.  So, this one is complete and I feel good about the integrity of the glue joint.  The tech directions for the glue (Lee Valley Cabinetmakers) says “apply at room temperature” but fails to tell you what room temperature should be — I’m sure it’s not the low 40’s though!

You may recall my previous post about making the L-shaped fence for the tablesaw.  Here’s where it came into use for this project.  In a nutshell,  one of its functions is to replace the sacrificial fence we often put on a rip fence when cutting rabbets.  The top and bottoms of these boxes feature a rabbeted piece that will be glued to form a solid cube.  Here’s how that is done:

After making some trial cuts to check the adjustments the rabbet around the underside of each piece.

DustCheck-Precut-DyedBox-1There was one more use for the dado head on this project.  The commissioned box will have a 2″ high lid which will require a dust check to have it close properly.  A trick you can use is to cut a dado or groove before you assemble the box.  The depth is equal to the thickness of the piece I’ll use for the dust check.  Now the piece is being guided against the fence and I’m being careful that the correct edge is being held against the fence.  This is where marking all of the pieces with the painters tape pays off.  So easy to flip a piece the wrong way!

DustCheck-Precut-DyedBox-2Here’s all of the pieces with the groove cut, ready to be assembled.  The other piece is Poplar and it will be shaped to become the dust check.  Glad I’m able to take it into the house to assemble.  The weather forecast calls for this cold spell to continue for the next week and I need to complete this order within a specific time frame.  No problem now,  shellac isn’t effected by low temps as much as other finishing materials.

Posted in Splined Miter Plywood, Types of Boxes | Tagged , , , , , | 1 Comment