Diane and I had a fantastic time when we visited Kentucky last week. We were based out of Lexington and traveled out each day from there. The focus of our trip was to check out the Longest Yard Sale in the World, something we’d seen on HGTV. If you’re interested, here is a LINK to their official website. We spent one of our days there exploring it to the south and another day heading north — great fun.
One of our favorite areas to visit was Berea because it’s in the main area to find a variety of Appalachian Arts & Crafts. Here’s a LINK to their welcome center. What a treat for us that the state of Kentucky has an official location to honor their crafts people. Something we’d like to see in Nevada but chance for that type of attraction would be slim to none! It was so fun talking to the artisans who had their shops in Berea and see them actually making what they specialized in. Jewelry makers, weavers, potters, artists, and even a dulcimer maker who moved me to buy a dulcimer of my very own — should be delivered next Monday! What really left an impression on both of us was the chance interact with other folks who have the same outlook as we do as to how to spend their time. Diane and I often kid each other that we both enjoy doing things that take an unbelievable amount of time to produce yet bring very little revenue to the table. But you know what, this is what we enjoy and the people we met in Berea and also the craft show at the Shaker Village were of the same mind. What better way to spend your time than being creative.
At the craft show held on the grounds of the Shaker Village we bought an assortment of hand carved, wooden spoons.
 These are made of Cherry and as you can see, the grain is pretty spectacular. I wish the man had a business card and website but he didn’t so I can’t share it with you. These will remind us of our vacation every day as we use them and I didn’t want to just put them in a tupperware container. Naturally, had to make something special to house these in. As you can see there are a couple of spoons, the largest being called a chili spoon. The second one down is actually designed for icing so Diane will use that on cupcakes but I may have to use it to stir fry as well!

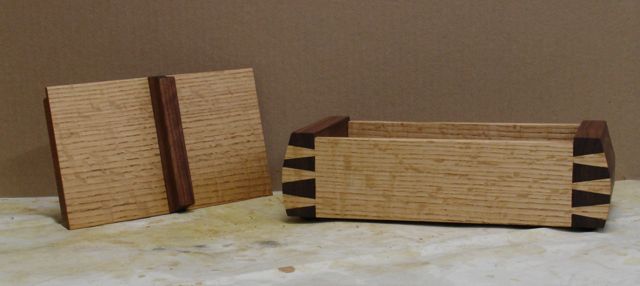
Here’s what I came up with for a container. I happened to have a small piece of curly Cherry left over from another project so that’s what was used. The finish is mineral oil, same as what is used on the spoons. It almost seems to be a matched set.
Making an eight sided container isinteresting. The process began by cutting slats with 22.5 degree edges to make this octagon shaped vessel. I experimented with some MDF to see what size they needed to be so they would hold the spoons without a lot of slop around them. Turns out that 1 3/8″ was what I needed. These are 5/16″ thick and the grain was arranged to creat an interesting pattern. Assembly was with packaging tape.

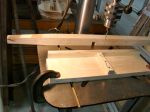
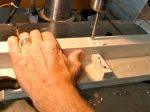
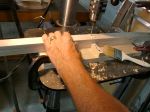
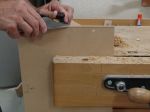
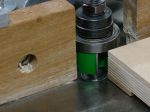
After laying them out and applying the tape a bottom piece had to be made. This is the tricky part. Partially cut with a chop saw and then by hand to finish it off. The trick is getting it the correct size. When you take material off one of the edges it changes the size of the two edges next to it. Here’s how I worked that out; by marking a reference point I gradually planed each surface until I had an acceptable fit. This doesn’t have to be water tight so a little gap didn’t concern me. To trim them I found that using a shooting board with a block plane worked well.
-

- Reference Edge: A
-
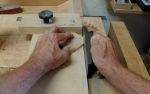
- Shooting Board to Size
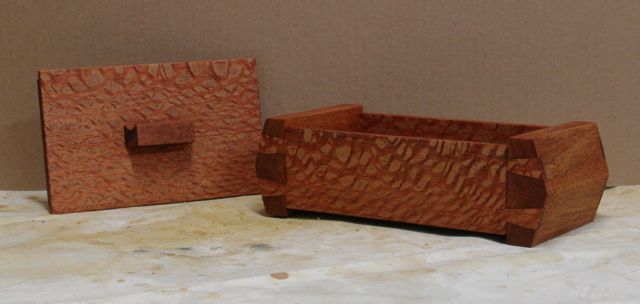
 After sizing the bottom, liquid hide glue was applied to the edges and the entire piece was wrapped with the packaging tape to dry overnight. All that was required was a light sanding and then several coats of mineral oil to protect it. I used 400 grit wet/dry paper to apply the oil while creating a smooth finish at the same time. If you have cutting boards or any other wooden item you use around food mineral oil is your best way to preserve and protect it. Here’s one additional picture of the completed project.