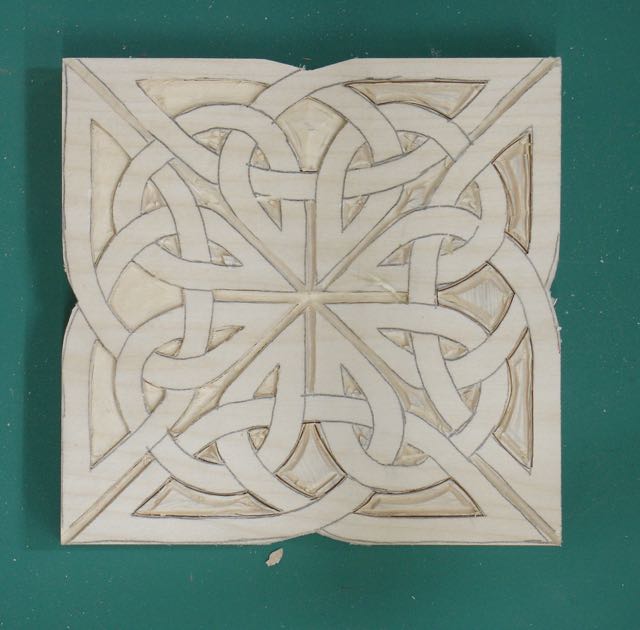
First Asa-No-Ha
Here’s the first, completed Kumiko design. This has been a cool process to get into and the teacher in me always likes to share what I’ve discovered during the journey! In my first blog about this I showed the jigs that were made to accomplish this and there were a few changes needed.
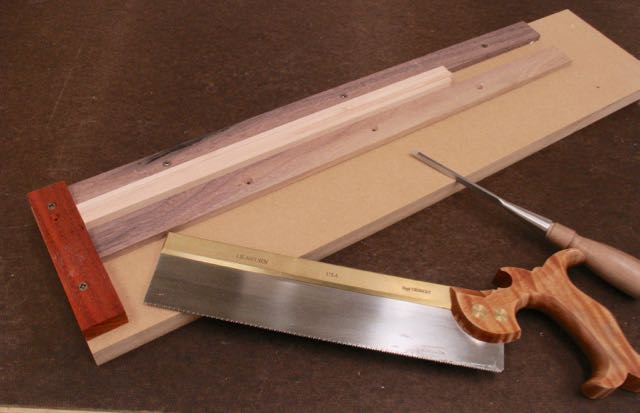
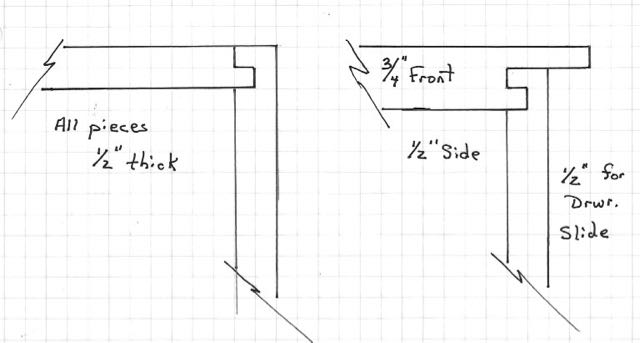
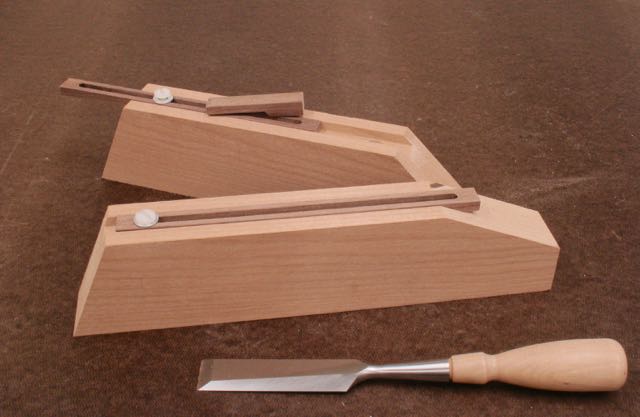
Lap Joint Cutting Jig
For starters there were two problems with the lap joint cutting jig. The first is that the stop at the end is thicker than the pieces being cut so that interfered with the try square when laying out the joints. The other is that the screws holding the pieces in the jig could be hit with the saw — not good! Easy enough to drill more holes to make sure that didn’t happen. An additional jig was needed to cut the small pieces that make up the design, simple plywood one that uses a Japanese style saw took care of that. Speaking of saws, after trying both I find that using the dovetail saw gives me more accuracy than the Japanese style saw. That one gives a finer cut but after decades of cutting joints with the dovetail, English style that’s what I’m most comfortable and accurate with.
Lay-out and measuring is an critical thing with this work. I’m using the books by Desmond King as well as the articles in Fine Woodworking by Michael Pekovich for my inspiration. Desmond is Australian so naturally the dimensions are metric. At first I balked at using it but it proved to be much easier to determine the “pitch” using metrics instead of fractions. Turns out that the pieces I planed down to 3/16″ thick (Mitsuke in Japanese terms) equals 5mm. I won’t bore you with the details but it is much easier to add and divide millimeters than it is to add unlike fractions together and then try to divide them into an even measurement! For accuracy, once the distance was calculated my preference is to lay it out with a divider.
Pieces cut now it’s time to do the joinery. First up is the diagonal which is is cut at 45° creating a 90° point that fits across each of the four square. By the way, this Asa-no-ha is roughly 4 1/2″ square.
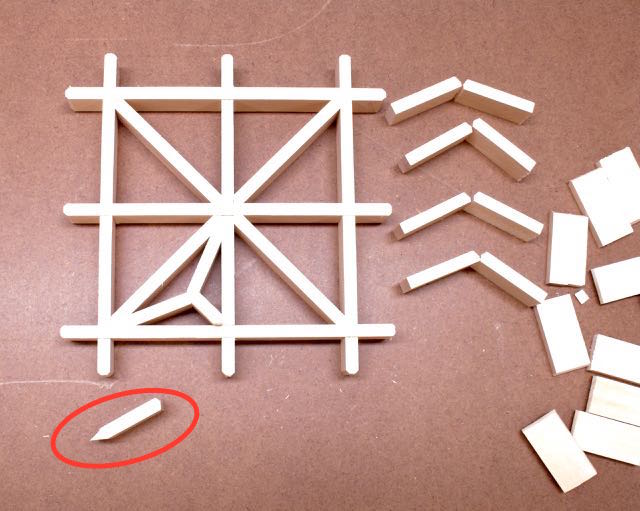
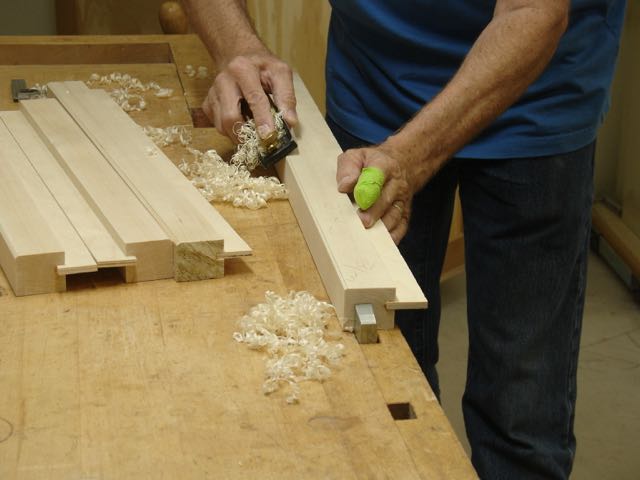
Hinge Piece
The diagonal is relatively easy, it’s the hinge pieces (longest piece) and small locking part that require more attention. The jigs with an adjustable stop make this easier to do. It was suggested doing the more difficult. It’s circled in red and notice that the left side is tapered equally at 22.5° while the other is cut in an approximate 1/3 to 2/3 amount at 67.5°. Having two jigs to cut that 22.5° angle is helpful. After scribing a line on the face of the joint I would place the piece in the jig and try to line the scribed line up with where the jig ends, there is a bit of trial and error required so be sure to cut extra pieces. After the hinge pieces fit, the final part to the puzzle is the small locking piece that comes in from the corners, both ends are cut at 45°. Since this locks everything together you’ll need to individually fit each one. A small bit of glue applied with a toothpick was all that was required, everything locked together nicely!


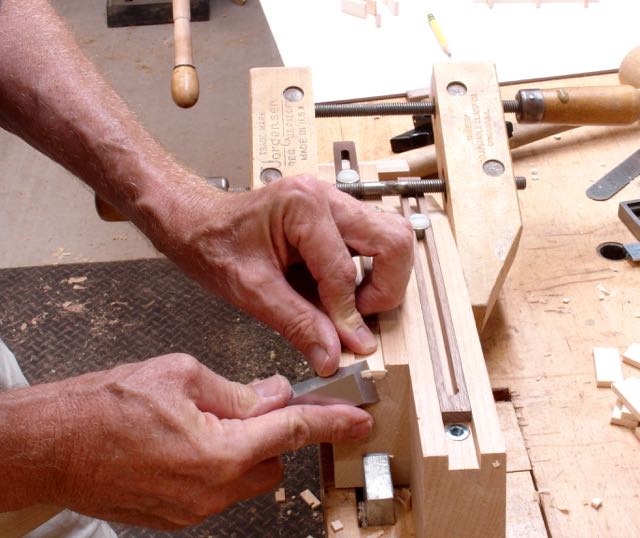
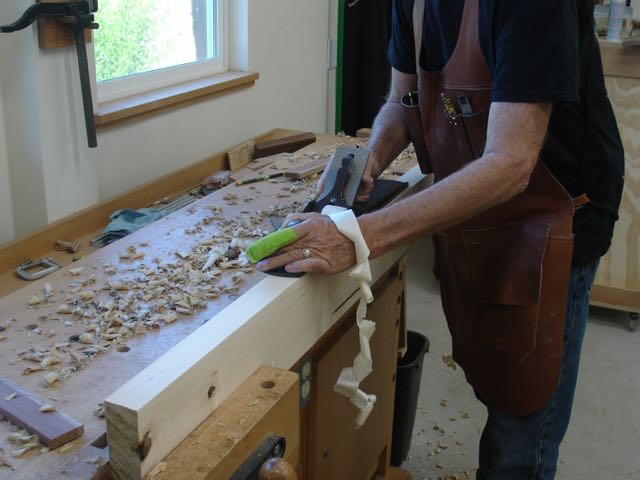
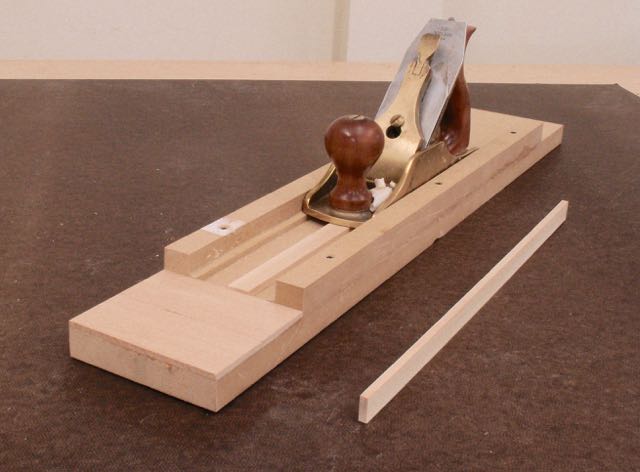
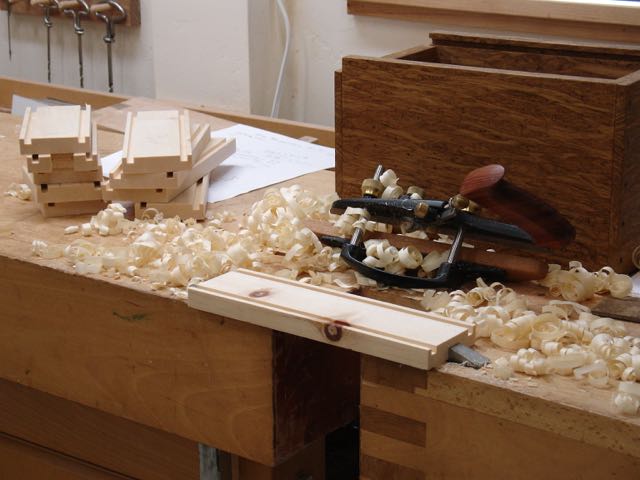
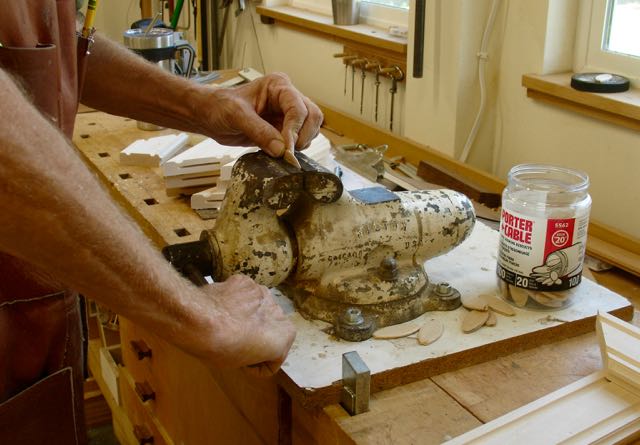
Cutting the Hinge Pieces
I’ve tried using both a wide chisel as suggested my Pekovich in his article and also a low angle block plane. Although the plane seems to cut smoother I found it awkward for these smaller pieces — interested to hear from others and their experience cutting these small pieces so appreciate your comments. The picture at the right shows the set up for cutting the unequal 67.5° pieces.
Not perfect but I’m pleased with the first effort at Kumiko — who knows where I’ll end up down that rabbit hole HillBilly Daiku warned me about!


")