Danish Cord Hall Bench

This is about the fourth or fifth seat I’ve ever woven and I always get so involved with the process — love watching things come to life! In our new home we needed a bench for the entry hall where you could sit to take off or put on shoes. I’ll talk about making the frame later on and will focus on the process I used to weave the seat first. Traditionally, Danish cord seating uses L-shaped nails to hold the cording in place but in Fine Woodworking there was an article by David Johnson where he demonstrated a way to weave it without using the nails. That was the way that the warp (front to back weave) was created. It involved a number of different knots and splicing in new cord was an interesting process but on the long rails of this bench easy to accomplish.

For the weft (side to side weave) I ended up using a technique demonstrated by Ed Hammond on a YouTube video. I’ve always liked the look of that double side rail weave. Rather than using knots and splices he uses staples to secure the cord to the frame for the weft. I believe his warp is traditional with the nails. There would have been so many splices for this project I could see very quickly that it would become a hassle! With the warp you’re only using a single strand of the cord, for the weft you use a pair of cords. To keep splices to a minimum it’s best to use the longest piece you think you can handle, I began with about 90′ of cord so doubled up means I was weaving with 45′ at the beginning of the process. Here’s a picture essay of the process:

A neighbor asked how long this process took me, my standard reply to this common question is that I really don’t keep track of the time it takes. It’s really about the process and enjoyment I get from the results even when making custom pieces for others. The weaving process is challenging, I’ll admit to having to take out two different courses because I missed a warp and had the weft going either under two or over two rather than over/under/over/under etc. If you’re at all interested in weaving a chair seat I’d suggest you take it on!

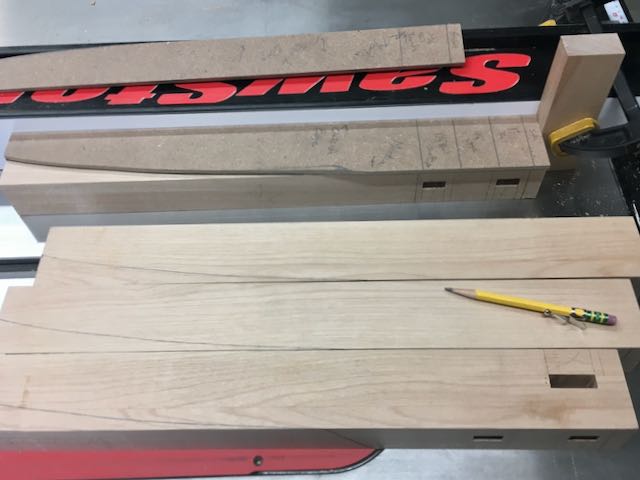
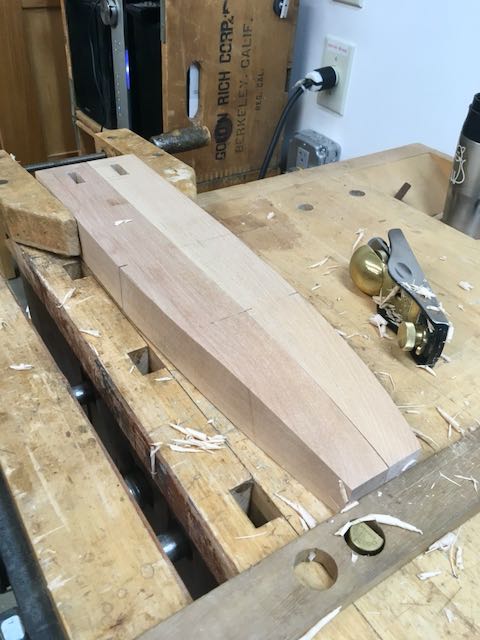
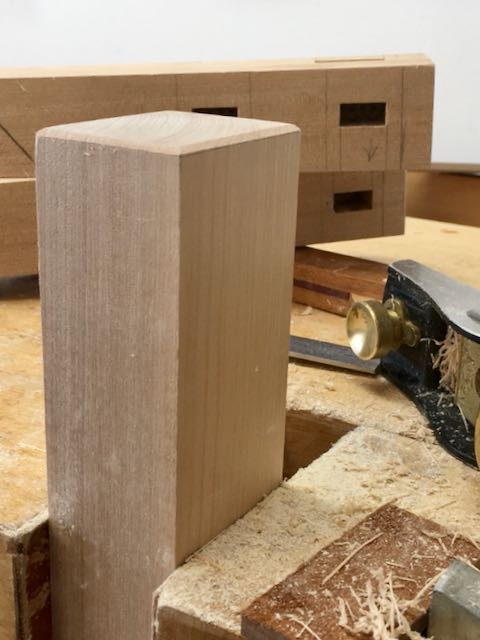
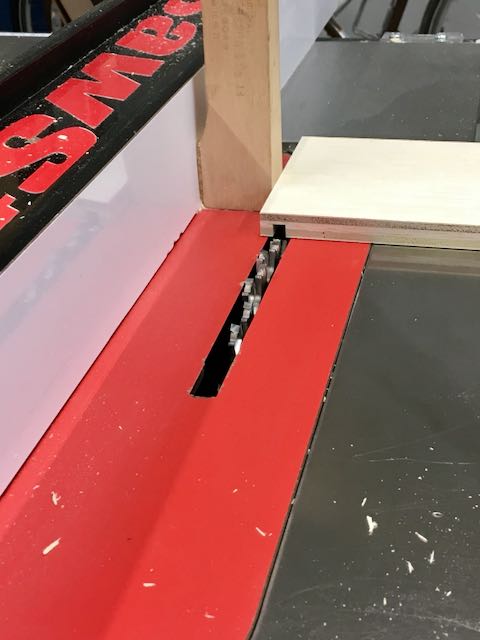
The framework for the bench is from a piece of 8/4 Birch lumber purchased from Peterman Lumber here in Las Vegas. It was built using my usual method of first using the table saw to cut pieces to approximate size then hand planing to required sizes. I use a hollow chisel mortiser and then tenoning jig on table saw to cut the tenons. They’re left oversized so I can fine tune with a rabbet block plane. The curved and tapers on the legs are first bandsawn, and again; finalized with a low angle block plane. The glue I prefer is Old Brown Glue and the finish is OSMO Polyoil. Once again, here’s a picture essay to clarify the process:

Now that this project is complete it’s time to do concentrate on a number of picture frames for Diane’s upcoming show at Meyer Vogl Gallery.

Posted in Uncategorized | Tagged , , , , , | 1 Comment

Simplified Method for Sliding Drawers

Granted, this isn’t the greatest of pictures but allow me to explain. While setting up my new shop space I realized I needed drawers so decided to make these. It’s a method I’ve used for a long time but many who have visited my shop have never seen it so I thought it’s time to share with other woodworkers. This is a unit I mounted into a metal cabinet from Home Depot. It’s made from a piece of 3/4″ particle board the builder had in the trash, 1/4″ MDF, and 1/2″ plywood. You can put a more attractive face on them but since these are strictly utilitarian the plywood will suffice. Dimensions were determined by the measurements inside the cabinet.

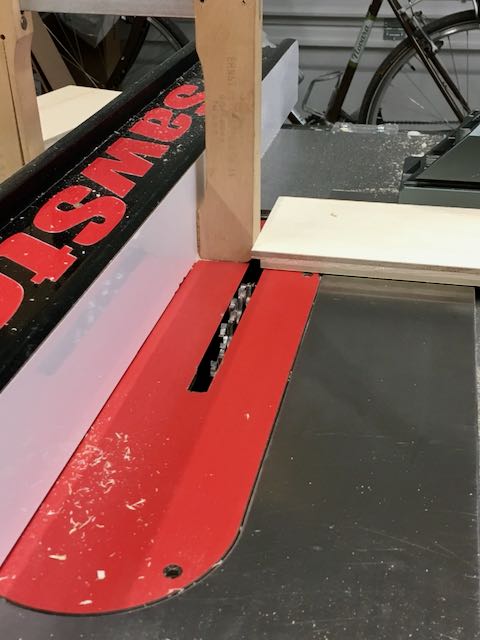
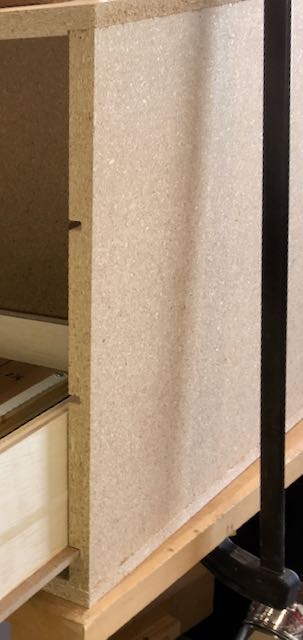
Particle board may not be the best choice but with the price of materials these days dumpster diving seems to be the right thing to do! My method is to always use some type of joinery, in this case a rabbet cut on the ends of each side and a full rabbet all around the back. Surely not a place for a rabbet plane so I used the tablesaw. First adjust the blade height to the thickness of the particle board. Then adjust the fence to cut a rabbet in a single pass while guiding it the piece upright against the fence. Using a rabbet helps register the pieces and ensure a square case. Before gluing and screwing these parts together a 1/4″ wide by about 3/8″ deep dado is cut to support the MDF shelf bottom. Cut both sides of the case at the same setting so they align. That’s also the “slide”. While the glue is drying it’s time to cut the pieces that will make up the drawer unit. I used some type of “sanded plywood” again from Home Depot and am amazed at the price of it!!!

The 1/4″ dado set used to cut the grooves in the sides is also used to cut the simple tongue and groove joint used for the drawers. Use some scrap pieces to set them up. The drawers were assembled with glue and 1″ long, #18 brads. Using a brad nailer and a speed square to establish square corners is helpful. While that’s drying cut the 1/4″ MDF to fit in the slots. Although it seems flimsy, once you’ve glued and brad nailed the drawer to it it is remarkable strong and stable! These drawers are about 16″ wide, 31″ long, and 5″ deep. Also attached a couple of dividers which makes them even more stable.

Final steps are to ease the corners of the MDF, I also use a beeswax to make them easy to open/close. Simple wooden knobs were added and the unit was bolted to the shelf — works great!

The right hand picture shows the unit bolted into the cabinet, the other was during assembly. If you have enough depth in your case this system can give you “full extension” slides. Simply make the MDF bottom deeper than the drawer box. Hope you find this helpful, fairly quick project that does require a bit of careful measuring. Feel free to ask me any questions — John

Posted in Uncategorized | Tagged , , | Leave a comment

New Year, New Home, and New Shop!

After living in Phoenix for the past 6 years or so Diane and I decided it was time to return to southern Nevada to be closer to family and take advantage of the rising housing market in Phoenix. Although we loved our house there; the 1/3 acre and huge amount of time and effort it took to maintain it was starting to get to us! There were some other factors as well but we began to look for other areas to move to including Tucson and outlying parts of Phoenix but in the long run decided to buy a new home in North Las Vegas. Moved in the first of December and are loving it!

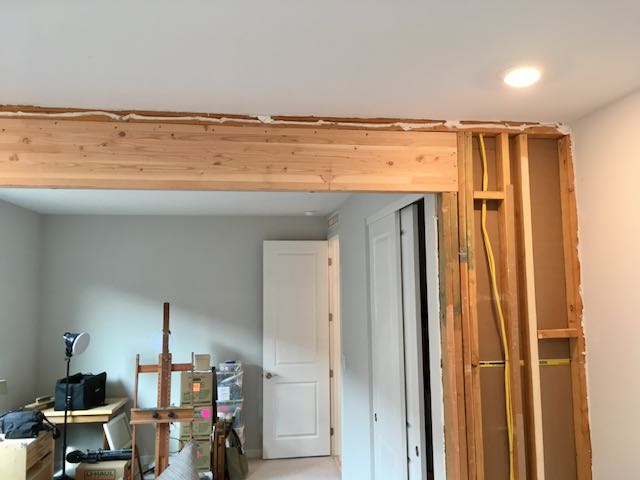
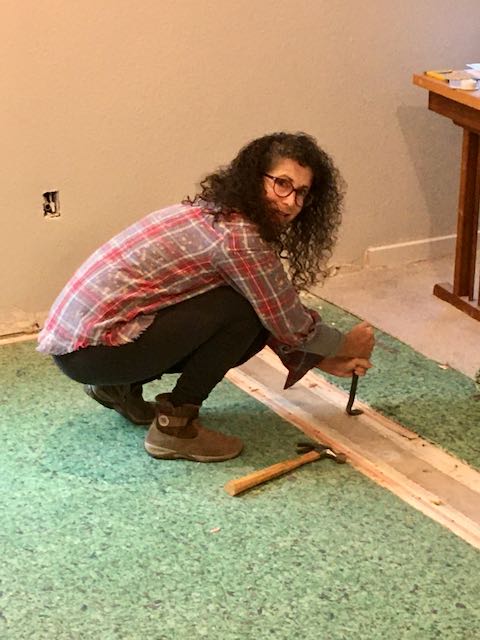
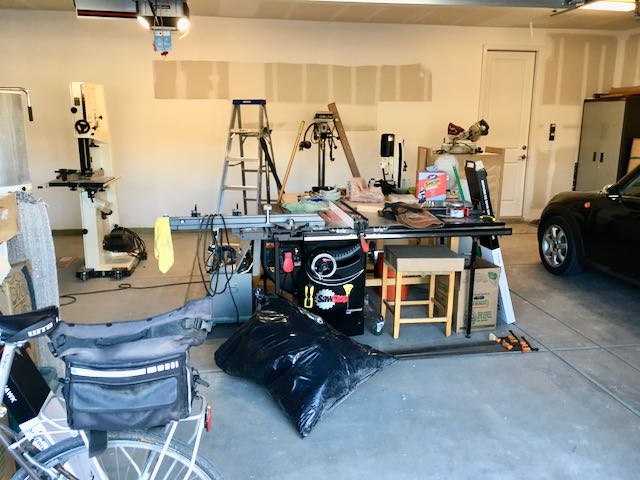
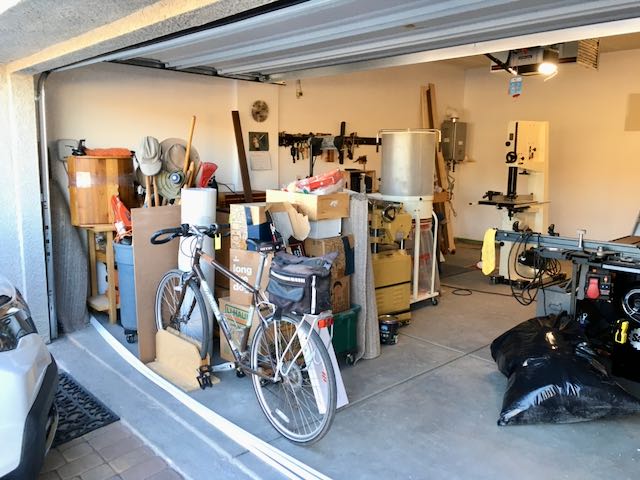
The biggest difference is that now, instead of having an existing “shop” that needs a ton of work to turn it into my “happy place” I now have a blank slate in the form of a 2 car garage! The process began with a scaled drawing but now that I’m here I can visualize the space and eventual results. Our plan was to remove a wall between a bedroom and the den to create an art studio for Diane. As luck would have it, this wall is a bearing wall. We were extremely blessed to have the superintendent of this development help us with this project. He introduced us to some of the original workers who built our house and they were willing to work with us in their off-time on our remodel. Electrician, framers, and drywall is what we needed and they worked efficiently and for a good price! I removed the drywall first, then the electrician changed and re-routed some wiring that was in the wall. Next up were the framers and drywall. Diane and I did the painting and laid a beautiful vinyl plank floor. We’ve ordered a set of French doors with rain glass to close it off. As we speak, Diane is able to work in her new space — a sheet stapled across the main entrance keeps Khali out and off of Diane’s palette!

My shop is another matter but much progress has been made this past month. The unbelievable blessings have continued with this move! When we did our walk-through the superintendent told us an error was made with the kitchen cabinets. The uppers were supposed to be 42″ but 36″ ones were mistakenly installed. Our first thought was that we’d get some kind of refund but he told us that the 42″ ones have already been ordered and to compensate for our “inconvenience” he would install some of the 36″ cabinets in the laundry room and put the rest where ever wanted in the garage, now there’s an “inconvenience” that’s easy to live with!!

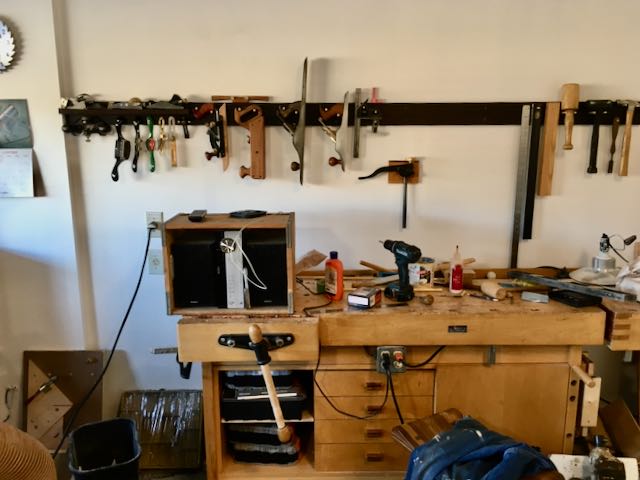
In the garage I’ve added a 220v/20a circuit for the big tools and another dedicated 110v/20a circuit for bench tools. Lighting needs to be improved and until the cabinets are installed I’m working out of boxes. With the work on the studio there hasn’t been a lot of time to work out there anyway. Here’s a few pictures of what’s been going on. The workbench is in position and my planes, measuring tools, and others I like to have on hand are in place. Along the back wall I’ve attached ledger strips that serve two purposes; first off they locate and add support to the bottom of the cabinets and will also be used to hang jigs and other tools.

It’s a work in progress but progress is definitely being made!

Posted in Uncategorized | 6 Comments

Trestle Frame #215

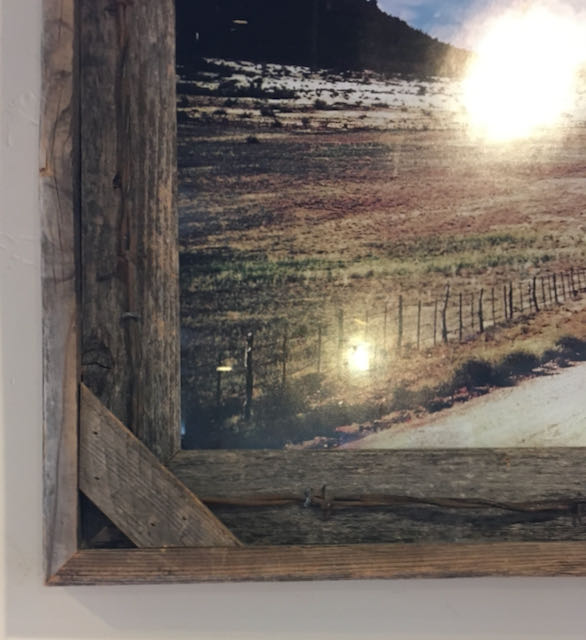
I’m sure I’m not the only one that is inspired by seeing work that others have done. My wife recently completed a painting; At the Station which had a woman sitting on a chair. The chair reminded me of an architectural detail often found in a trestle. Then, I saw this frame in a pizza parlor and it inspired me to refine it. As you can see in the picture I took, it is a barnwood type of frame obviously stapled together which isn’t my style! What attracted me was the diagonal piece place at the corners; it just adds an interesting element which mimicked the chair the subject of the painting is sitting on.

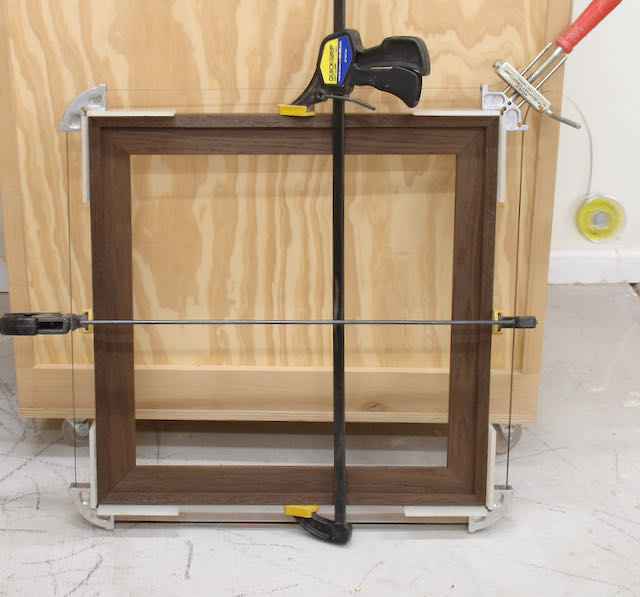
The frame is made of Roasted Oak and is my typical construction. The panel and outer cap are tongue and groove. First step is to miter, biscuit, and glue the panel section. The cap is then mitered and glued and clamped to the panel. I’m old school and keep things clamped over-night. The following day the pieces were milled to put in the corners. To my eye, the inspiration frame looked crude so my goal was to refine that. Rather than just staple that piece into the corner my choice was to inset it across the cap, this way it added a detail on the side of the frame too.

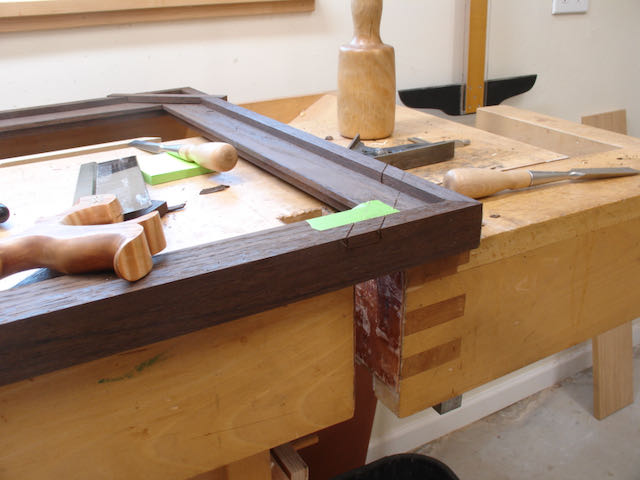
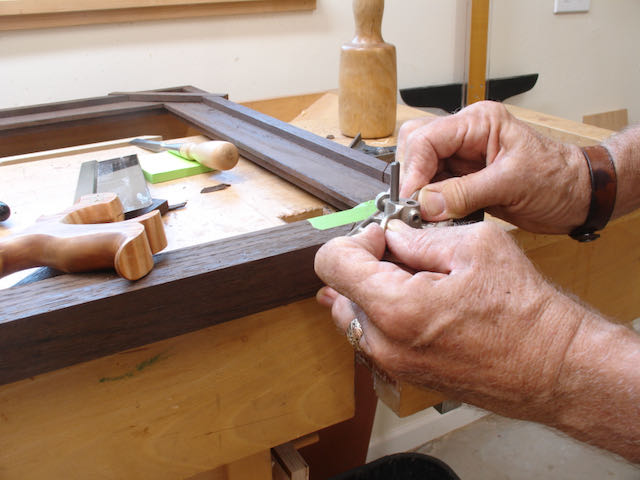
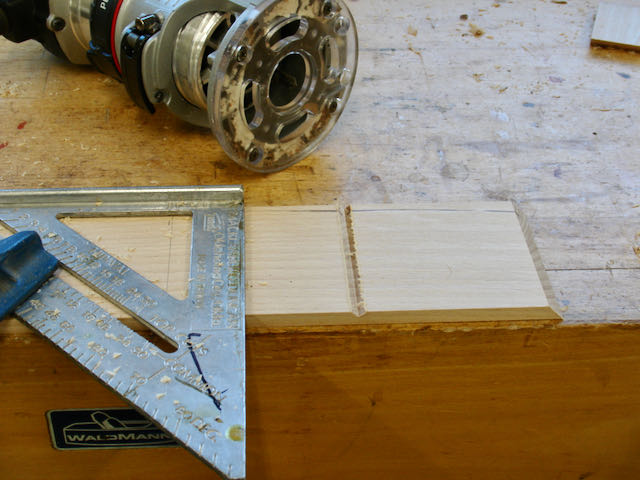
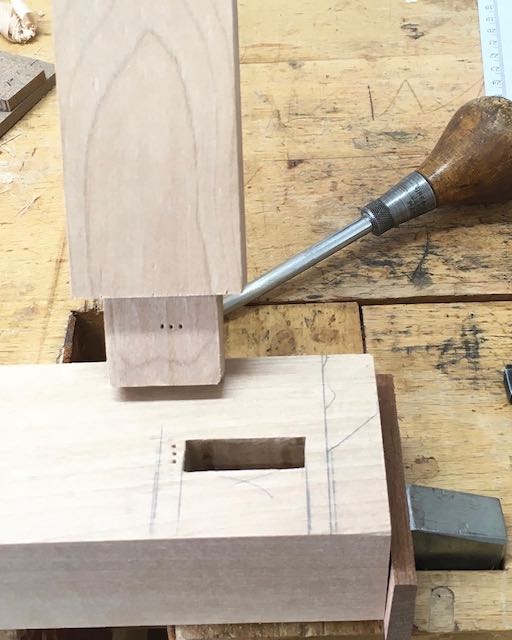
The first step was where to position the angled piece on the corners. Rather than just staple it in (like the inspiration frame) I thought it would better if it was inset into the frame and the end grain would add some interest to the sides of frame. The process was similar to cutting a hinge mortise; locate and cut one side then slide the piece in position to just cover the kerf and mark the other side. I use an old Stanley #271 router plane to not only smooth the bottom but also to mark the depth of the cut. Had to be careful with the chisels since this Oak is pretty grainy and the process used to “roast” it leaves the wood very dry and brittle.

The frame was finished with Osmo Polyx which gives a very nice, deep black color and still allows the wood grain to show. Two coats, wet sanded in followed by a coat of Liberon Black Bison Wax and the frame is ready for the painting. Here’s are the final results, the painting measures 20″ square and is oil on panel:

Posted in Uncategorized | 1 Comment

It’s all About the Wood: Zebrawood Valet

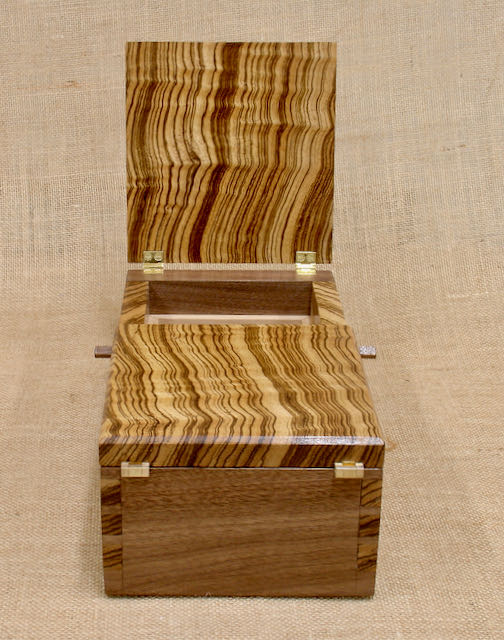
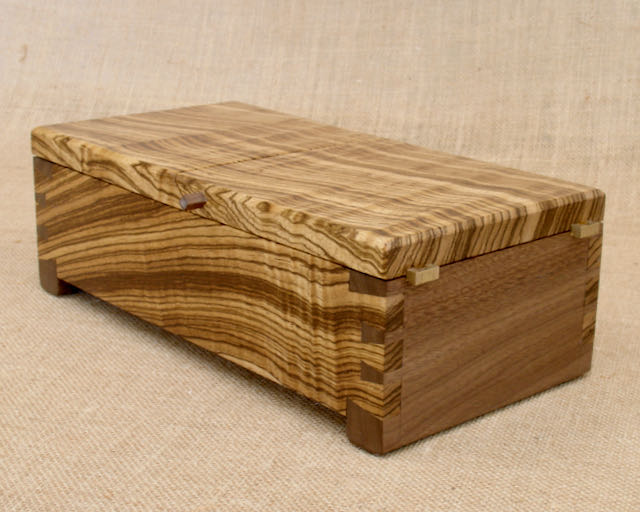
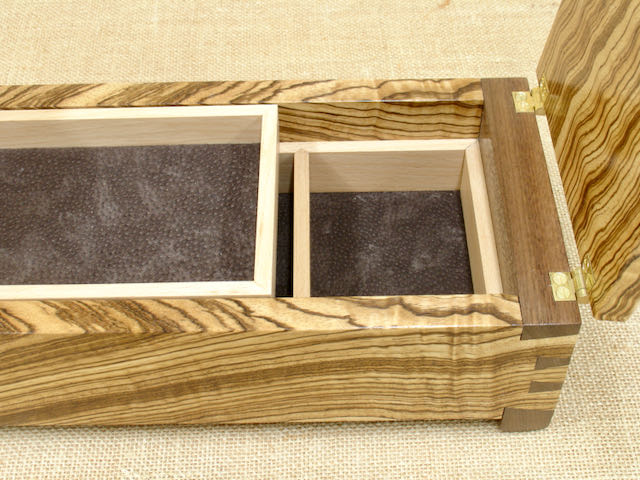
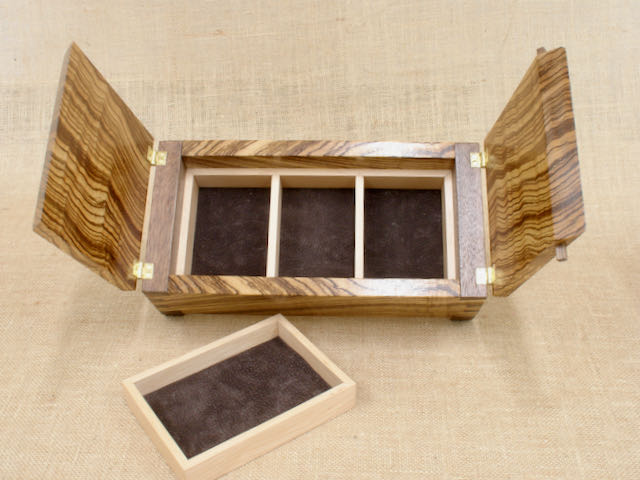
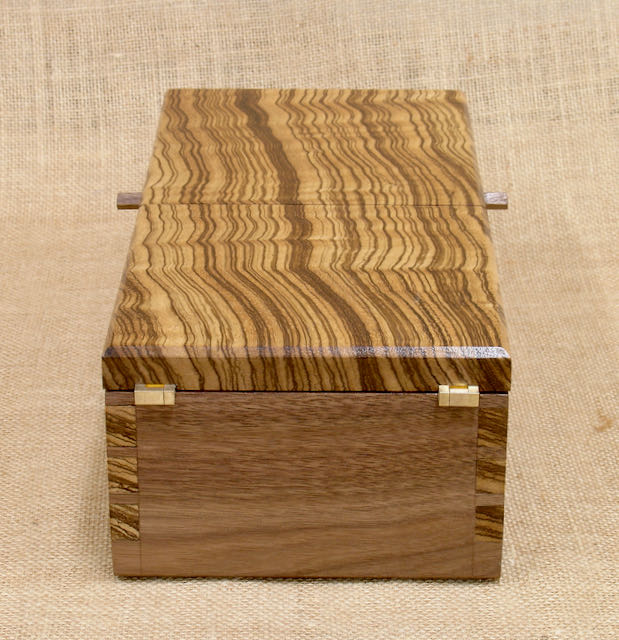
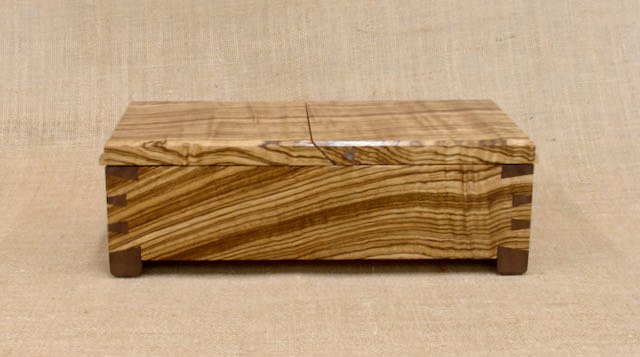
It’s been said that a picture is worth a thousand words so I’ll save you reading and just share some pictures of my latest valet. Zebrawood and Black Walnut, my design featuring hand cut, houndstooth dovetails. The tray and dividers are European Beech, and lined with pigskin.

This was a piece of wood that really caught my eye when I went to Woodworkers Source here in Phoenix — just went there to pick up some finishing material and it just jumped out at me and I couldn’t resist! The hinges are solid brass stop hinges from Horton Brasses and accent this project nicely. The finish is platinum shellac and wax.

For me, woodworking is all about the process and as I was working on this project couldn’t help but think about the time required to create this when compared to the relative ease and automated process used in commercial endeavors. As an example, I wanted to elevate how the dividers in the bottom of the box are inserted. When I was a carpenter doing roof framing there is a joint called a “birds mouth“. I thought that would add some interest even knowing many won’t even notice. I began by cutting a V-groove in the side piece. This was more than wide enough for both sides and fit snugly. It was cut to required width and marked so the V-grooves would have the right orientation. Next I needed to make a new “donkey ears” fixture to plane a matching V for the dividers. It was a long and probably boring process to read about so I’ll do a slide show to illustrate it. I enjoy the process and I’m curious to know how many of you fellow woodworkers feel the same way. Do you enjoy the process of figuring something out or do you just want to get it done the quickest way?

Posted in Uncategorized | 3 Comments

Donkey Ear Shooting Board And Box Dividers

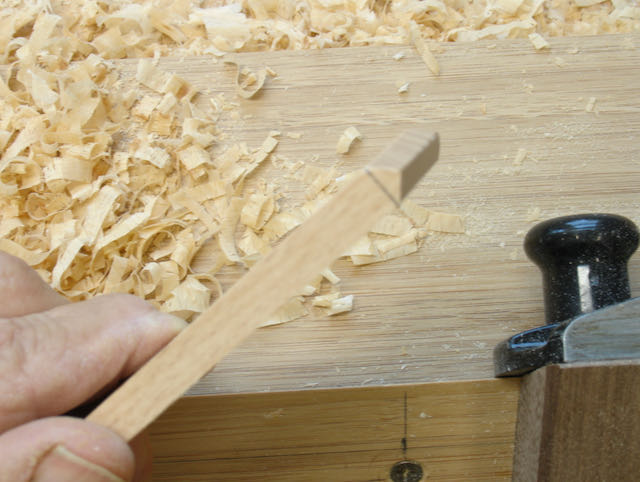
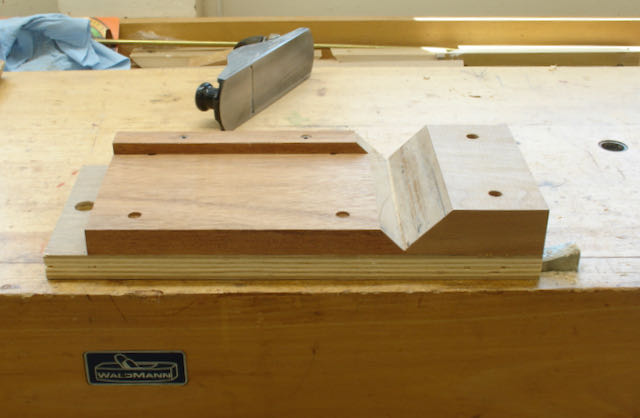
If you’re not familiar with shooting boards you may wonder what the heck a Donkey Ear shooting board is! For hand tool woodworkers a shooting board is something used with a handplane to true up miters, ends, and edges after they have been sawn with either a power or hand saw. In my work they are used for moldings and boxes so I generally only need a block plane with them. My original is shown on the left and it wasn’t very accurate. I had heard of Donkey Ears and found this video by Bob Rozaieski on YouTube I decided to make one for my work and share it on my blog. The only change I made was to make it so that it could be held on the workbench between dogs, his design had a cleat that clamped into the vise. I had some of the Bamboo left from the kitchen island project so that’s what I used. He stressed that getting the 45° exact on the base piece is critical. Admittedly, pre-drilling the screw holes and holding it all in place was a bit of a challenge. The big advantage to this style is that you’re able to work moldings in both directions which is critical when working around a corner. For this blog though the goal was simply making dividers for the inside of a box.

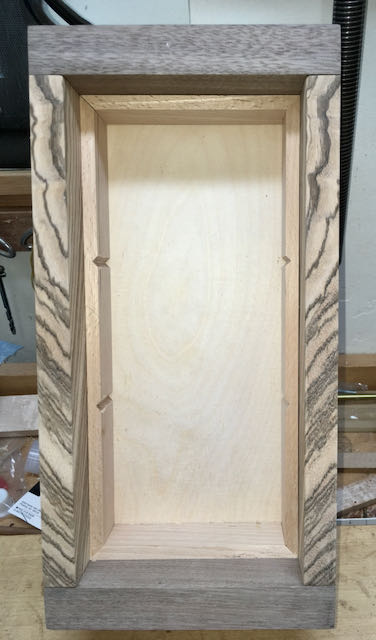
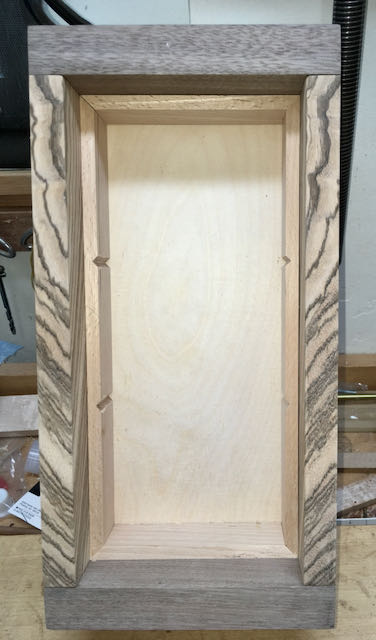
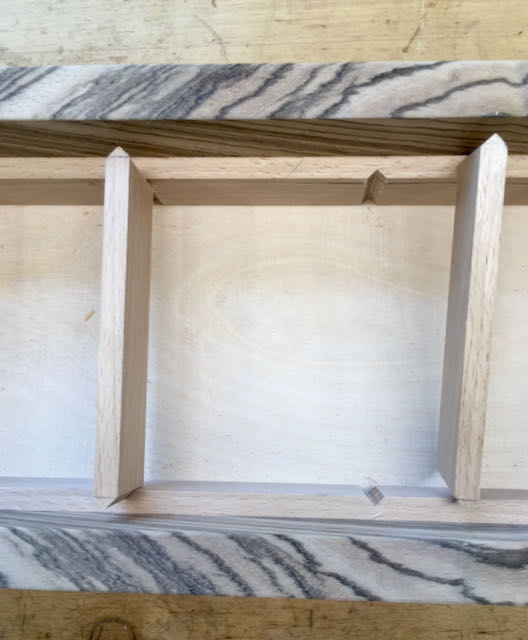
The picture at the left shows the inside of the Valet box, notice the pieces that are inserted. They’re about 1 1/4″ wide but were made from a wider piece so that any tear out from shooting the miters on the ends could be planed off when they cut to final size. After they fit, I used a V-bit in a small router to cut the slots for the dividers. After that they were ripped to the 1 1/4″ width. Other than dividing the bottom of the box there will also be a sliding tray that sits on top of them. The next step was fitting the dividers.

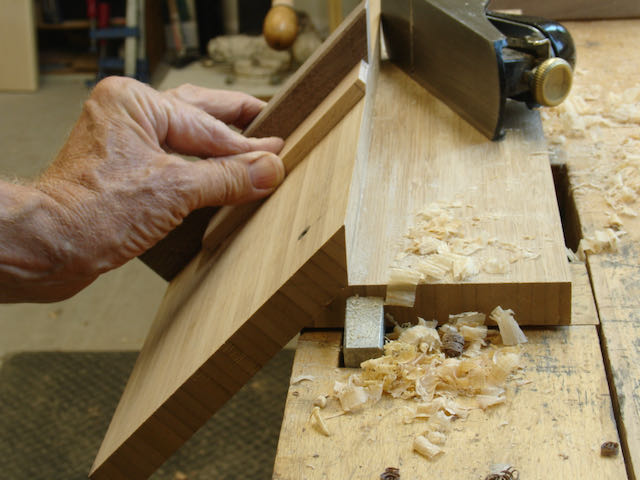
This began by taking a long piece of the Beech and using the Donkey Ear shooting board to create a V that would fit snugly between the side pieces. The depth of the V slot was marked on the end of the board which was then mitered. This piece was long enough to make both dividers. The extra length makes it easier to hold.

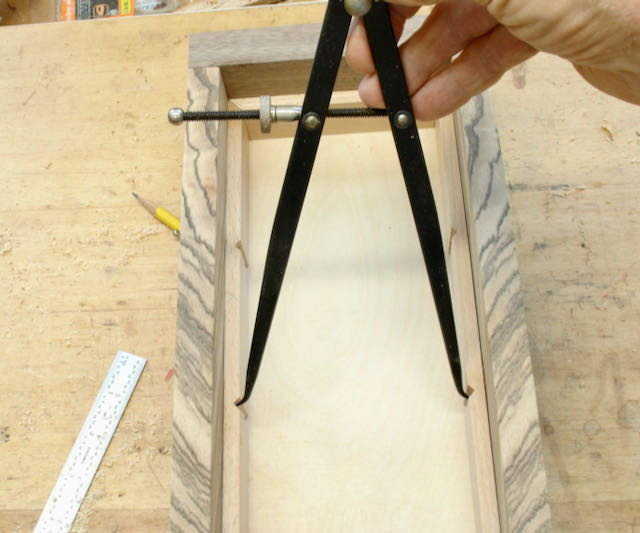
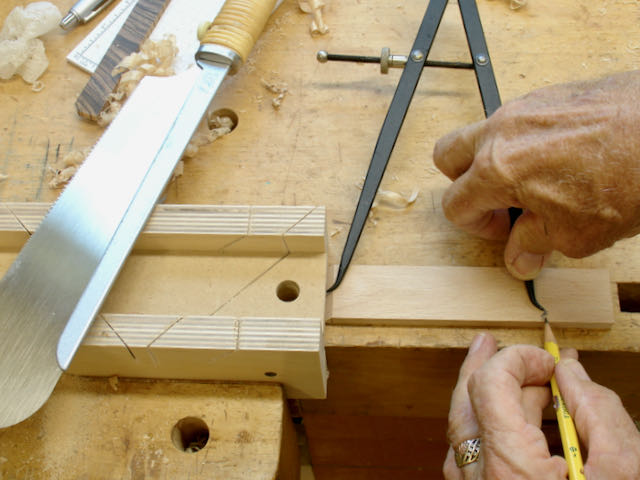
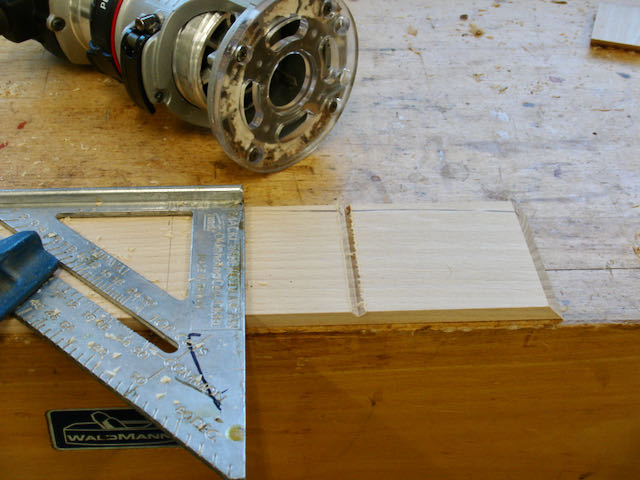
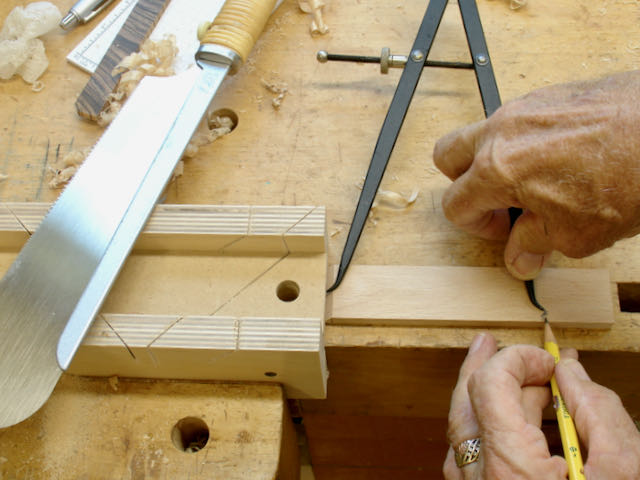
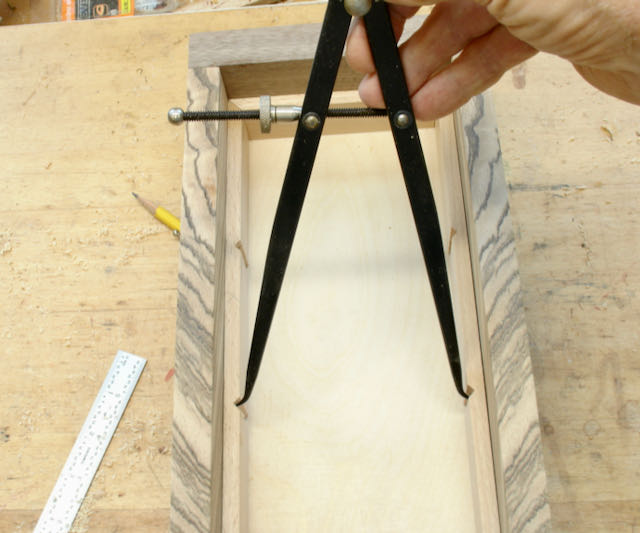
Some things I’d like to point out here. With this style of Donkey Ears it was much easier to hold the wood while mitering the ends. I used a practice slot from the router to check the fit. The next hurdle was measuring the length needed. Too small for even a 6″ ruler so thought to use an inside caliper and then laying that out on the wood. The piece was then cut to length and the ‘V’ was mitered on the opposite end. I think the technical term is “fiddle fart around” until the fit was what I wanted! I “eyeballed” that to get it as even as possible. It’s a snug fit so no glue will be needed once the valet is complete.

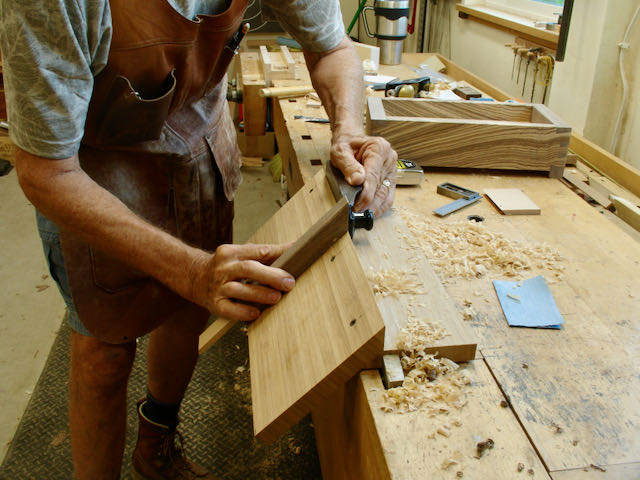
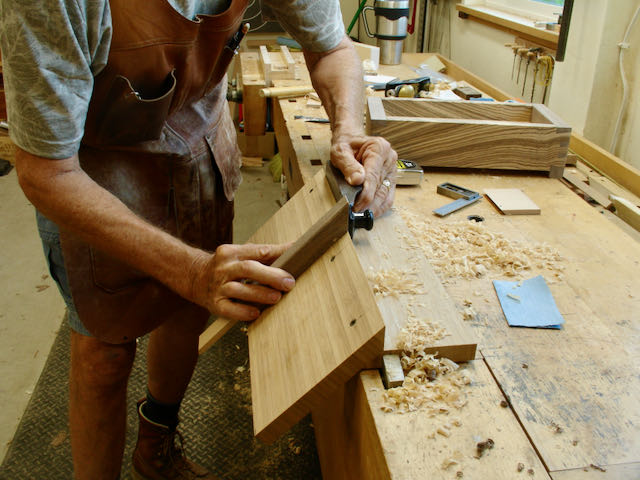
Using my left hand to guide the plane and my right hand to hold the wood gave me good control. The only odd thing, probably caused by the way my hand contacted the plane, is that the depth of cut changed. Seems as if the palm of my hand loosened the depth adjustment and until I figured that out is drove me crazy! Sure, a CNC machine or a matched set of router bits could accomplish this task in minutes rather than half a day but there no challenge in that so why bother?

So there you have it; to my eye, the ‘V’ has more appeal than a simple dado and butted divider. Once the box is completely finished I may put a spot of glue on the longer side pieces before fitting in these dividers. Hope it made sense to you, if not feel free to ask me a question in the comment section.

Posted in Uncategorized | 1 Comment

Kitchen Re-Do: Bamboo Island

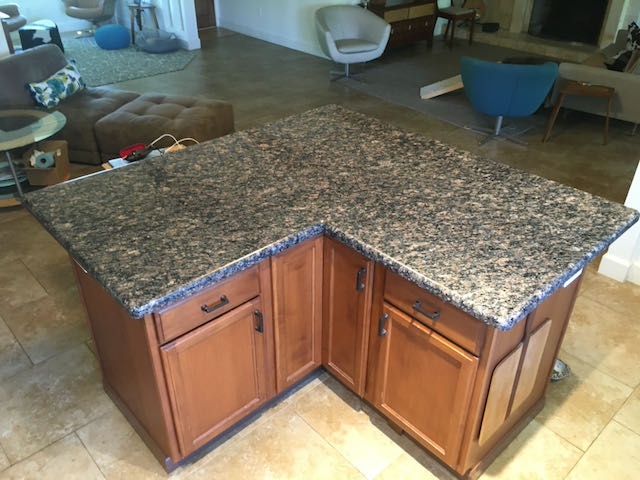
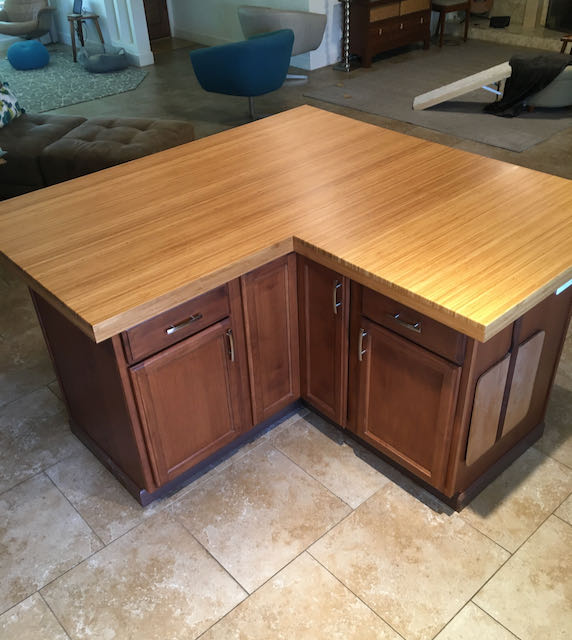
Before & After (Note: grab arrow to see full views)

After living in our house for 5+ years we thought the kitchen could use some changes, although functional it felt as if it were a dark area even though there is a window above the sink. When you walk in the front door the darkness is what you’d notice first. The cabinets are dark and the black granite; well, it goes without saying is positively dark!

We use the island as our place to eat breakfast, use computers, and also food preparation. Although beautiful, granite is a very cold surface to work on while using computers so that was another slight negative. Replacing all of the counters wasn’t an option, from experience if you attempt to remove them chances of damaging the cabinets is a possibility and I really wasn’t planning on a complete kitchen remodel. So enter Bamboo, Woodworkers Source here in Phoenix has been advertising it so thought it was worth looking into.

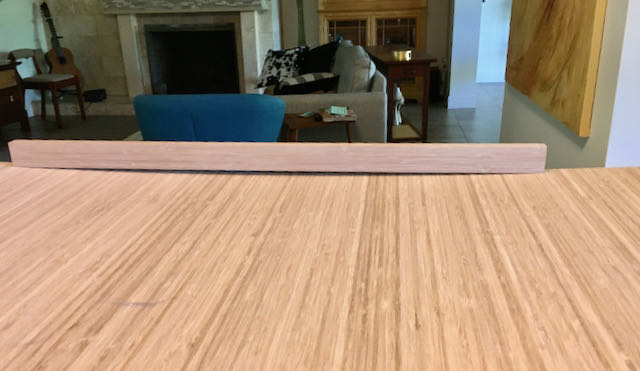
It’s available in 8′ pieces measuring about 9″ and 12″ wide. It’s also offered as a 4’x8′ sheet. My first step was to buy a 9″ wide piece and make a mock-up. The plan was to simply make the L-shaped piece to fit over the top of the granite. I used Osmo Polyx in a satin for the finish. I was happy with the method, finish, and color of the finished mock-up so the project was a go. We purchased one 4’x8′ sheet and 2 of the 12″ wide boards. One purpose of my blog is to share what I’ve learned and the 4’x8′ sheet needs to be kept flat!! I’d leaned it on edge against the wall, when I was ready to start (about 1 1/2 weeks later) I cut it to approximate length and Diane and I brought it into the house and laid it on top of the island.

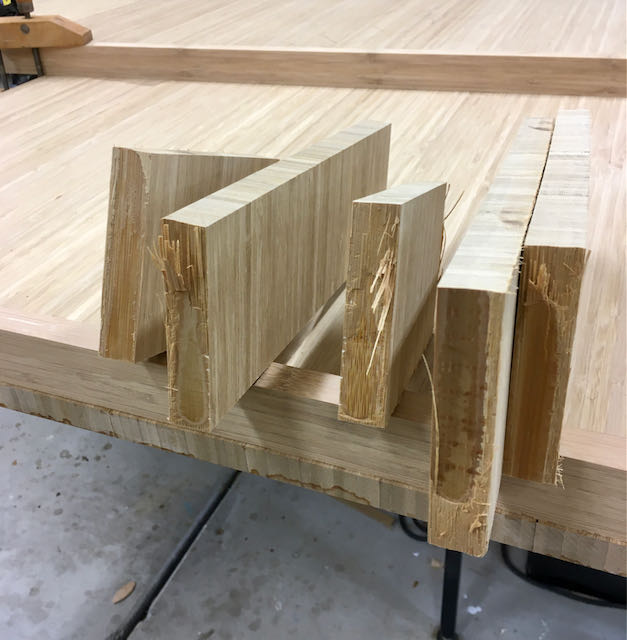
It warped big time!! I called Woodworkers Source and they were willing to exchange the sheet but since I’d already cut it that wasn’t an option. Decided to let it lay to see if it would relax flat on its own but also sprayed water on it and clamped a straight edge across both edges. The parallel clamps were put on without a lot of pressure and I’d tighten them every couple of hours. I did hear some cracking but nothing major. It makes sense, if you look at the right hand picture think of a round piece of Bamboo being sliced into “planks”. Some of them will be more of a C shape and only make contact on the outer edges. I wasn’t concerned about the piece bowing once it was installed because of my plan for building it.

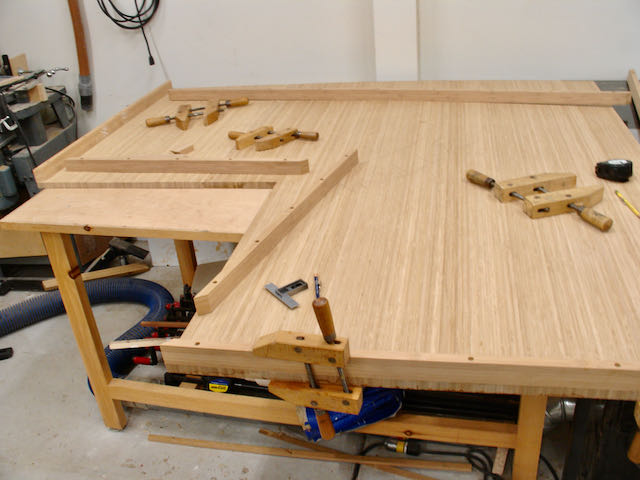
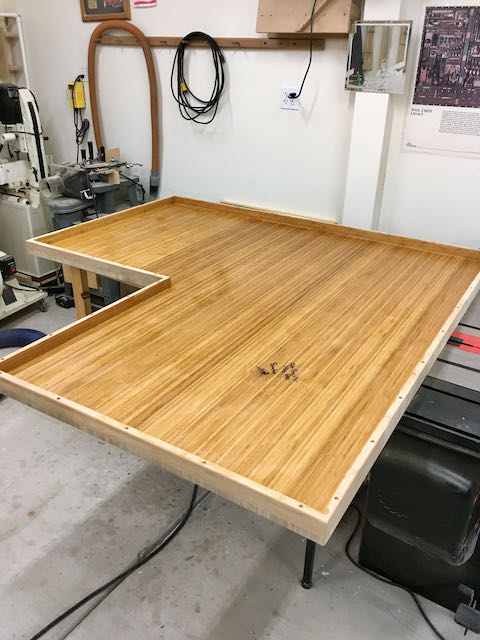
Construction was typical so I won’t bore you with the details. The granite wasn’t square so I scribed it in place and used a small trim saw with a straight edge to cut it. Jointer planed to smooth the cut and then edged it with 1 5/8″ wide strips of the Bamboo. This was glued and screwed into place.

The first step was to cut the banding and pre-drilling and countersink for the screws. Pieces were clamped in place and a screw was inserted into the hole, tapped with a small hammer to locate it, then pre-drilled before applying the glue. To guarantee a good joint it they were also clamped, old school style!

Before flipping the piece over the bottom was prepared by using a cabinet scraper to remove the glue and surface the joint, sanded, and a small round over was done to the outer edge. Two coats of shellac were then brushed on so that both surfaces will be sealed and not absorb moisture — want to prevent any warping since the plan is to simply lay this over the granite.

To finish the top the process was the same as the bottom — scrape off glue lines, sand, and round over the edge. Three coats of the Osmo Polyx satin finish were hand rubbed into the wood using a white, nylon scrubby. I allowed 24 hours drying time between each coat. My neighbor helped bring it in and my fingers were crossed. I’d broken that rule of dry fitting, this piece was much to large and awkward for Diane and I to do that! Thankfully, it dropped right on and fits like a glove. There is no movement and if a future owner prefers to have matching granite it’ll simply lift off!

Posted in Uncategorized | 1 Comment

Contemporary Cigar Humidor

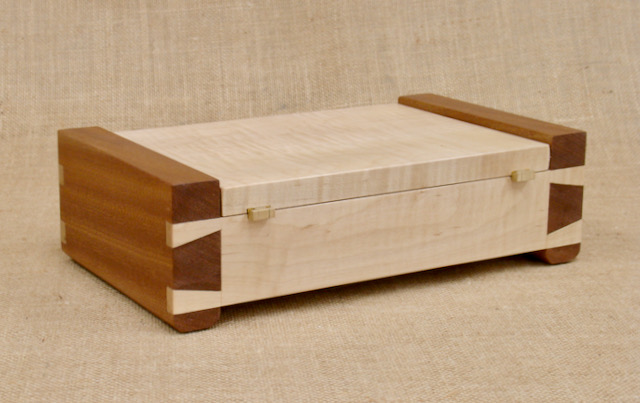
The subject of making a custom cigar humidor recently came up when I was talking with the owner of Creative Gateway Gallery. They have galleries in Scottsdale, Phoenix, and Sedona. He mentioned that cigar art was popular and suggested that perhaps designing and building a humidor based on my box technique may be a good addition for the gallery. This led to me to doing some research, online and talking to owners of cigar lounges. A requirement for a humidor is that it’s lined with Spanish Cedar which is the best material to control the humidity requirements of cigars and also that the box has a good seal. It’s up to the owner of the humidor to “season” the inside and maintain the humidity. What you see in these pictures is the result of that, my interpretation of that traditional humidor. I used a piece of Curly Maple for the top, front, and back and ribbon grain Sapele for the sides. Hand cut dovetails are both decorative and allow for strong box construction.
My typical construction for this is to first cut a rabbet on the ends of the front and back piece which matches the thickness of the side pieces. Generally this will be 1/4″ which allows me to cut a 3/16″ groove without cutting into the tails, that groove is to inset the bottom. Tools used for this joinery is a skewed rabbet plane (on left) and a small plow plane (on right). Besides being safer than power tools, woodworking with hand tools is much more satisfying than using power tools. The dovetails are then laid out and cut using a combination of dovetail saws, chisels, and a mallet.

Stock Preparation

After the dovetails are fitted it’s time for assembly. A plywood bottom is inserted into the grooves prior to glue up with Old Brown Glue, my glue of choice for this type of work. Setting the bottom into grooves helps create an airtight space. A cedar panel will be added. After planing and some light sanding the box is ready for shellac, about 8 coats. Notice that in the right hand picture the inside of the box as well as the underside of the lid have been taped off to prevent getting any shellac on the inside of the humidor. Although it’s a relatively benign odor which shouldn’t linger I didn’t want to take any chances that it could affect the cigars. Traditionally the Spanish Cedar lining is left unfinished. The lining is mitered in the corners which locks it in place. After cutting the pieces slightly oversized with a saw they are mitered using a shooting board and plane as shown in the picture on the left.

I found a piece of Spanish Cedar at Woodworkers Source that caught my eye because it seemed to have what’s referred to as a “fiddleback” pattern. It was 4/4 so after resawing it I was able to get 5/16″ thick pieces for the sides and laminate them for the top and bottom. No finish on these but look at the beautiful grain pattern after using my smooth plane on it — stunning!

Horton Brasses PB-404
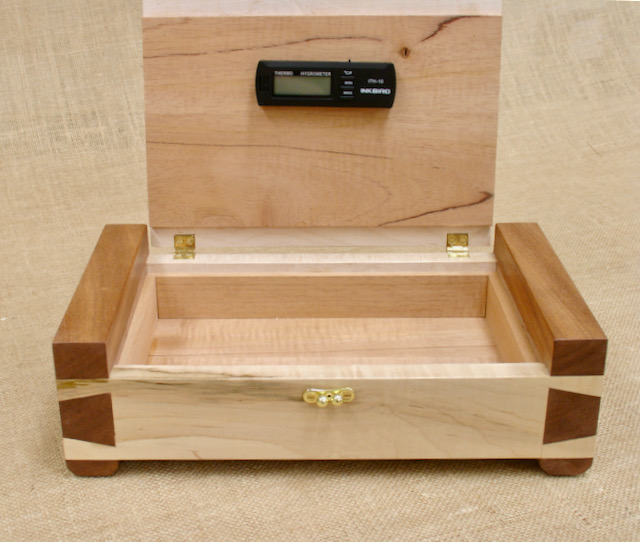
Completed Humidor with Hygrometer

To complement this humidor only the best hardware would suffice. That would be the brass stop hinges recently offered by Horton Brasses. These are small stop hinges and seemed to be the perfect choice for the way I designed this project. The latch I chose was a ball type that will secure the lid and create the airtight space a fine cigar needs. After adding a Hygrometer to the inside of the lid this humidor is now ready for seasoning by whoever buys it, I think it’ll look great on their desk.

Posted in Uncategorized | Leave a comment

Entry Door Project

Here’s a picture of our door as it originally was. As you can see, the Arizona heat hasn’t been kind to it. Because of all the clavos and corner hardware attempting to sand/remove the finish while the door was in place wasn’t an option. Diane and I explored the possibility of having the door replaced but that ran into the thousands of dollars — not an option! We both like doing projects so our choice was to do it ourselves. From start to finish was about a week’s time but the results are well worth it.

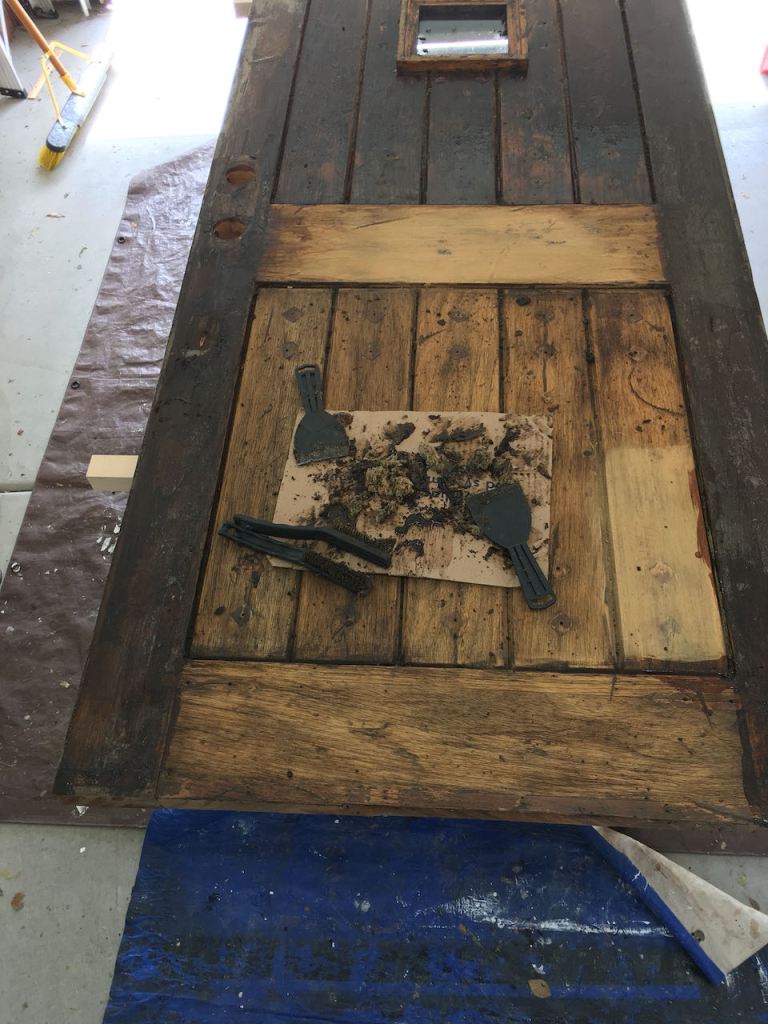
Here’s the installed door after our DIY skills gave it a do-over; now it’s a definite focal point for our house. We used Jasco’s Premium Epoxy and Paint Remover and as you may guess, the claim that it’ll remove up to 15 layers of paint is a bit of an exaggeration! The first coat only removed whatever top layer had been previously applied. Diane and I each worked on the panels at the center first. We let subsequent coats of the paint remover sit longer than the recommended 15 minutes which helped. The first tools we used were plastic putty knives/scrapers followed by a brush with brass bristles. Didn’t take long to round over the edges on the scrapers and completely clog up the brushes. Thankfully those are relatively inexpensive and well worth replacing as needed. Once they got dull or clogged they weren’t very effective.

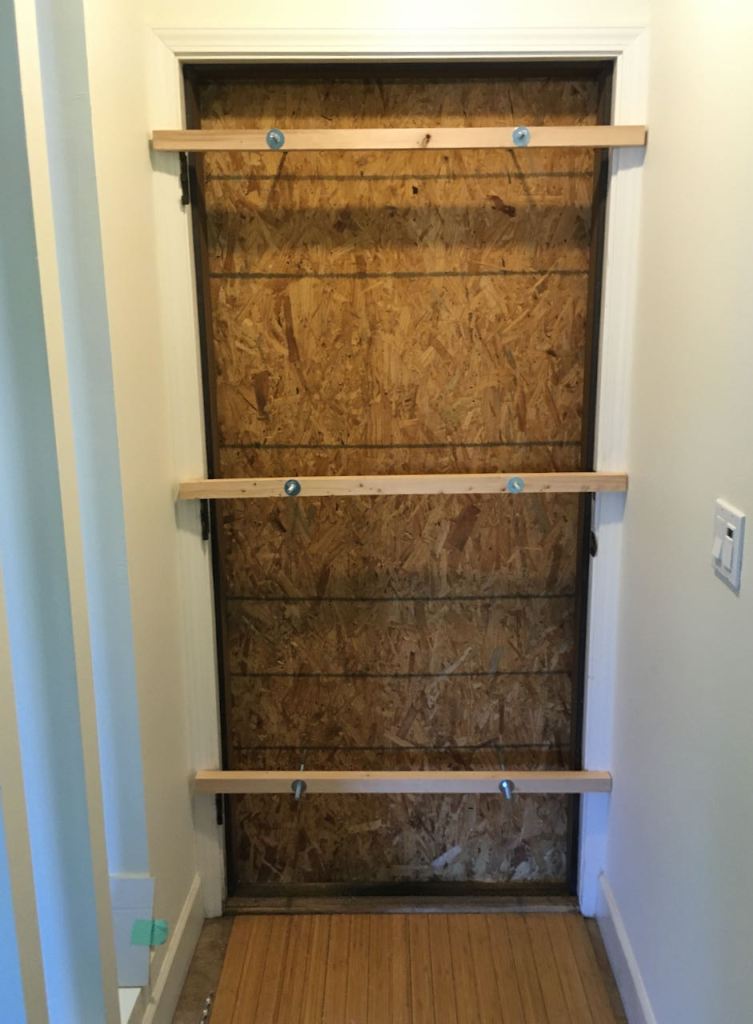
The door was placed on a pair of sawhorses in the garage which made it easy to work on. The front door was secured by cutting a piece of OSB plywood to size and then running long carriage bolts through some 2×2’s inside of the door frame. After removing all of the hardware and clavos it was time to tackle removing the finish. As recommended, we began the process on the inner panels. Brushed on the paint remover in one direction, let it sit for 15 minutes, then begin to scrap. Look at the before picture, notice how the lower 2/3’s of the door has really been beaten up by the sun? That area was only slightly easier to get clean. After scraping off as much as possible we used a brass, wire brush to remove as much of the old finish as possible. This process was repeated 3-4 times, the inside was tougher to remove since it hadn’t been out in the weather like the front of the door. Here’s a short slideshow of the project, I’ll describe what you’re seeing in the paragraph under it.

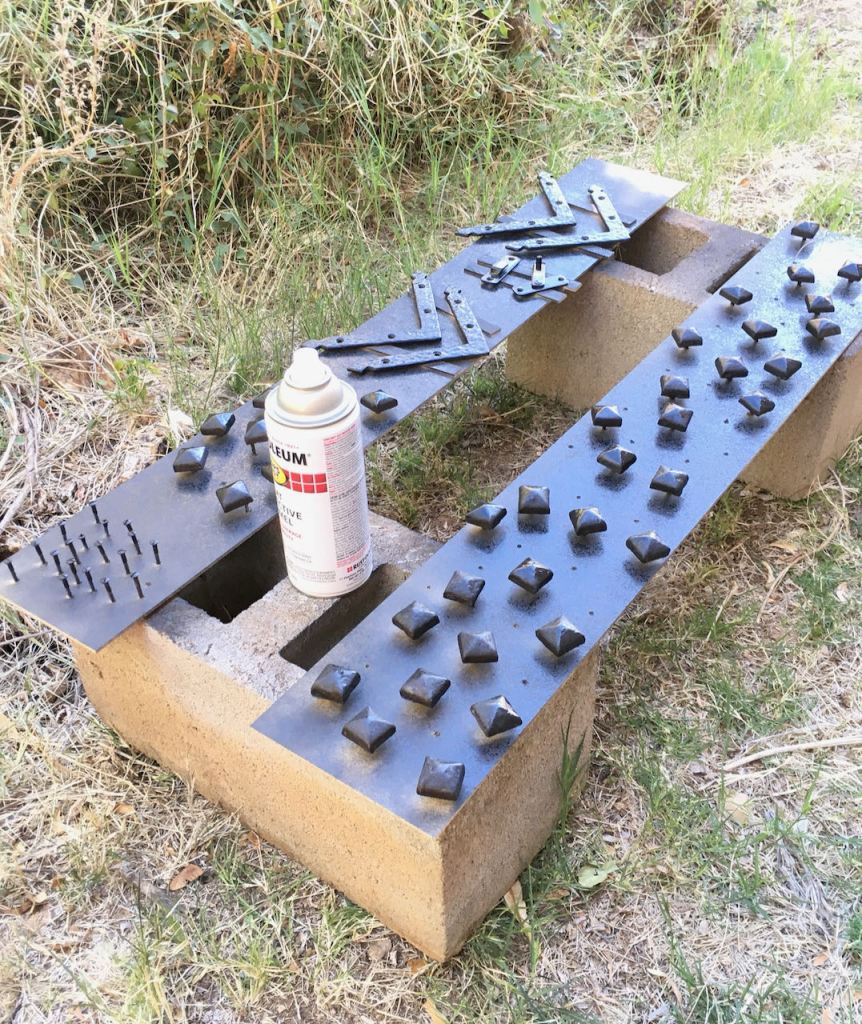
The first picture shows how the house was secured with a piece of OSB plywood using long carriage bolts that go through the 2×2’s and tightened against the door frame. Needed to create a temporary weatherstrip at the bottom out of some rolled up paper towel! The next two pictures give you an idea of the stripping process. I did some experimental sanding to see how that would look and judge how many times the stripper would need to be applied. Using brass brushes after getting most of the “goop” off with the scrapers worked really well. Most of the surfaces needed 4 applications of the paint remover. The final picture is of the hardware which was cleaned with steel wool and denatured alcohol and then sprayed with Rustoleum flat black.

Next up was sanding and yes, my furniture work rarely sees sandpaper since I prefer a hand planed surface but this project is different. When using an oil finish you don’t want to go to a super fine grits like 320 which I saw someone do on a video. That polishes the surface too much and the oil won’t penetrate very well. For this project, 150 grit was perfect. I’ve never been a fan of surface coatings and a project like this that’s exposed to the desert weather that can range from below freezing to 120° plus a surface coating is lucky to last a year! For that reason I chose General Finishes Exterior Oil. Application is to apply a fairly thick coat with a brush, allow it to penetrate for 10-15 minutes and then wipe it completely dry. Very important that the surface is completely wiped dry. We’d let one side dry a few hours, flip the door to do the other side, and then repeat the next day for a total of 3 coats.
After re-installing the clavos, corner braces, and hinges my neighbor helped me re-install it. Also re-hung the “speakeasy” door using a piano hinge. The original hinges were pretty chintzy! The door handle and lock had a dark, antique finish that was pretty much destroyed by the sun. It was replaced with a brushed nickel set from Schlage which gives the door a contemporary flair. I’m sure the door will need to be refreshed every year or two but it will be as simple as wiping on a coat of oil with either a rag or nylon scrubby then wiping completely dry. It won’t stick to the hardware, won’t need to be sanded, and can easily be done with the door in place.

Safety Note: If you’ve never worked with an oil based finish it is very important that you put your rags in either an airtight container (which you probably don’t have) or do like I do and soak them in a bucket of water. After soaking lay them out to dry and discard in the trash. Spontaneous Combustion is real, I know from personal experience!

Posted in Uncategorized | 1 Comment

Roasted Oak Floater Frame

Keeping it Real by Diane Eugster

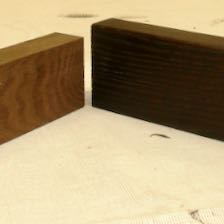
Once I published a picture of this project the messages started coming in: “what in the world is Roasted Oak?” Allow me to answer that first before I blog about this frame and painting by Diane Eugster. Roasted Oak is wood that has been placed in a kiln for an extended period of time so that all of the sap and sugars caramelize the wood and essentially turn it a dark brown. I’ve also used poplar for a frame that was treated the same way. It was purchased from Woodworkers Source here in Phoenix, here’s a LINK explaining the process. When you are cutting this wood it smells like you’re cleaning out a fireplace! The color goes completely through and if you look closely at the finished product there is a very slight hint of brown in the grain of the wood which warms it up nicely. The finish is Osmo Polyx Oil #3054 which is wet sanded into the surface. It’s the same product I use for my furniture work.

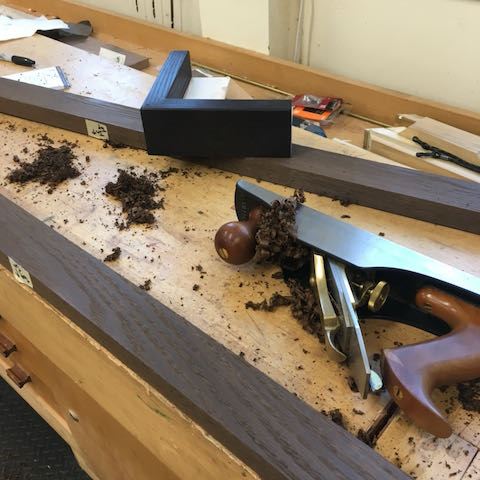
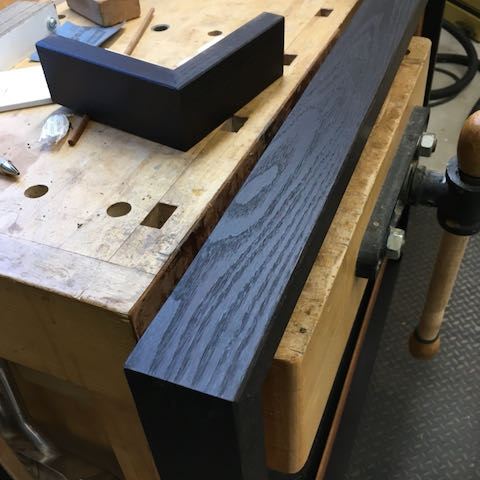
I added these pictures to illustrate how the wood works and finishes. At left is a piece of the raw wood next to an oiled one. The center shows it being planed which it does nicely. At right you can see how the grain shows through and how (IMHO) how beautiful it is!

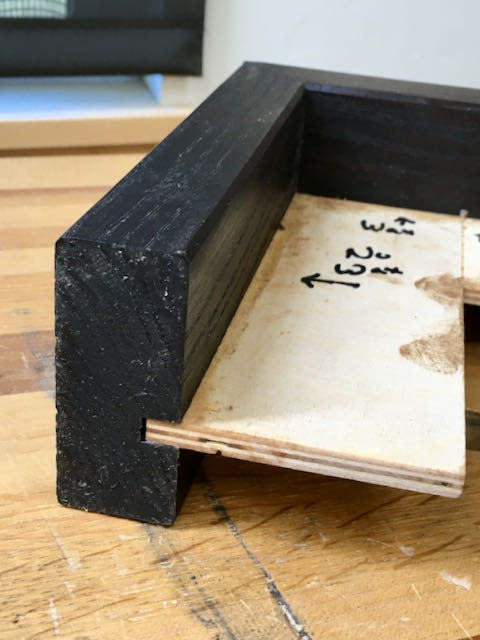
A question I’ve been asked quite often deals with how I make a Floater style frame. Many commercial moldings available are a simple L-shaped piece which presets the distance for the canvas to be mounted below the edge of the molding. My method is to cut a dado (groove) in the side of the frame located at whatever distance I need to accommodate the artwork. I’ll glue a piece of Baltic Birch plywood into that to mount the canvas or panel. You can see that in the photo at the left. Another advantage to this method is that the plywood piece reinforces the corner of the frame.

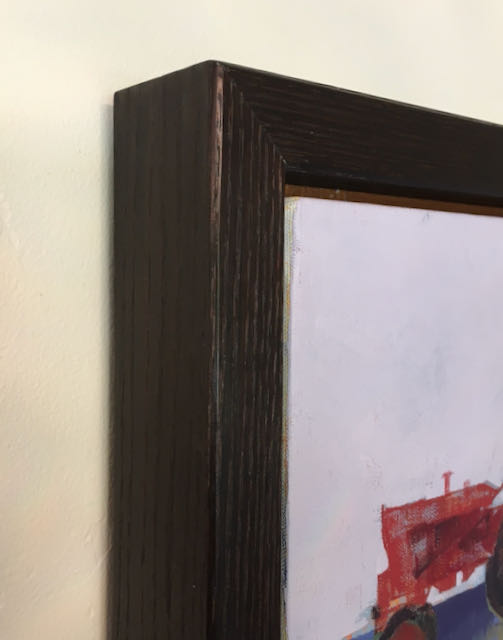
A few notes on the assembly. I was advised to use a polyurethane glue so Gorilla Glue is my go to for that. Each corner is also reinforced with a biscuit. During the dry clamping step the Birch plywood was cut to the correct size. Gorilla glue applied to the corners, assembled and then clamped, next the plywood pieces are glued into their place and left to dry overnight. The next step was cutting a slight chamfer on the inner and outer edge with a router. The inside chamfer was squared off with a chisel. The Osmo finish is applied with a brush and allowed to soak in completely before wiping dry. I used 320 wet/dry paper to complete the process and as you can see, it gave very nice results! Notice in the corner detail how that chamfer has a gleam to it depending on how the light hits it or the vantage point of the viewer.

One thing I noticed during the wet sanding process is that the resulting slurry is dark. Many times I’ll use splines of contrasting wood at each corner of the frame and this slurry would probably color the contrasting color of the spline — guess that’ll be the next experiment!! By the way, the size of Diane’s painting is 24″ x 30″ and it is oil on canvas and the size of the molding is approximately 1+” thick by 2+” wide. That size was determined by the width of the stock I was able to get.

Posted in Uncategorized | 1 Comment