Making Tabernacle Frame #234

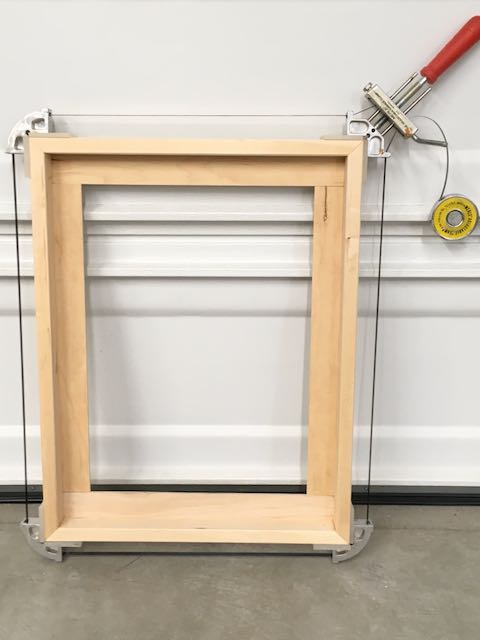
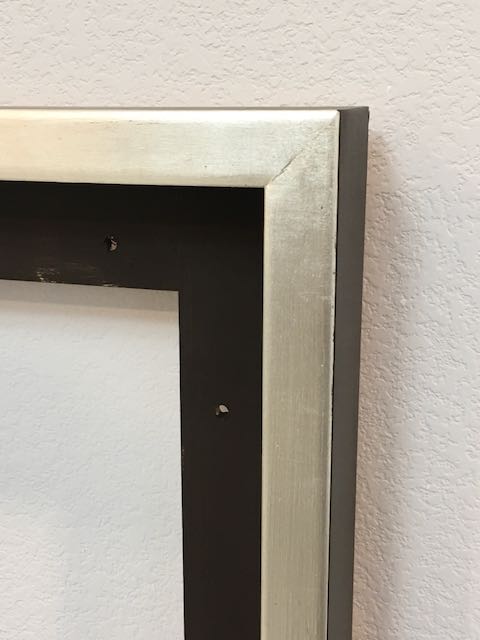
There’s a feature of WordPress I really like called image compare that allows you to see the final results and then slide the arrow to the other side to view the backstory. The backstory on this frame is the full size drawing made of it on the assembly table of my shop.

The finished frame and painting by Diane Eugster and the backstory of its design

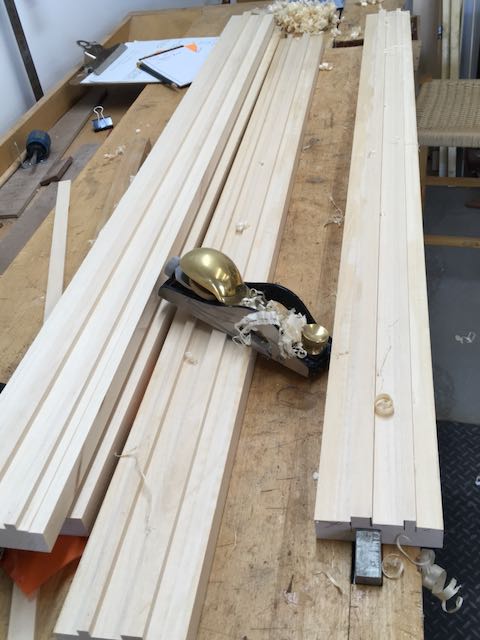
Although I’ve made tabernacle frames for other artists, this is the first one I’ve made for my wife and favorite artist Diane Eugster. The title of this painting is Heartbeat and it’s a 24″ square, oil on canvas. The goal was to design a frame inspired by tabernacle style that was still somewhat contemporary. Moldings can be made by hand using planes and routers but these were found at my local, so-called big box store. I prefer to draw these out full size so the moldings can be shown easily to get a true representation of how the frame will look.

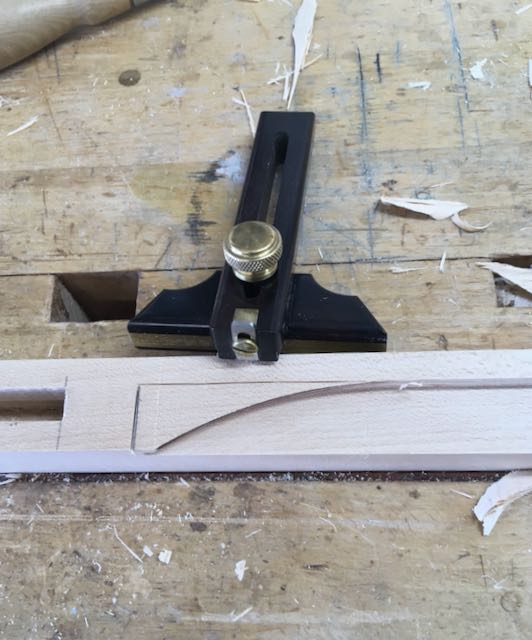
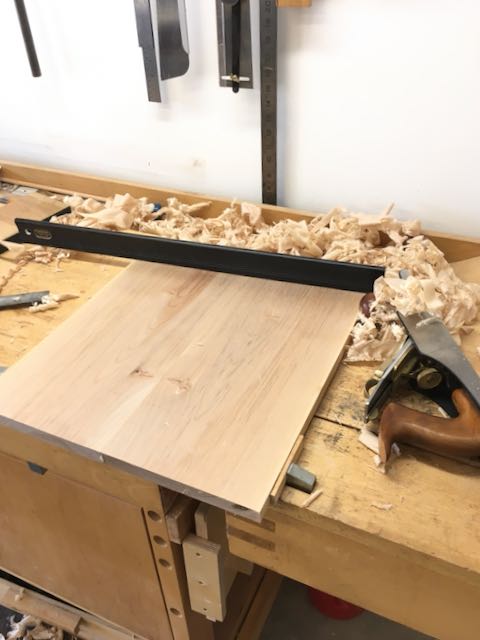
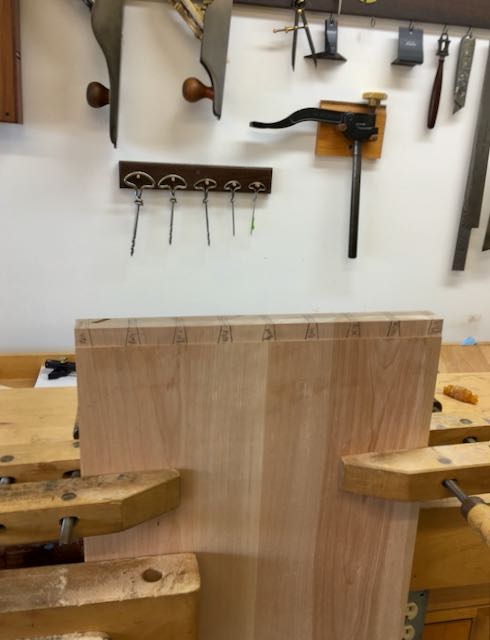
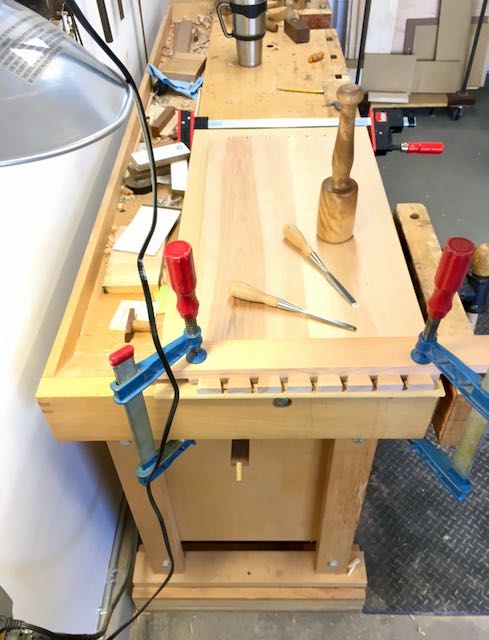
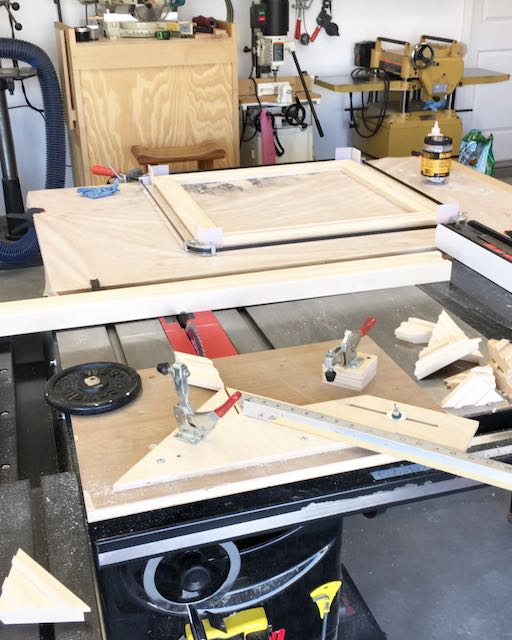
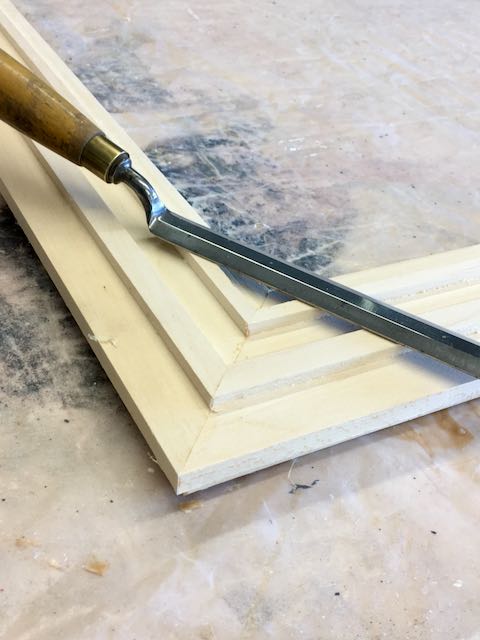
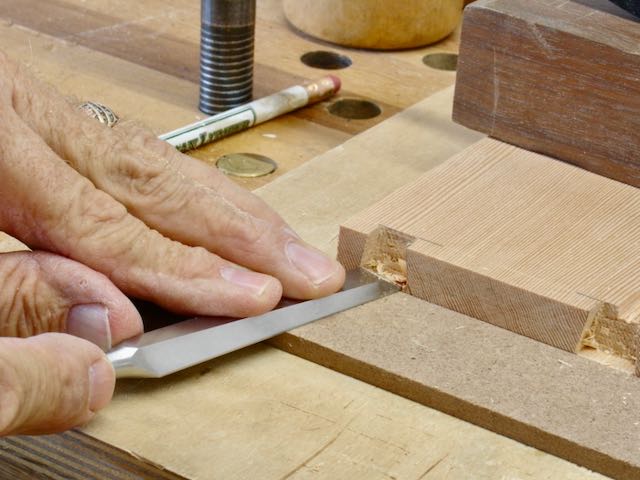
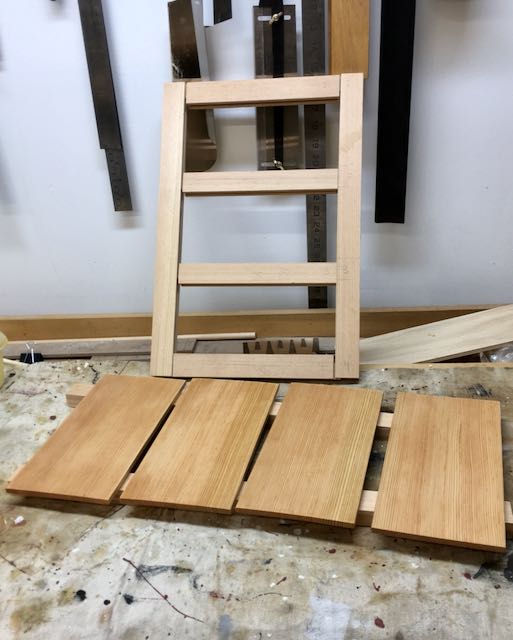
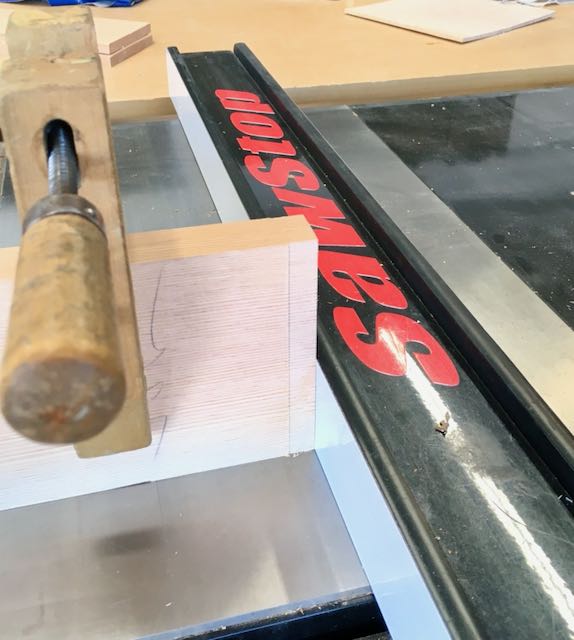
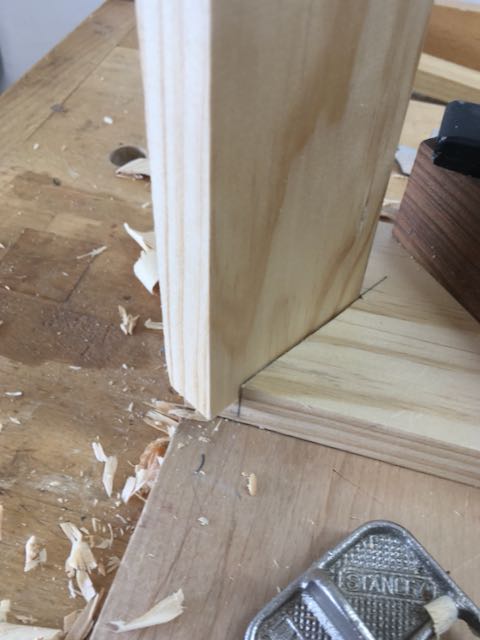
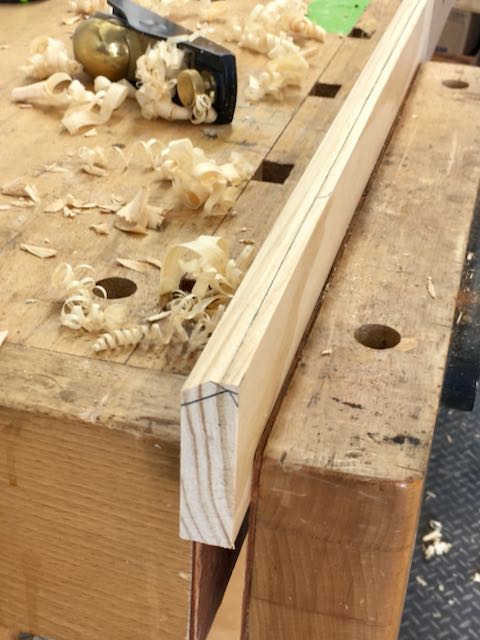
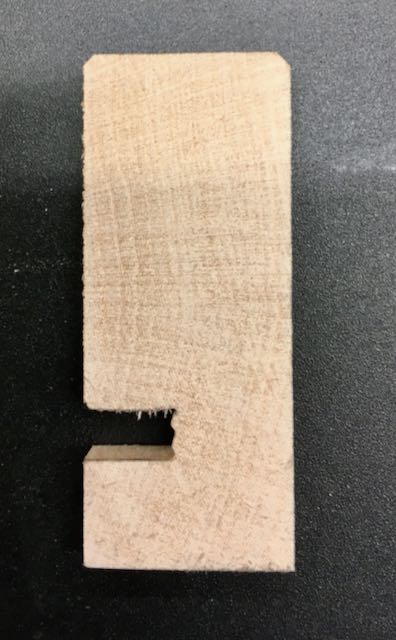
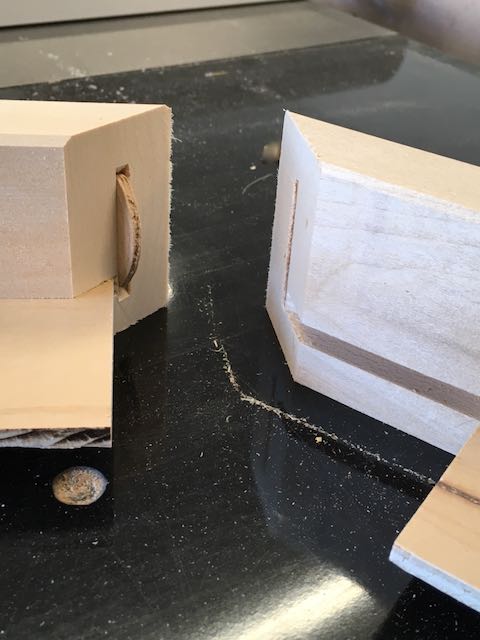
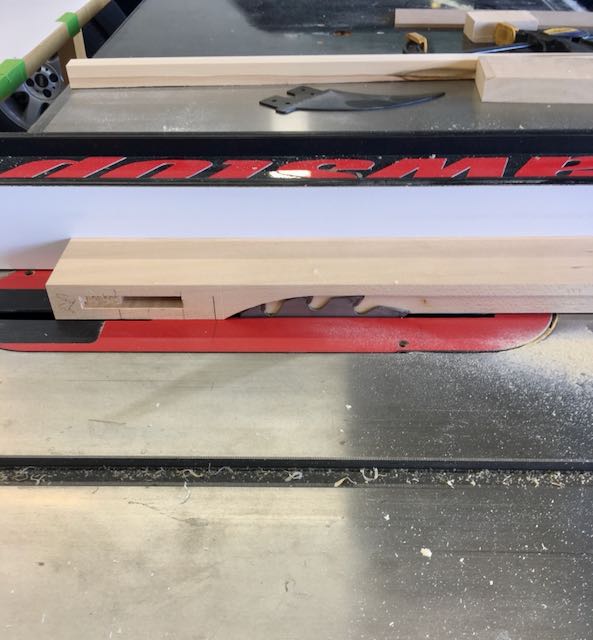
The method of construction for tabernacle frames requires mortise and tenon joinery rather than the typical mitered corners found on most frames. The reason is that the side, top, and bottom pieces are not the same width. The bottom is the widest so I prefer using double mortise and tenons there to prevent any twisting. The material used is 1 1/16″ thick Basswood. Cutting the rabbet for the canvas to sit in is different than the process for a mitered frame. I use a typical, 1/4″ rabbet cut with a dado head on the tablesaw. The top and bottom pieces are rabbeted their entire length but not the side pieces. For the sides you need to start and stop the cuts on each piece. This is accomplished by drawing lines on the tablesaw showing the beginning and end of the cut. On each piece you also draw lines where the rabbet starts and stops. You need to slowly and carefully lower the piece down onto the blade (saw turned on) then advance it to the mark showing the end of the cut. At this point, the piece is carefully lifted up and off of the blade. Although this seems like a somewhat risky process if you pay attention to what you’re doing it’s not a problem. Since the ends of this cut are round due to the blade the final step is to use a chisel and mallet to square the ends of them.
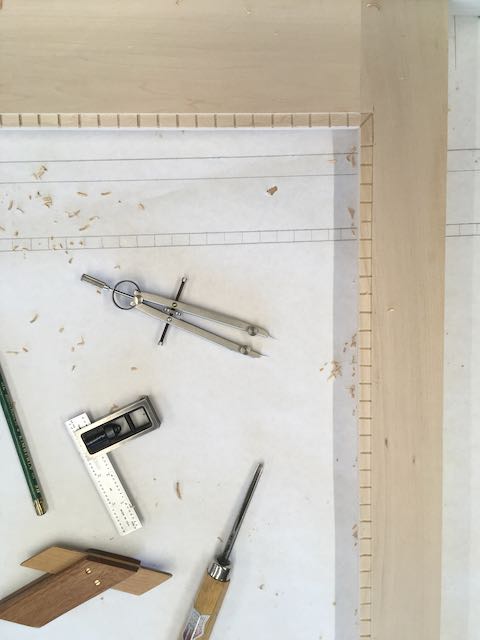
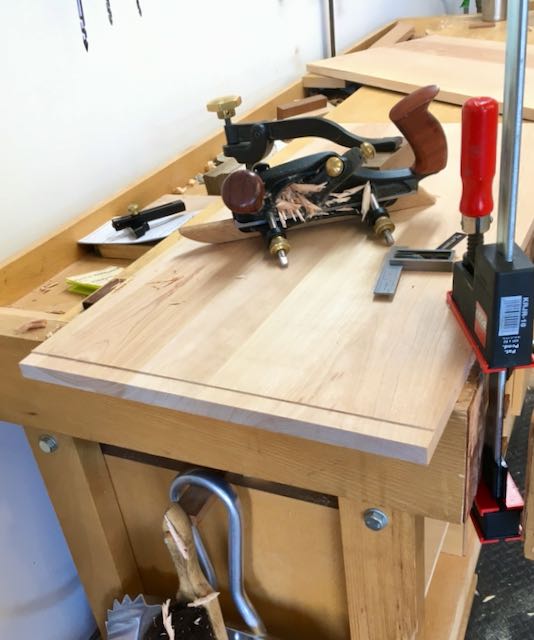
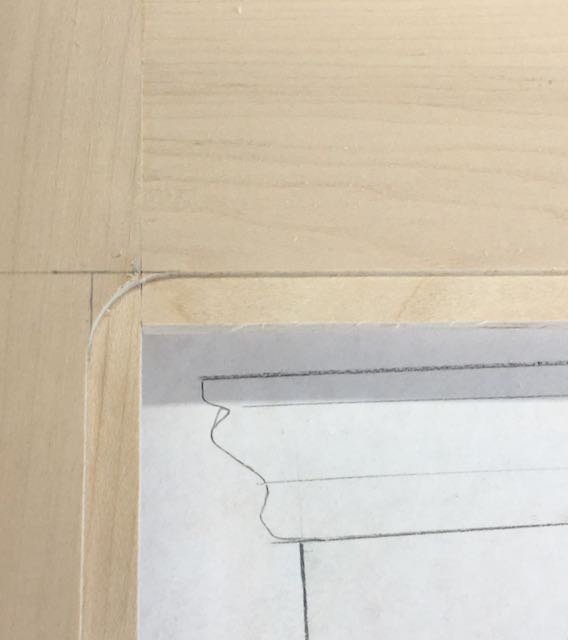
Now that the frame is assembled the sight edge is ready for carving. The first step was creating a shallow, 3/8″ wide rabbet with a router. Once again this leaves a rounded corner and requires some chisel work to square off. It takes a bit of math work and guesstimation to figure out the spacing for the grooves but once I was satisfied they were stepped off with a divider and chiseled with a Dastra #41/4mm small gouge. All that remained was some light sanding to soften the edges.
After completing the sight edge it’s time to miter and attach the moldings and top cap for the frame. The top cap is glued and screwed to the frame, the screw holes were countersunk and plugged. I use glue and #18 brads to attach the moldings and putty all of the holes and any gaps with Durham’s Rock Hard Water Putty, a product I’ve used for decades that many people have never heard of! What makes this product my choice is that it comes in powder form and you simply mix with water when needed – shelf life is forever! I’m guessing most of you have had the experience of finding that tube or can of wood putty on your shelf hard as a rock just when you need it, that doesn’t happen with this product. Once the frame has been sanded it’s time for the finish process which I’ve illustrated below.

The first step to the finishing process is to apply 2 coats of shellac to the entire frame. Before applying the rest of the finish I tape off the back — don’t like seeing any finish on the backs of my frames. The next step is the burnisher/sealer and once it’s dry and burnished the areas to be gilded were taped off. Two coats of a slightly thinned Japan black from Rosco is applied with a brush and allowed to dry completly. The frame needed to be taped off to oil gild the rope detail and the sight edge. These areas were also sealed with shellac after the size was completely dry. For gilding small areas like this I use quick size. The final steps to this process involved mixing a few drops of Mixol black into an acrylic, matte medium to minimize that overpowering composition gold. Wax and steel wool is used as a final step to get an overall warm finish.

If you need a tabernacle frame for one of your paintings or have questions on making one of your own please contact me through this blog.
Posted in Uncategorized | Tagged , , , , , , , | 5 Comments

Guestroom Cabinet or The Battle of Birch is Over!

I really like this WordPress feature called Image Compare where you can use the arrow to compare two images. When I taught I always emphasized to my students the satisfaction they’d get by seeing the results of what they first imagined and sketched on paper to the finished product created with their own hands and initiative. Into my seventh decade and that satisfaction is what keeps me going!

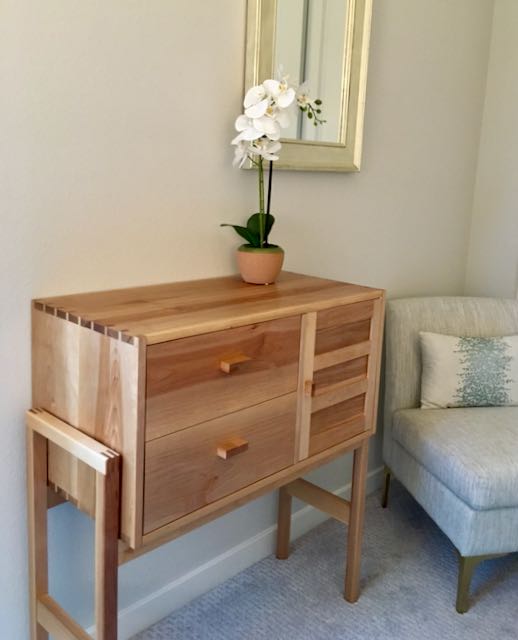
If you read my first blog about this project; My Battle with Birch you know what happened, if not you can link to it. In a nutshell, the panels cupped after laminating them together and that really threw the dovetail layout off. Luckily, I started on the bottom and figured out that by applying cauls and clamps when doing the layout and eventual assembly there was more accuracy. Looking back, I should have let the boards acclimate after resawing for longer but hindsight is 20/20 right? I did do that for the drawer stock and had much better results. All in all, this was a great learning experience and since it wasn’t for a client I felt more freedom to experiment with techniques I didn’t usually use.

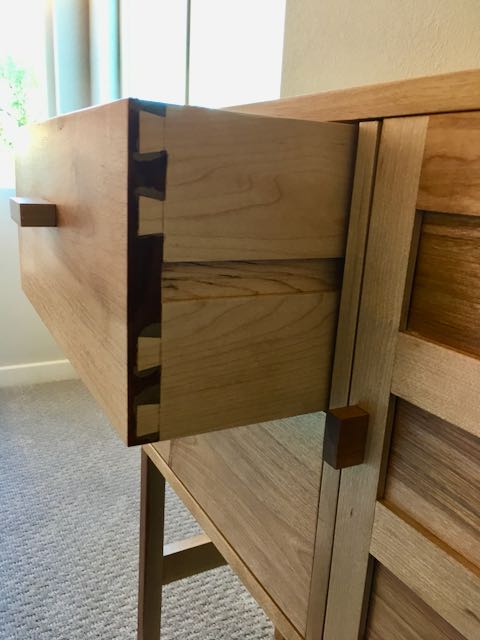
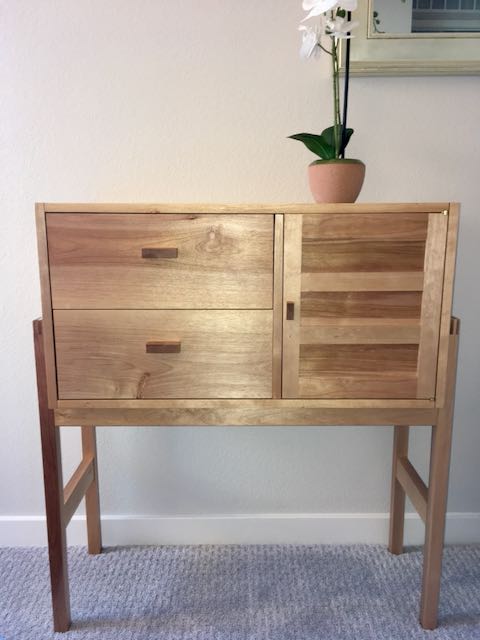
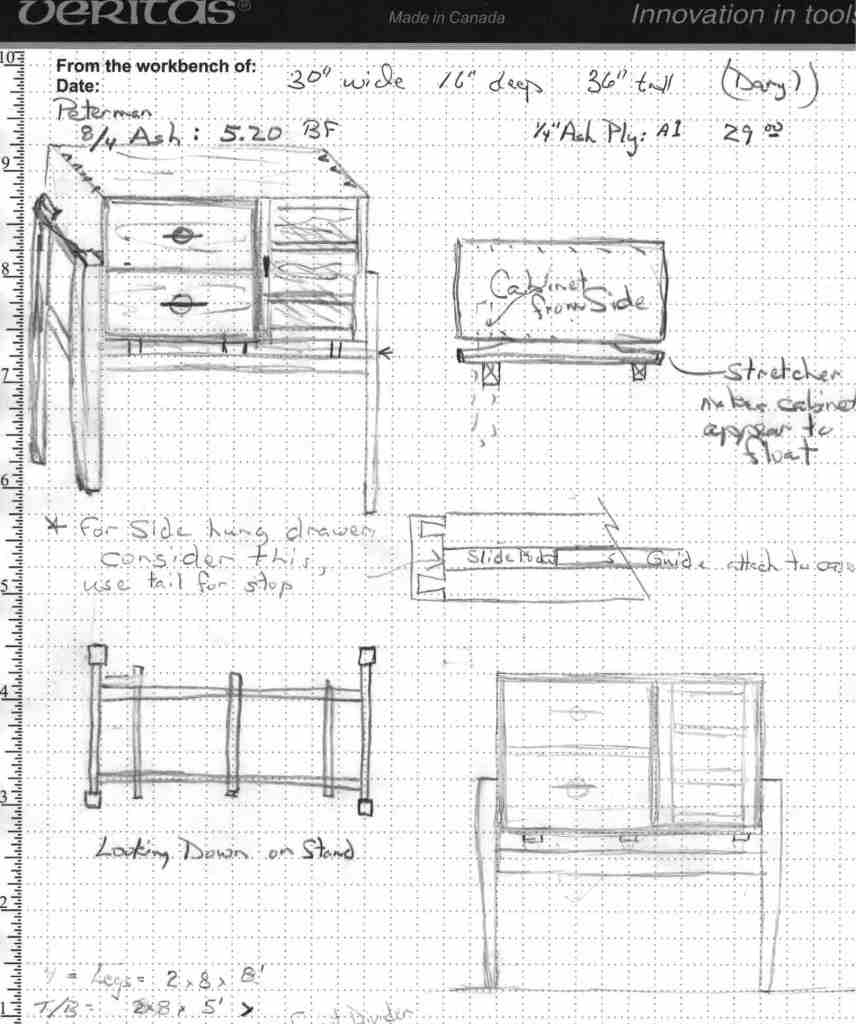
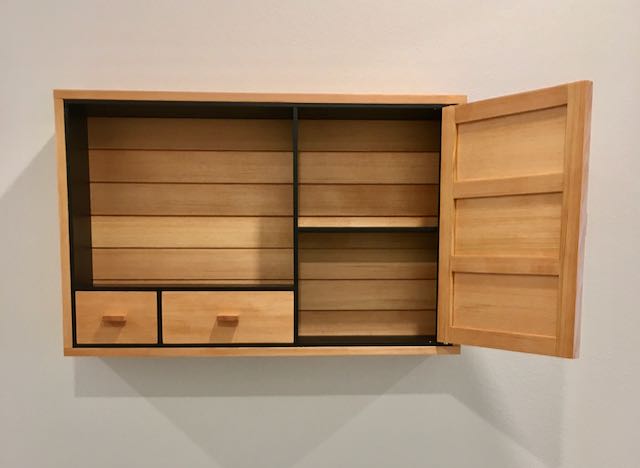
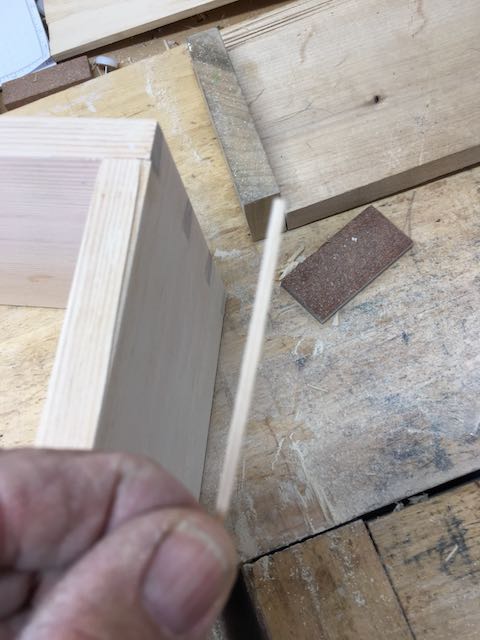
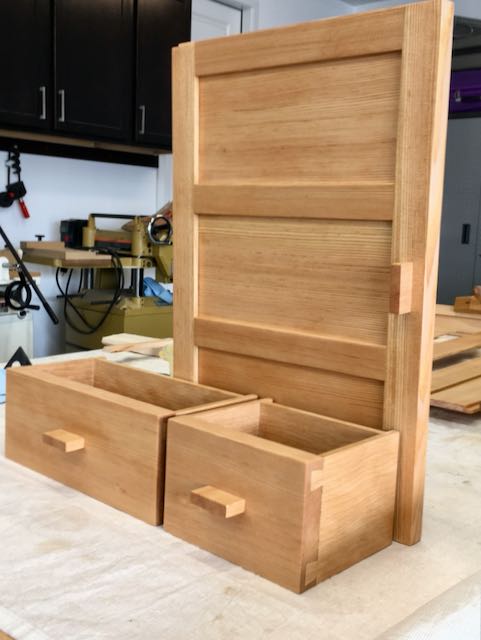
One technique I wanted to try was side hung drawers that used the drawer front as a stop. I’ve done them before where the groove in the drawer side was routed but didn’t go the entire depth of the drawer. When using the drawer front as a stop it’s easier to set the distance, it’s simply the thickness of the drawer front. The drawers are approximately 7″ tall x 16″ wide and 14″ deep. The sides are soft Maple. One odd thing I noticed about the Birch is that the Old Brown Glue absorbed into the end grain and didn’t clean up like it always has in the past.

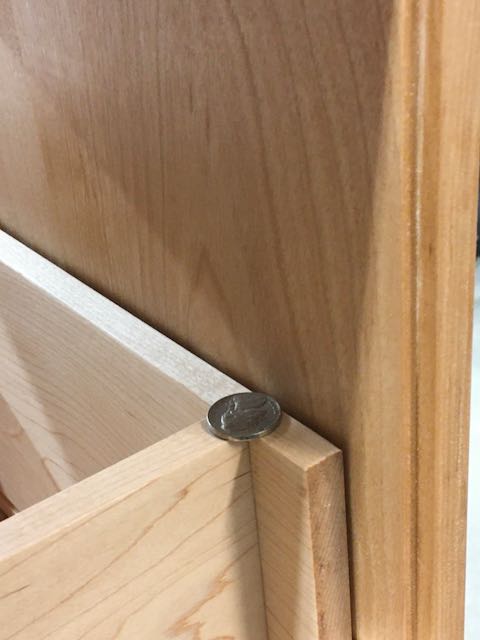
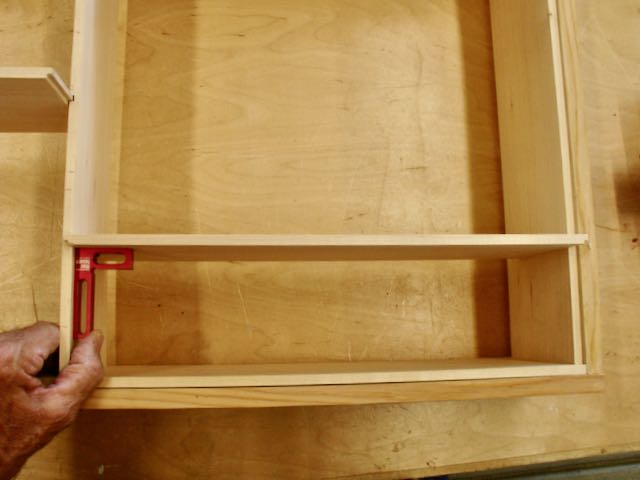
The method I used to get the spacing between the drawers is using a nickel or a dime, they’re +/- 1/16″. After placing the bottom drawer on the coins and putting the slide in the slot I measured from the bottom of the case to the bottom of the slide. Next a piece of MDF is cut to that measurement and the slide is attached with a couple of screws. As long as the MDF is square and the slide is held firmly against it you’re insured of the same placement on both sides of the box. At this point I’m concerned with the height only, not the setback. Once the height is good, I place coins on the lower drawer, put the top drawer and slides in place, measure and repeat the process with another MDF spacer. If the spacing between drawers if correct it’s time to attach them permanently, a small combination square is adjusted to the thickness of the drawer front and the slides are installed. A bit of wax and they’re good to go!

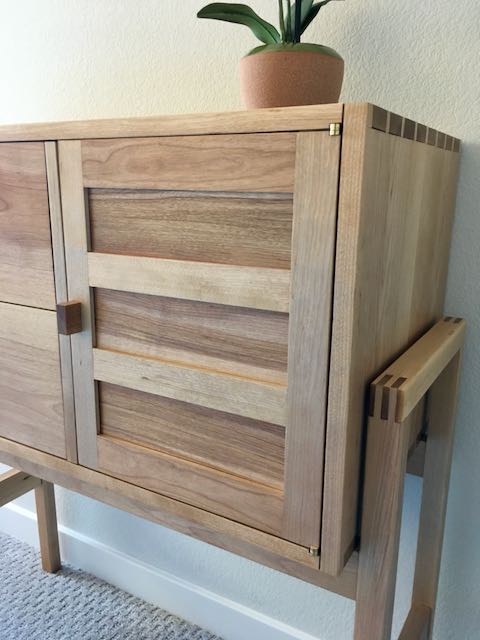
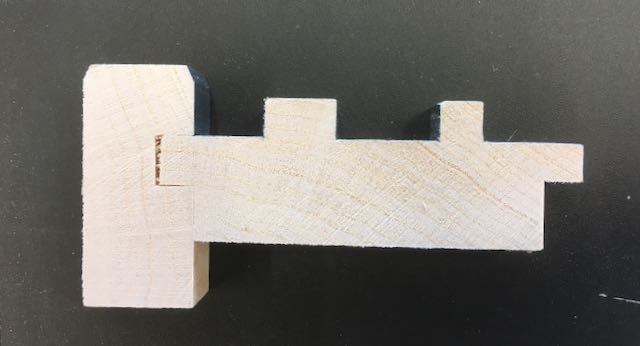
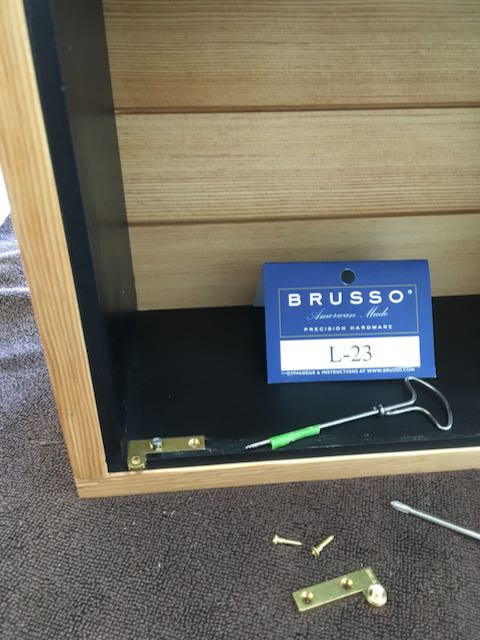
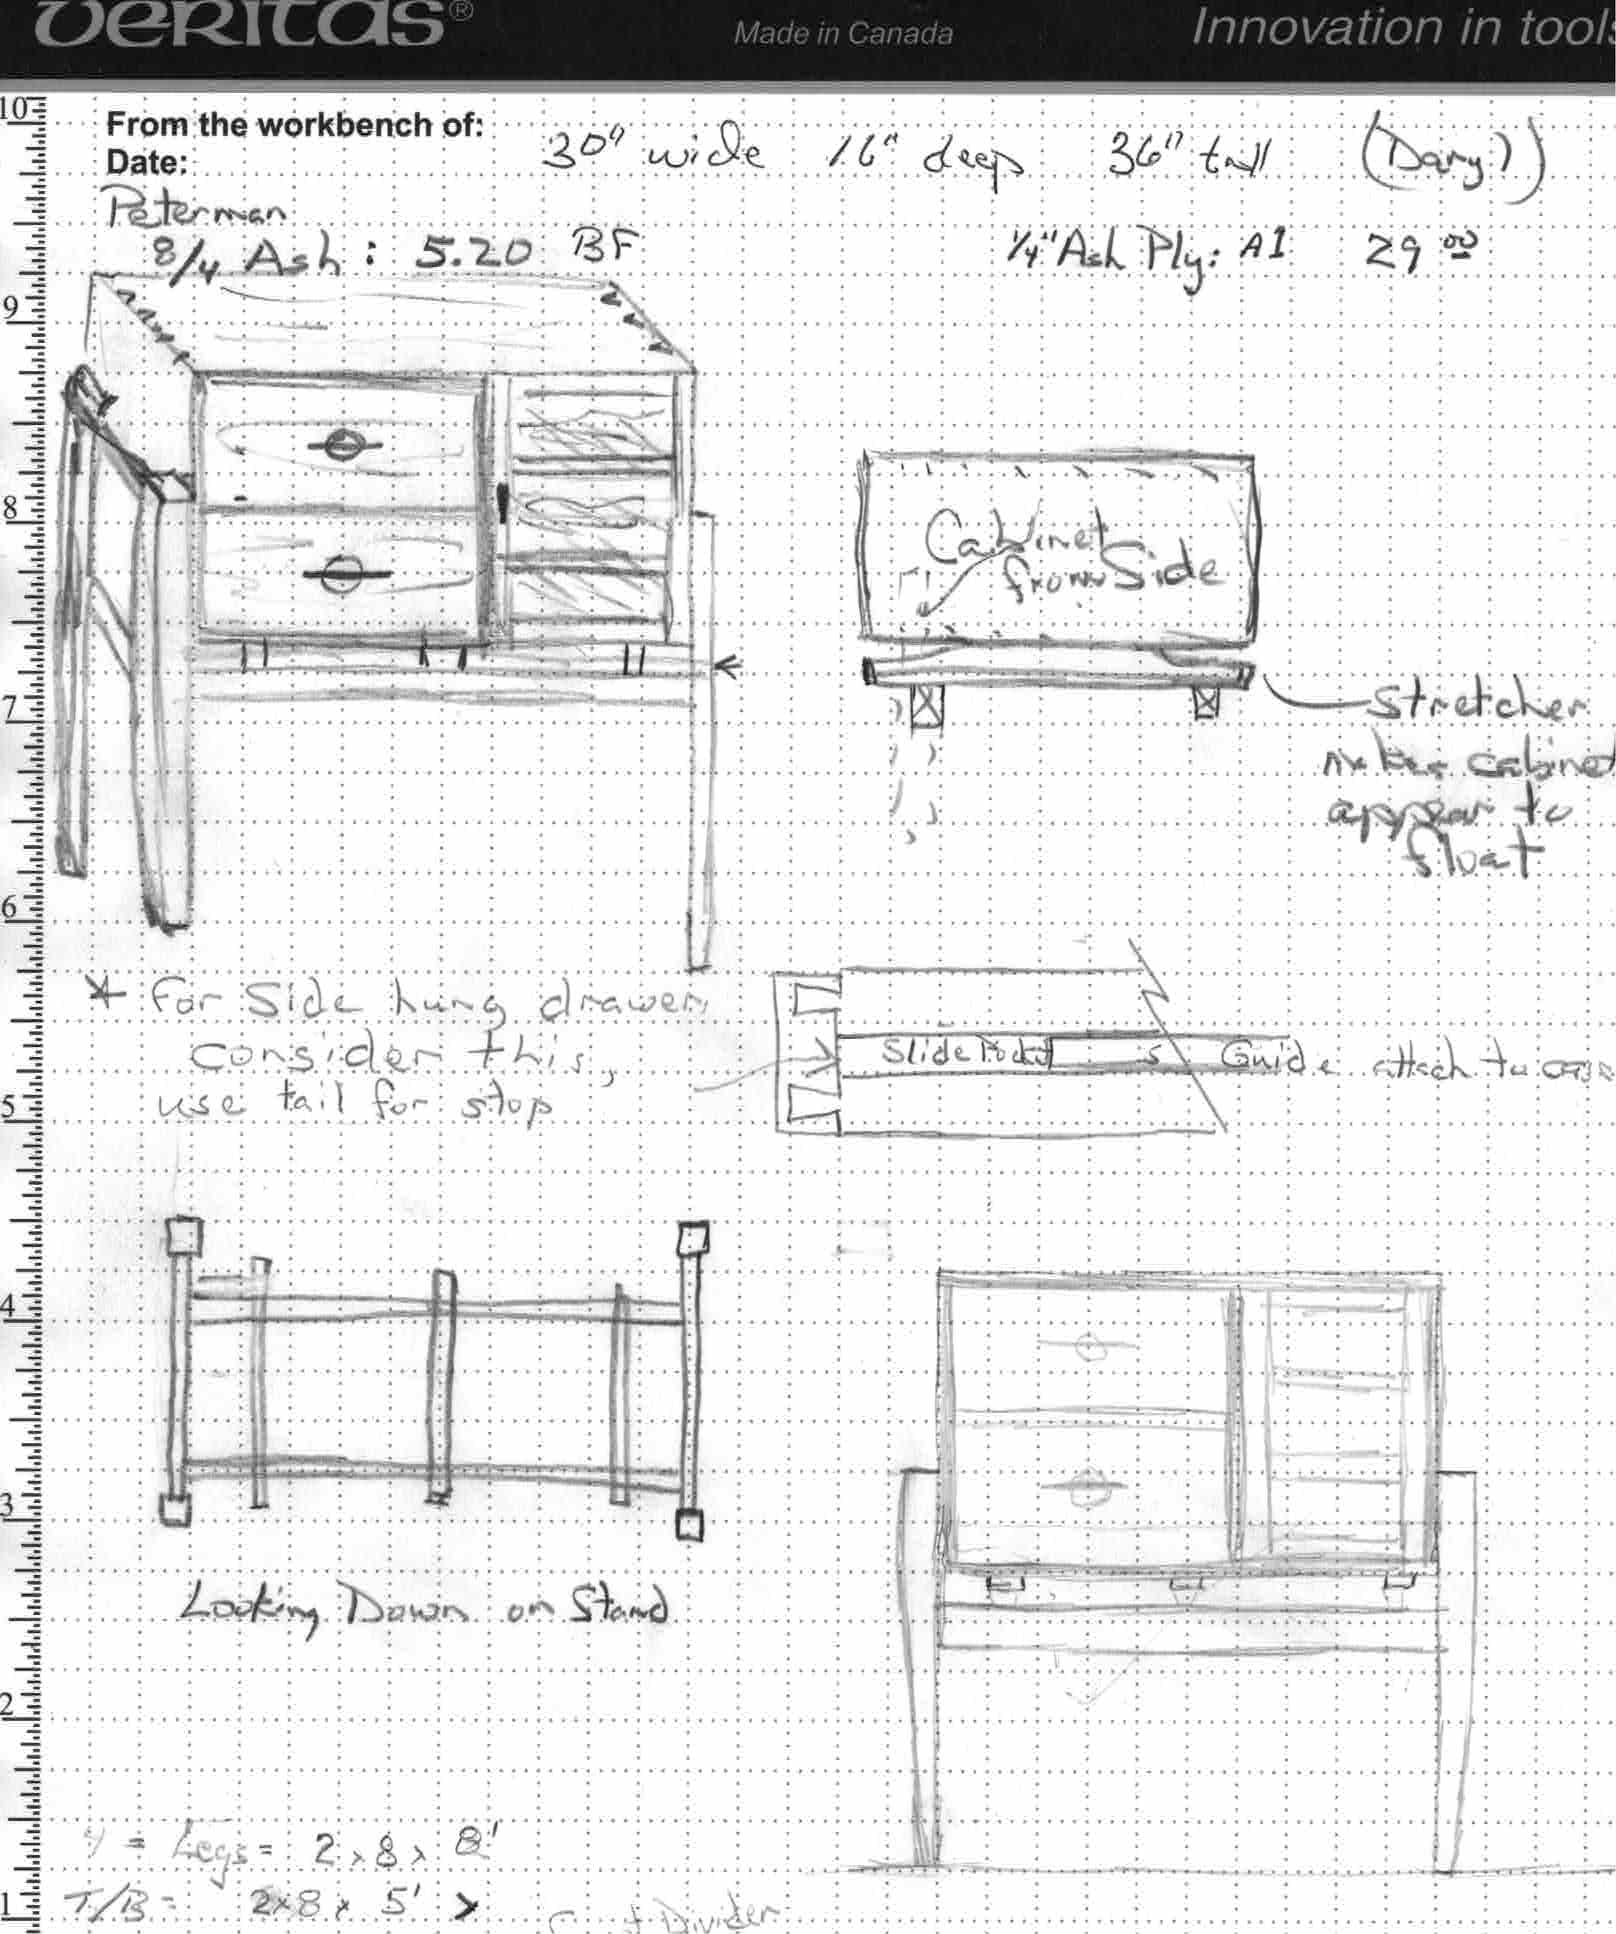
The final technique for this project was to use a double bridle joint on the stand. If you look at my original drawing you can see I changed from that. I have an old issue of Fine Woodworking Magazine featuring double bridle joinery and I decided to use that here. Already had the contrast of the dovetails so this seemed appropriate. It was issue #247 and after completing the work realized my rip blade really needed sharpening! Offset knife hinges from Brusso and the small, endgrain knobs add a bit elegance I was after for this piece. The finish is OSMO polyx #3043. Two coats applied with grey and white nylon scrubbies.

Hopefully I’ll be contacted from a future client who likes this piece and would like their own version of it! Here’s an ironic twist — never thought I’d be the first one to use it, I got the dreaded Covid and am now quarantined in my own guestroom!!

Posted in Uncategorized | 9 Comments

My Battle with Birch!!

With our recent move, we now have a guest bedroom with a bed but no dresser or drawer space for guests to use. The room is large enough for a small chest so rather than going to Home Goods, Mayfair, etc. as a woodworker I figured there’s always time for a project and this is the design I came up with.

My initial plan was to make it out of Ash but the price and selection at my local supply didn’t meet my needs. Their Ash had a very pronounced and vivid grain plus they won’t cut boards and what they had wasn’t suitable. You may remember my recent Danish cord entry bench project. It was made of Birch. I really liked the workability and the way it finished so decided this project would be Birch as well — not all Birches are created equal!

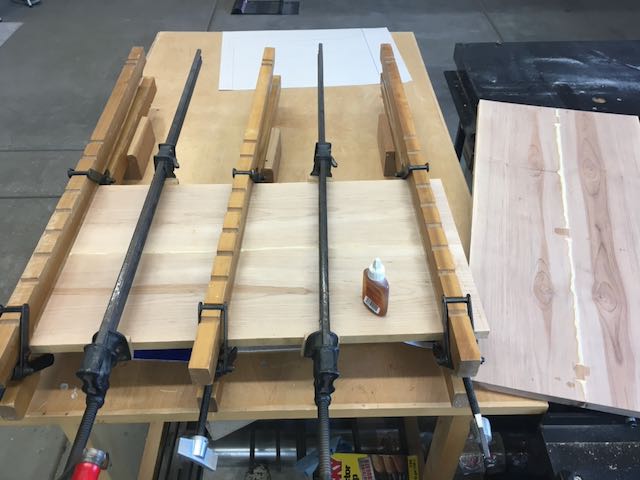
I purchased 8/4 and the main goal was to get 7″-8″ width so I could resaw and book match them yield panels around 16″ wide. My usual sequence is to plane a good edge, resaw, then run through the planer to get both pieces the same thickness. After establishing a good edge on both pieces with my old #7 Stanley corrugated plane they are glued up with Gorilla glue and panel clamped overnight. For some unknown reason every one of the panels cupped and if anyone who reads this has an idea why I would certainly appreciate your thoughts! This piece was designed based on my 15″ planer. What I do is plane the cup out of one side as good as I can, then rip the panel to where it just fits in the planer to smooth out the other face which will be finished off with hand planes. This cupping of the panels is what caused my battle with the Birch!

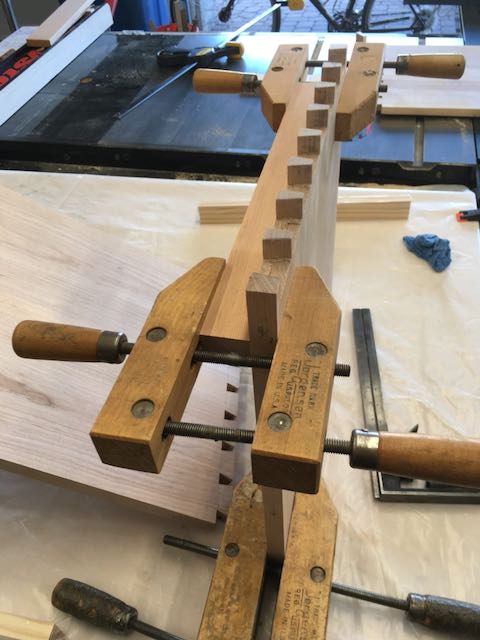
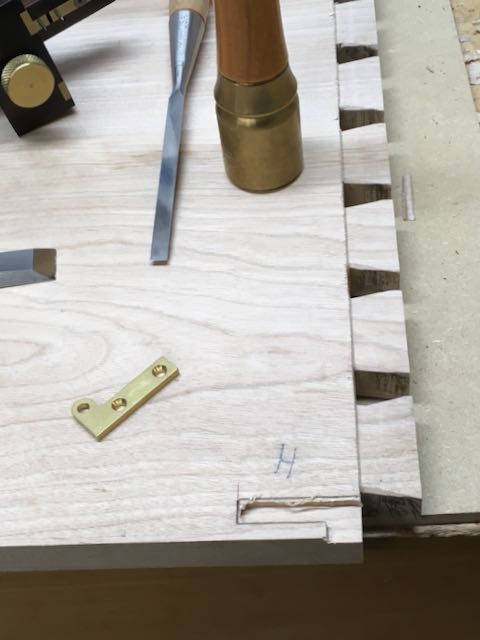
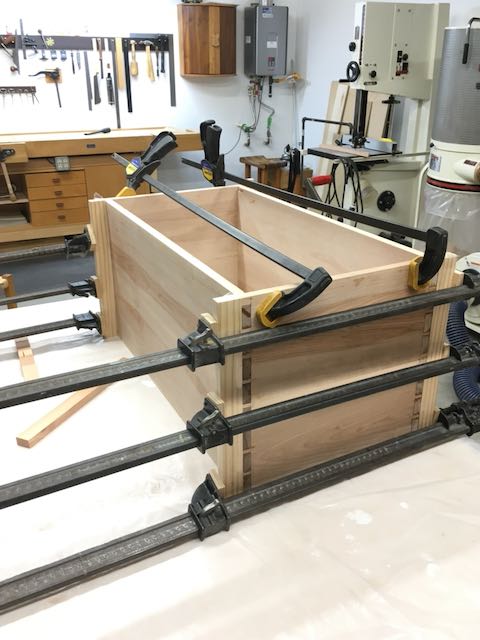
Every step of the project became a hassle due to that cupping. Reminded me of starting my carpenter apprenticeship after Nam; my first boss always stressed that if we screwed up on the foundation we’d be fighting it every step of the way and he was right. It’s been a long time since that I’ve made this many dovetails on a project (8 tails) so this became a personal challenge. That cup threw the layout off so things didn’t fit “right off the saw”! One thing that helped somewhat was clamping a caul to the panels when transferring tails to the pin board. I also used that when glueing the piece up. Since this is a personal piece for me I can accept the results, if it was for a client I’d have to start over. Here’s a collage of the process.

At this point the case is glued up and the divider has been installed to separate the drawers and door. Since this has turned into a project where I can challenge myself to do techniques I haven’t done before I may use a double bridle joint for the stand — heck, mortise and tenons are no challenge. I am also working on a Tabernacle Frame for Diane’s latest work, something I’ve wanted for quite some time. Anything to stay off the couch right?

Posted in Uncategorized | Tagged , | 4 Comments

Latest Frame Profile #232

When I started making frames it was always hard to find information, I got the feeling that creating, carving, gilding, finishing, etc. were secrets that no one was willing to share so the teacher in my decided to share my work via my blog. If it helps someone that’s my intent. Am I an expert? no way but if what I share helps someone else “it’s all good!”
If you’ve seen my blog you probably know that my wife, Diane Eugster is my main client and I enjoy coming up with frames that compliment her work. I get inspiration when I see it on her easel in the studio. She recently completed a painting titled “You Can Leave Your Hat On” and I noticed how the black in the subjects hat resembled the stripe on tuxedo trousers. I wondered if it would be possible to subtlety show that in a frame. The painting is 24″ square and is a stretched canvas.

The main material I use for frames is a 1 1/16″ Basswood from Peterman Lumber which comes in random width and length. The width available will determine how wide the frame can be and Diane always tells me the wider the better! If you look at the sample piece at the beginning of the blog the side piece measures 3/4″ x 1 3/4″ and the panel is 1″ x 3″. My furniture background dictates that I use joinery for strength so after the wood has been planed to size the first step was to set up a 3/8″ wide dado to groove the edging. By using an edging like this you can create a frame to fit stretched canvas from 4/4 material. The final step for the edging was planing a slight chamfer on both edges of the outer surface.

The first step was cutting the groove in the edging that would eventually be used for the tongue on the panel. Next up was to create the profile on the panel piece. The depth is 1/4″ and the width of them is narrower as they get to the sight edge. The dado head was then adjusted to create the tongue that is glued into the edging and also the rabbet. The dado set leaves a pretty nice surface that only needed a little refining with a rabbet block plane.

All that remained was to miter the edging, the tongue and groove joint for joining the edging to the panel reinforces the frame. These were glued on and clamped overnight. This makes for a strong frame and almost guarantees that the miters will never separate. After any required cleanup and light sanding the frame was first sealed with shellac and then 2 coats of Japan Drop black were brushed on.

I allowed 2 days for the Japan to cure then lightly burnished the top surfaces and outside of the edging with 4/0 steel wool. Liberon Black Bison wax was applied to those burnished surfaces which I think now mimics that tuxedo stripe effect I was after!

Posted in Uncategorized | Tagged , , | 2 Comments

Wall Hung Cabinet Part II

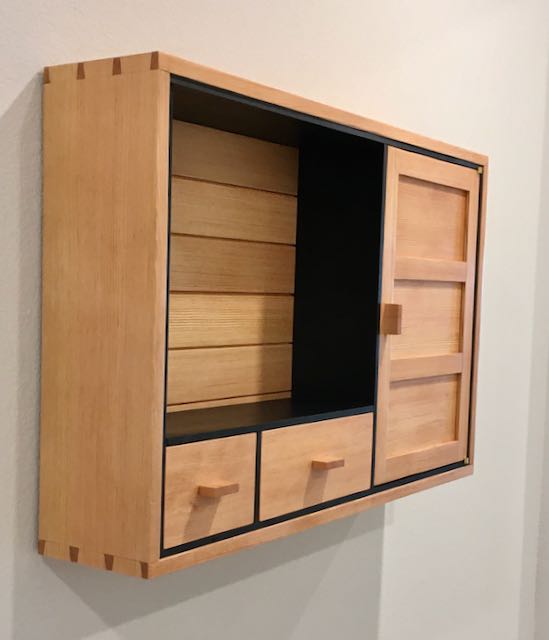
If you’ve seen Part I hopefully you enjoyed it so this is the follow up from that blog. I’ll start with the drawers which feature half blind dovetails and the Douglas Fir for the drawer fronts. The back and sides are from some 1/4″ thick Beech and measure 3 1/2″ tall. Dovetails are tails first and the only “trick” I can share is that when I scribe the pocket I set the marking gauge to the thickness of a piece of MDF which is more or less 1/4″. For me this makes it easy to pare the final thickness of what I believe is referred to as the web. Traditional style of drawer with a plywood bottom.
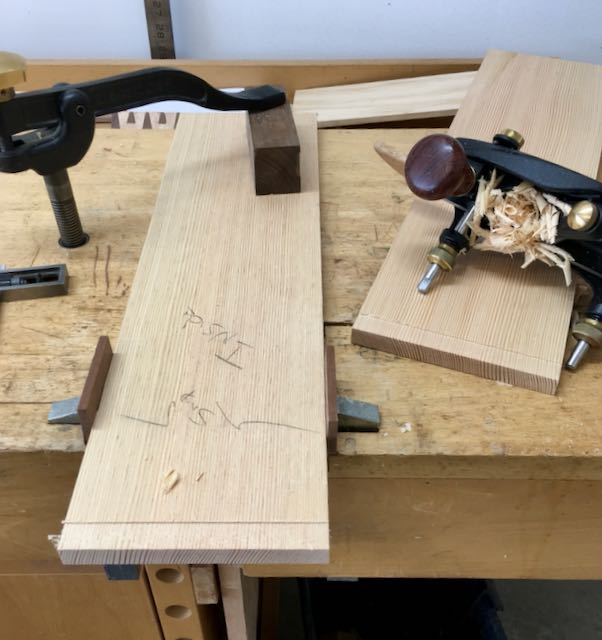
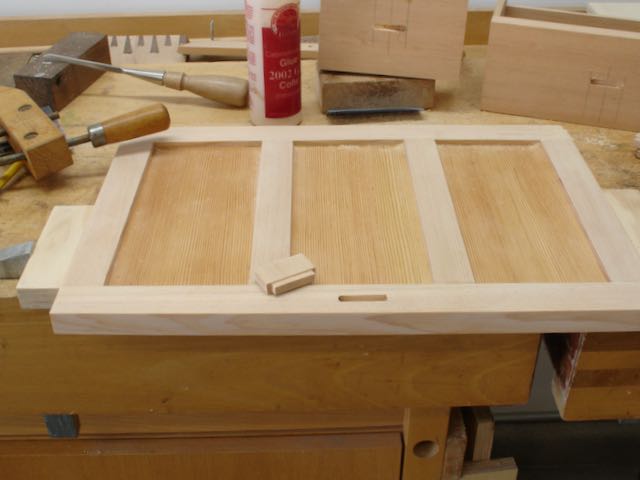
The door is typical panel and frame construction using resawn Douglas Fir for the panels and a tongue and groove frame. Since I had 4 panels, decided to finish all of them and choose the best for the door. They sit in a 1/4″ x 3/8″ deep groove. As usual, the panels were finished with Osmo PolyX before assembly.

For the pulls on the door and drawer I did a separate blog that you can see here: https://woodworksbyjohn.wordpress.com/wp-admin/post.php?post=7144&action=edit

Brusso Knife Hinges

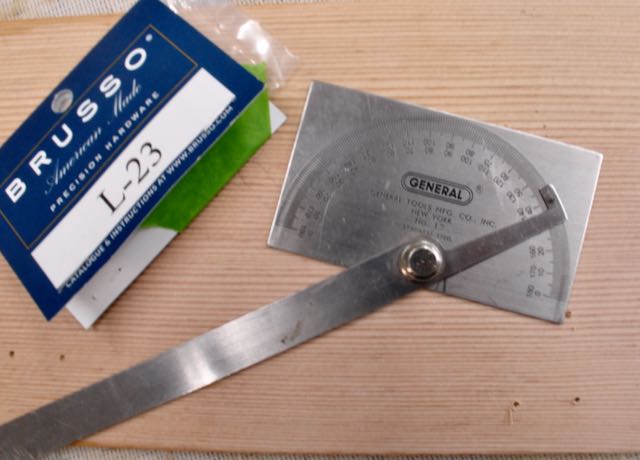
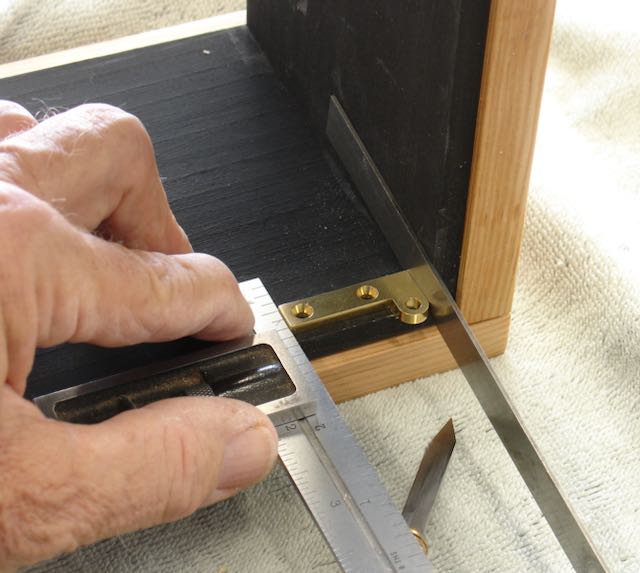
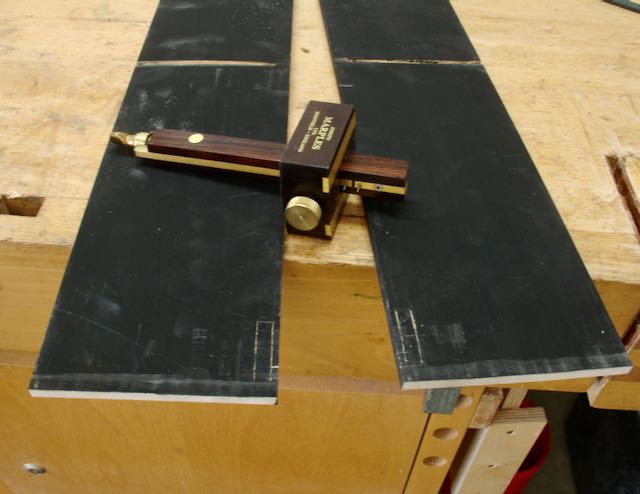
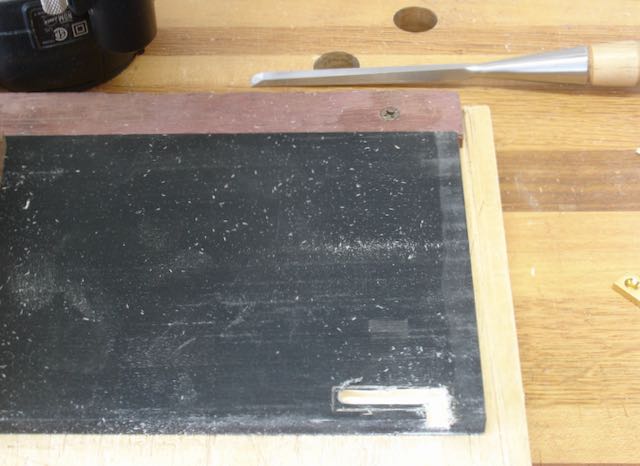
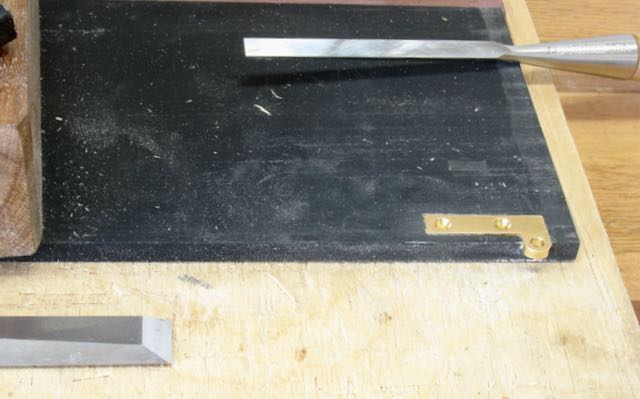
This was one skill I wanted to hone and get more proficient in. If you look on the internet there are dozens of ways that claim to be the best so just like any other process I watched how Matt Kenney did it, watched folks on line, then practiced and came up with what worked best for me. From what I understand it’s the washer on the knife hinge that determines the reveal between the door and the frame. I discovered by accident that the blade of my old General No. 17 was the same thickness which made it easy to set the reveal! I see this tool on Ebay and I’ve had mine for years so it’d be wise to check the thickness of one if you have it. I also used my mortise marking gauge to lay out the size of the knife hinge.

The last step was making and installing the shiplap back. I used the vertical grain Fir horizontally and each piece is approximately 3/8″ x 2 1/2″ with a 3/8″ lap. They are spaced 1/8″ apart with one nail at the junction of each lap. The French cleat (also 3/8″ thick Fir) was nailed and glued to the shiplap so that it was slightly proud of the back. Adding a piece of the same thickness to the bottom of the back side hangs the unit slightly proud of the wall which makes it appear to float. As you can probably tell, I’m very happy with the way this project turned out. Appreciate any comments or questions you may have — John

Posted in Uncategorized | Tagged , , , , , , , , , | 2 Comments

Wall Hung Cabinet Part I

Here is a photo of the wall hung cabinet in my entryway. If you recognize the inspiration for this piece from the work of Matt Kenney you’re right! His technique of using a painted liner in a box or cabinet intrigued me so when I saw that he offered a 6 week, online Zoom class I decided to take it and see what I could learn. The class included everything from design considerations, wood selection, and he showed his methods to make this piece. I’m really pleased with how it all came out so will share with you what was required to make a similar item. My cabinet is made from vertical grain Douglas Fir and Basswood for the liner and dividers. Overall measurements are 5 1/2″ deep by 28″ long and 18″ tall. I’ll write this blog with lots of pictures.

Case

Vertical grain Douglas Fir has always been attractive to me, my earliest memory of it is in the mid-60’s as a teenager working in a local lumber yard where it was commonly used then for bullnosed stair tread material. It can be tough to work with since it tends to be “splintery” which I found out. After prepping the material primarily with a Stanley No.80 cabinet scraper it was time to cut the dovetails. Matt showed a technique using a special Forrest blade which cuts the dovetails and requires careful set up of your table saw. I prefer the quietness of hand work so always cut mine by hand. Within the last year of so I opened my wallet up for the Knew Concepts coping saw to cut the waste. After seeing so many others use it thought I’d give it a try. There is a learning curve and for me it works best if I deepen the scribed baseline with a chisel before using that saw. I also use my skew rabbet plane from Veritas to cut a shoulder on the tailboard like the old Stanley 140 trick. This helps to line things up when you transfer to the pin board and leaves a clean, inside corner.

Liner and Dividers

After the case was assembled the outside and front edge were finished with Osmo Polyx oil. The inside was left unfinished since the liner is glued and clamped to it. I used Basswood and painted it with a blend of Casein paint that I use on picture frames. Only the show side and front edge were painted which resulted in some cupping. That was a concern but by using a lot of parallel clamps to hold it down while the glue set seemed to work. The liner was sized to allow space for the 3/8″ thick shiplap plus a French cleat at the back and the front was set back about an eighth of an inch to create a shadow line. The dividers are 1/4″ Basswood and were assembled using a 3/16″ blind dado cut with a router. The method used was to measure the distance the bit cut from the base of the router. I then cut a piece of MDF to the distance of the dado from the bottom of the divider minus the space for the router. This way it was possible to ensure the distance was exactly the same on both sides. The cut starts at the back and stops about 1/2″ from the front. The tongues were cut using a skew rabbet plane after carefully sizing them to fit between the dados with a shooting board. The tongues were then trimmed and everything went together squarely.
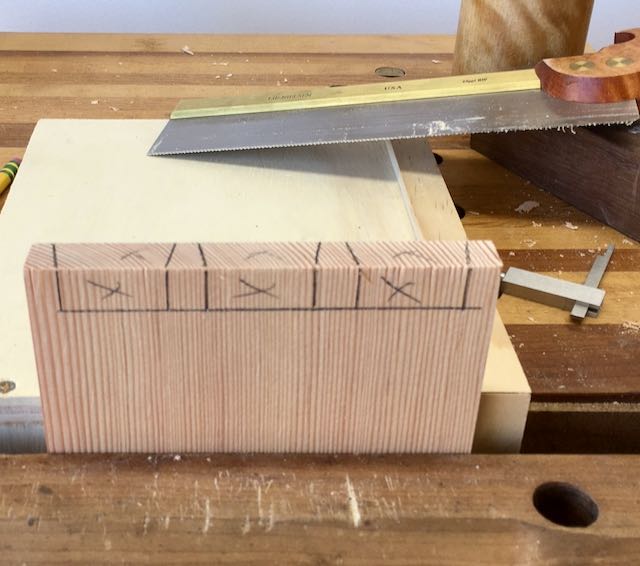
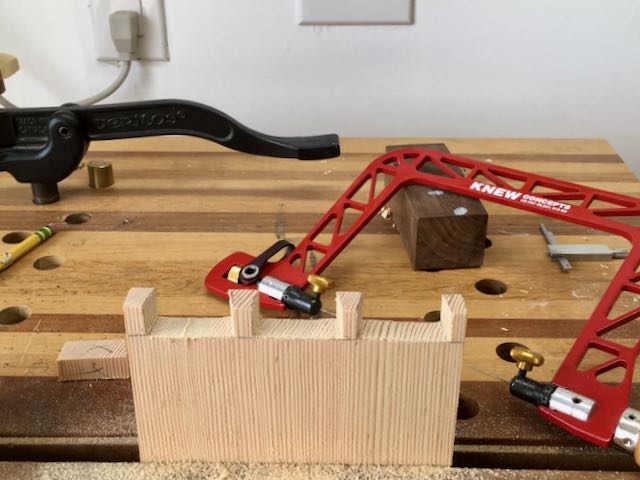
That’s enough for this blog, I’ll do part two and explain the drawers and door construction.

Posted in Uncategorized | Tagged , , , , , , , , , , , | Leave a comment

Small Details = Maximum Time

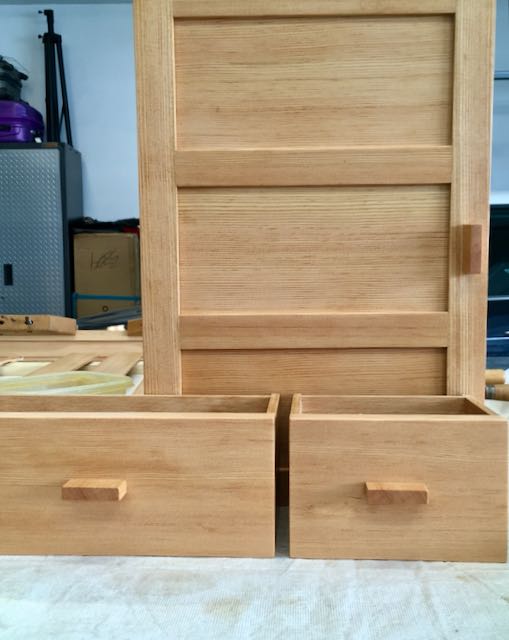
Here is the door and two drawers for the cabinet. It’s interesting how they don’t share the same coloration even though taken in the same spot with the same camera! In any case, the photo on the left is closer to the true coloration of this beautiful vertical grain Douglas Fir. To give you a sense of size, the door is approximately 10″ x 16″ and the drawers are 3 1/2″ tall by 5 1/2 and 9 1/4″ long. It’s real common for people to ask us “how long did that take” and quite honestly I’ve pretty much quit worrying about the time and am more concerned about trying to master the skills and the final result. When I taught junior high woodshop that was a goal — kids never realized the process behind the craft not to mention the math involved in a small detail like these pulls.

This project is for the Wall Hung Cabinet online class from Matt Kenney which is coming to fruition. The 6 week class ended up being a little bit longer due to some scheduling issues with Matt’s cameraman but all in all, it was a good experience that taught me things — that’s what it’s all about. You can see in the picture that the piece is almost complete and I’m only showing one, small portion of it — the pulls for the door and drawers. Although I like the way Matt does his handles with the small blocks, brass rod, and thread I wanted something different for my piece. Something that was light, streamlined, and minimalist and celebrated the vertical grain of the Douglas Fir. The piece I choose had some nice, tight end grain as you can see.

Like the title of this blog says; small details = maximum time! Not so simple, after selecting a piece of 3/8″ thick Douglas Fir with some nice, tight end grain it was ripped to 1 1/4″. After scribing 3/16″ all around one end the skew rabbet plane was used to cut a 1/16″ shoulder. This was carefully checked with a set up block to ensure a snug fit for the pull. Once satisfied with that the pull is cut to length. Lastly, a Dozuki saw is used to trim the tongue on the pull to fit the mortise.

Now it’s time to cut the mortise in the centers of the drawers and door. A plunge router with a 1/4″ bit was used for this step. The rounded corners created by the router bit were squared off with a chisel before the pull is glued and clamped in place. I usually like doing this mortise by hand but since the Douglas Fir tends to chip and splinter decided the router was a safer option. Many small steps that require attention to detail to complete.

I plan to write a complete blog about the construction of this cabinet and the class taught by Matt Kenney in the future. I think anyone who wants to learn some new techniques could benefit from the class.

Posted in Uncategorized | Tagged , , , , , , , | Leave a comment

Sharpening Opinions Please

Chisel Sharpening Day

I know only too well how true the old saying: “ask 10 woodworkers the same question and you’ll get 12 different answers” but I’m going to take a chance and ask it anyway! I would really like to know opinions of others out there who, like me, probably spend the majority of the time working by yourself in your shop. As the picture shows, I recently sharpened my bench chisels, I use a 30° bevel which I’ve found holds a better edge when using hardwoods and exotics.

Question #1: Micro or secondary bevels — your thoughts. I’ve decided not to do the micro bevels. I never use a power grinder which leaves a hollow ground so micro bevels never get very long. Without a hollow ground that micro bevel can get quite long and then it takes some time re-establish the entire bevel. The sharpening session I had yesterday was quite lengthy since the micro bevels were half way up the edge! I could see that if you used a power grinder you could restore the entire grind quickly but hand work takes much longer. What are your thoughts???

Question #2: As you can see, I use DMT diamond stones and have them in coarse, fine, extra fine, and extra extra fine. The question, if you have them is this — do you use some type of lubricant with them or use them dry? I’ve done it both ways and it seems that even though using some water with a few drops of detergent lifts the swarf off the stone, it also makes a mess! It also seems that using the stone dry the cutting action is more aggressive and the swarf can be removed with a paper towel. Your thoughts???

Question #3: If you use them, how do you clean your DMT diamond stones? I use Bar Keepers Friend and a a grey scrubby.

Question #4: When sharpening chisels do you remove the burr from the back on each stone before going on to the next grit? To restore the edges I spent a lot of time on the coarse stone so I removed the burr from the back on it before going to the fine stone. Then didn’t remove it until after the final strokes on the extra extra fine — what do you do???

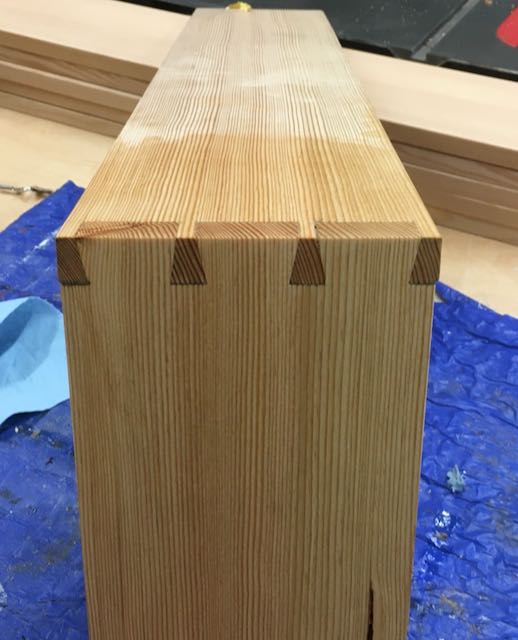
That’s enough questions and I’d appreciate some responses. One of the reasons for sharpening the chisels was to prepare for an online class I’m taking from Matt Kenney. It’s about making a small, wall hung cabinet. He has some construction methods I’d like to learn more about. I’m planning to use vertical grain Douglas Fir so wanted to see how it works with hand tools. These dovetails didn’t turn out too badly, the wood is pretty graining so starting the saw cuts requires concentration to stay on the scribed line. Pretty happy with these. To highlight the beautiful vertical grain I plan to use OSMO Polyx which I did on this corner. Anxious to get the first “hands on” lesson in the Matt Kenney class, so far it’s been about design and things to be aware of when selecting lumber. The wood I got is 4/4 and he’s mentioned we’ll probably surface to a thickness around 1/2 to 5/8 inch. Telling the grain direction is tricky with the Douglas Fir, used my smooth plane to surface the dovetails; worked well on one side but not so great on the other!

Posted in Uncategorized | Tagged , , , , , | 2 Comments

Finally — Carving Chisel Holder

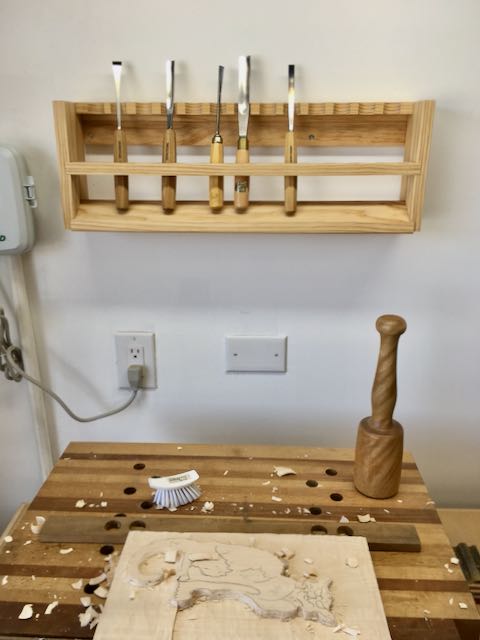
Ever since I started carving; having a safe place to lay the chisels I’m using on a project has been a problem. If it’s a picture frame I can lay them on other legs of the frame to keep them “corralled”. If it’s a relief carving I resort to laying a piece of wood on the side of the bench and pray they don’t roll off or get that dreaded metal to metal contact. They end up getting scattered and I waste time looking for the one I happen to need at the time. I carve on a 24″ long bench which is clamped to my 48″ long carving area so that doesn’t leave much room to lay the chisels down. After doing an internet search for some solution to this problem I found a blog by Bob Easton, someone I’ve had many online conversations with but never met in person. Here’s a LINK to it. By the way, he refers to a bench that you clamp onto another bench as a BOB!

I have to admit that I had some difficulties following his blog and pictures. I couldn’t figure out why the bottom shelf that the chisels sit on was angled at 45° and the more I looked at the pictures the more I became confused!! Decided to go ahead and treat this as a good, hand tool project exercise and figure things out as I went. I didn’t use an auger bit as he did, instead a forstner bit did the job. Teaching middle school woodshop for all the years I of course followed his advice and only drilled through one side until the point of the bit came through. The board was then flipped over on the drill press to complete the hole. Made some interesting discs, I also used a divider to set off the spacing for their centers. You can see the tape on the bench used to set the right size. I have room for 13 chisels.

Only two measurements were given; 8″ for the side pieces and 17+” for the pieces between. What I did was count how many chisels I was using for the current project, checked to see how much material I had and decided that 13 was a good number — I used dividers to step off their centers much like you do for laying out dovetails. Bob cut a series of stopped dados for this project so I followed suit. Didn’t have enough material for a full shelf so that too received a stop dado. My angle is about 35°. This was a good exercise in hand chiseled dados and my Stanley 271 router plane insured all of the bottoms were the same. Trick holding the wood for these routers but here’s how it was done, bench hook works to hold this small piece.

With the bottom shelf on my version not going the full width and a at different angle things were different but in a good way! During a dry fit the shelf was inserted into the stopped dados and then marked on the ends. Those lines were extended the length of the shelf and this gave me an opportunity to hand plane a chamfer. If you’re a hand tool woodworker you understand when I say this was fun! I used to teach my junior high school students how to use a block plane to cut chamfers and rounds and this reminded me of those times.

I followed Bob’s directions and used glue and screws for assembly. The rack also hangs on the wall with a French cleat. A coat of Danish Oil will keep it looking good! By the way; now that it’s complete I understand the function of that angled, bottom shelf. Gravity brings the tool down and it gets “wedged” between the top and bottom holes. It works equally for narrow or wide chisels and access is easy. Like Mick Jagger said after singing Like a Rolling Stone on the Stripped album — Thank you Bob!

Posted in Uncategorized | Tagged , , , , , , | 2 Comments

Floater Frame Technique

A very popular style of framing a painting these days is using what’s referred to as a “floater” frame. Traditionally used for thicker canvases but it’s also popular for any other size paintings. From what I’ve seen, commercially available molding is usually a simple L-shape slightly deeper than the thickness of the canvas that the art work sits in. As a furniture maker, the method I use is different and if you have some experience and tools you can use this method for your work so I’ll share it with you.

If the frame is to be painted or gilded I’ll use Basswood, some of my clients prefer hardwoods such as Oak, Mahogany, Walnut, etc. and the process is the same except I add splines across the mitered corners after mitering and joining them. These are for strength as well as an added design element. For this blog I’ll be using Basswood, usually 1″ or so thick.

Here is the general profile I use. This frame is for a 1 1/2″ thick canvas and is about 1″ thick and 2 1/4″ wide. The groove is cut first and is the thickness of the 1/4″ plywood used to support the painting. The top of the groove is 1 9/16″ from the top. You could use a dado head or router bit to cut this but in my experience it’s just as quick to set the height of your blade and then make 2 passes on the table saw. Since plywood thickness may vary it’s better to do it this way but do use some scrap to make trial cuts. Next step is to miter these pieces but before I do that I prefer to knock down that sharp edge by cutting a narrow 45° cut on those edges. Now you can miter them to fit the painting — don’t forget to add about 1/2″ to the canvas size which will give a 1/4″ reveal all around the art.

After the pieces are mitered my preference is to use face frame size biscuits in the corners. If you have a biscuit joiner it’s worth the extra step since the biscuits will stabilize the corners and prevent them from slipping during glue-up. The plywood not only supports the art work but also reinforces the corners! On two of the frame legs the plywood is full length so that it inserts into the adjoining leg, see the picture on the left. That will glue into the leg of that piece and give you a very strong joint. The other two legs have the plywood filled in between tightly which gives a square and strong frame. I always glue and clamp my frames overnight.

To mount the canvas I’ll drill an appropriate number of holes through the plywood with a 1/4″ bit. That hole is slightly oversized to allow some “wiggle room” to square the canvas with an even reveal all around. Use a #6 pan head sheet metal screw along with a #6 flat washer for attachment. I use 1/4″ MDF for spacers and predrill the holes in the canvas. You can use whatever method of finishing the frame you like, lately Japan black with some burnt umber mixed in has been my choice. Occasionally I’ll gild the front edge so I’ve added a short video of that in the next paragraph.

One additional step for when the edge of the frame is gilded, either water gilding or oil; is to create some sort of detail to separate the two elements. Without this, it can be a problem getting a clean edge. I’ve used a shop made scratch stock but now that I have a small plow plane (Veritas) from Lee Valley the technique has been refined. I also purchased the beading cutter set which is great too for creating my own profiles. Here’s a video I made of the process, usual disclaimer — I’m not a professional cinematographer!

Here’s a picture of how that process turned out. Notice the mounting holes for the art work. If you decide to use this method and run into something that you’d like to clarify feel free to contact me through my website.

Posted in Uncategorized | Tagged , , , , , , | 5 Comments